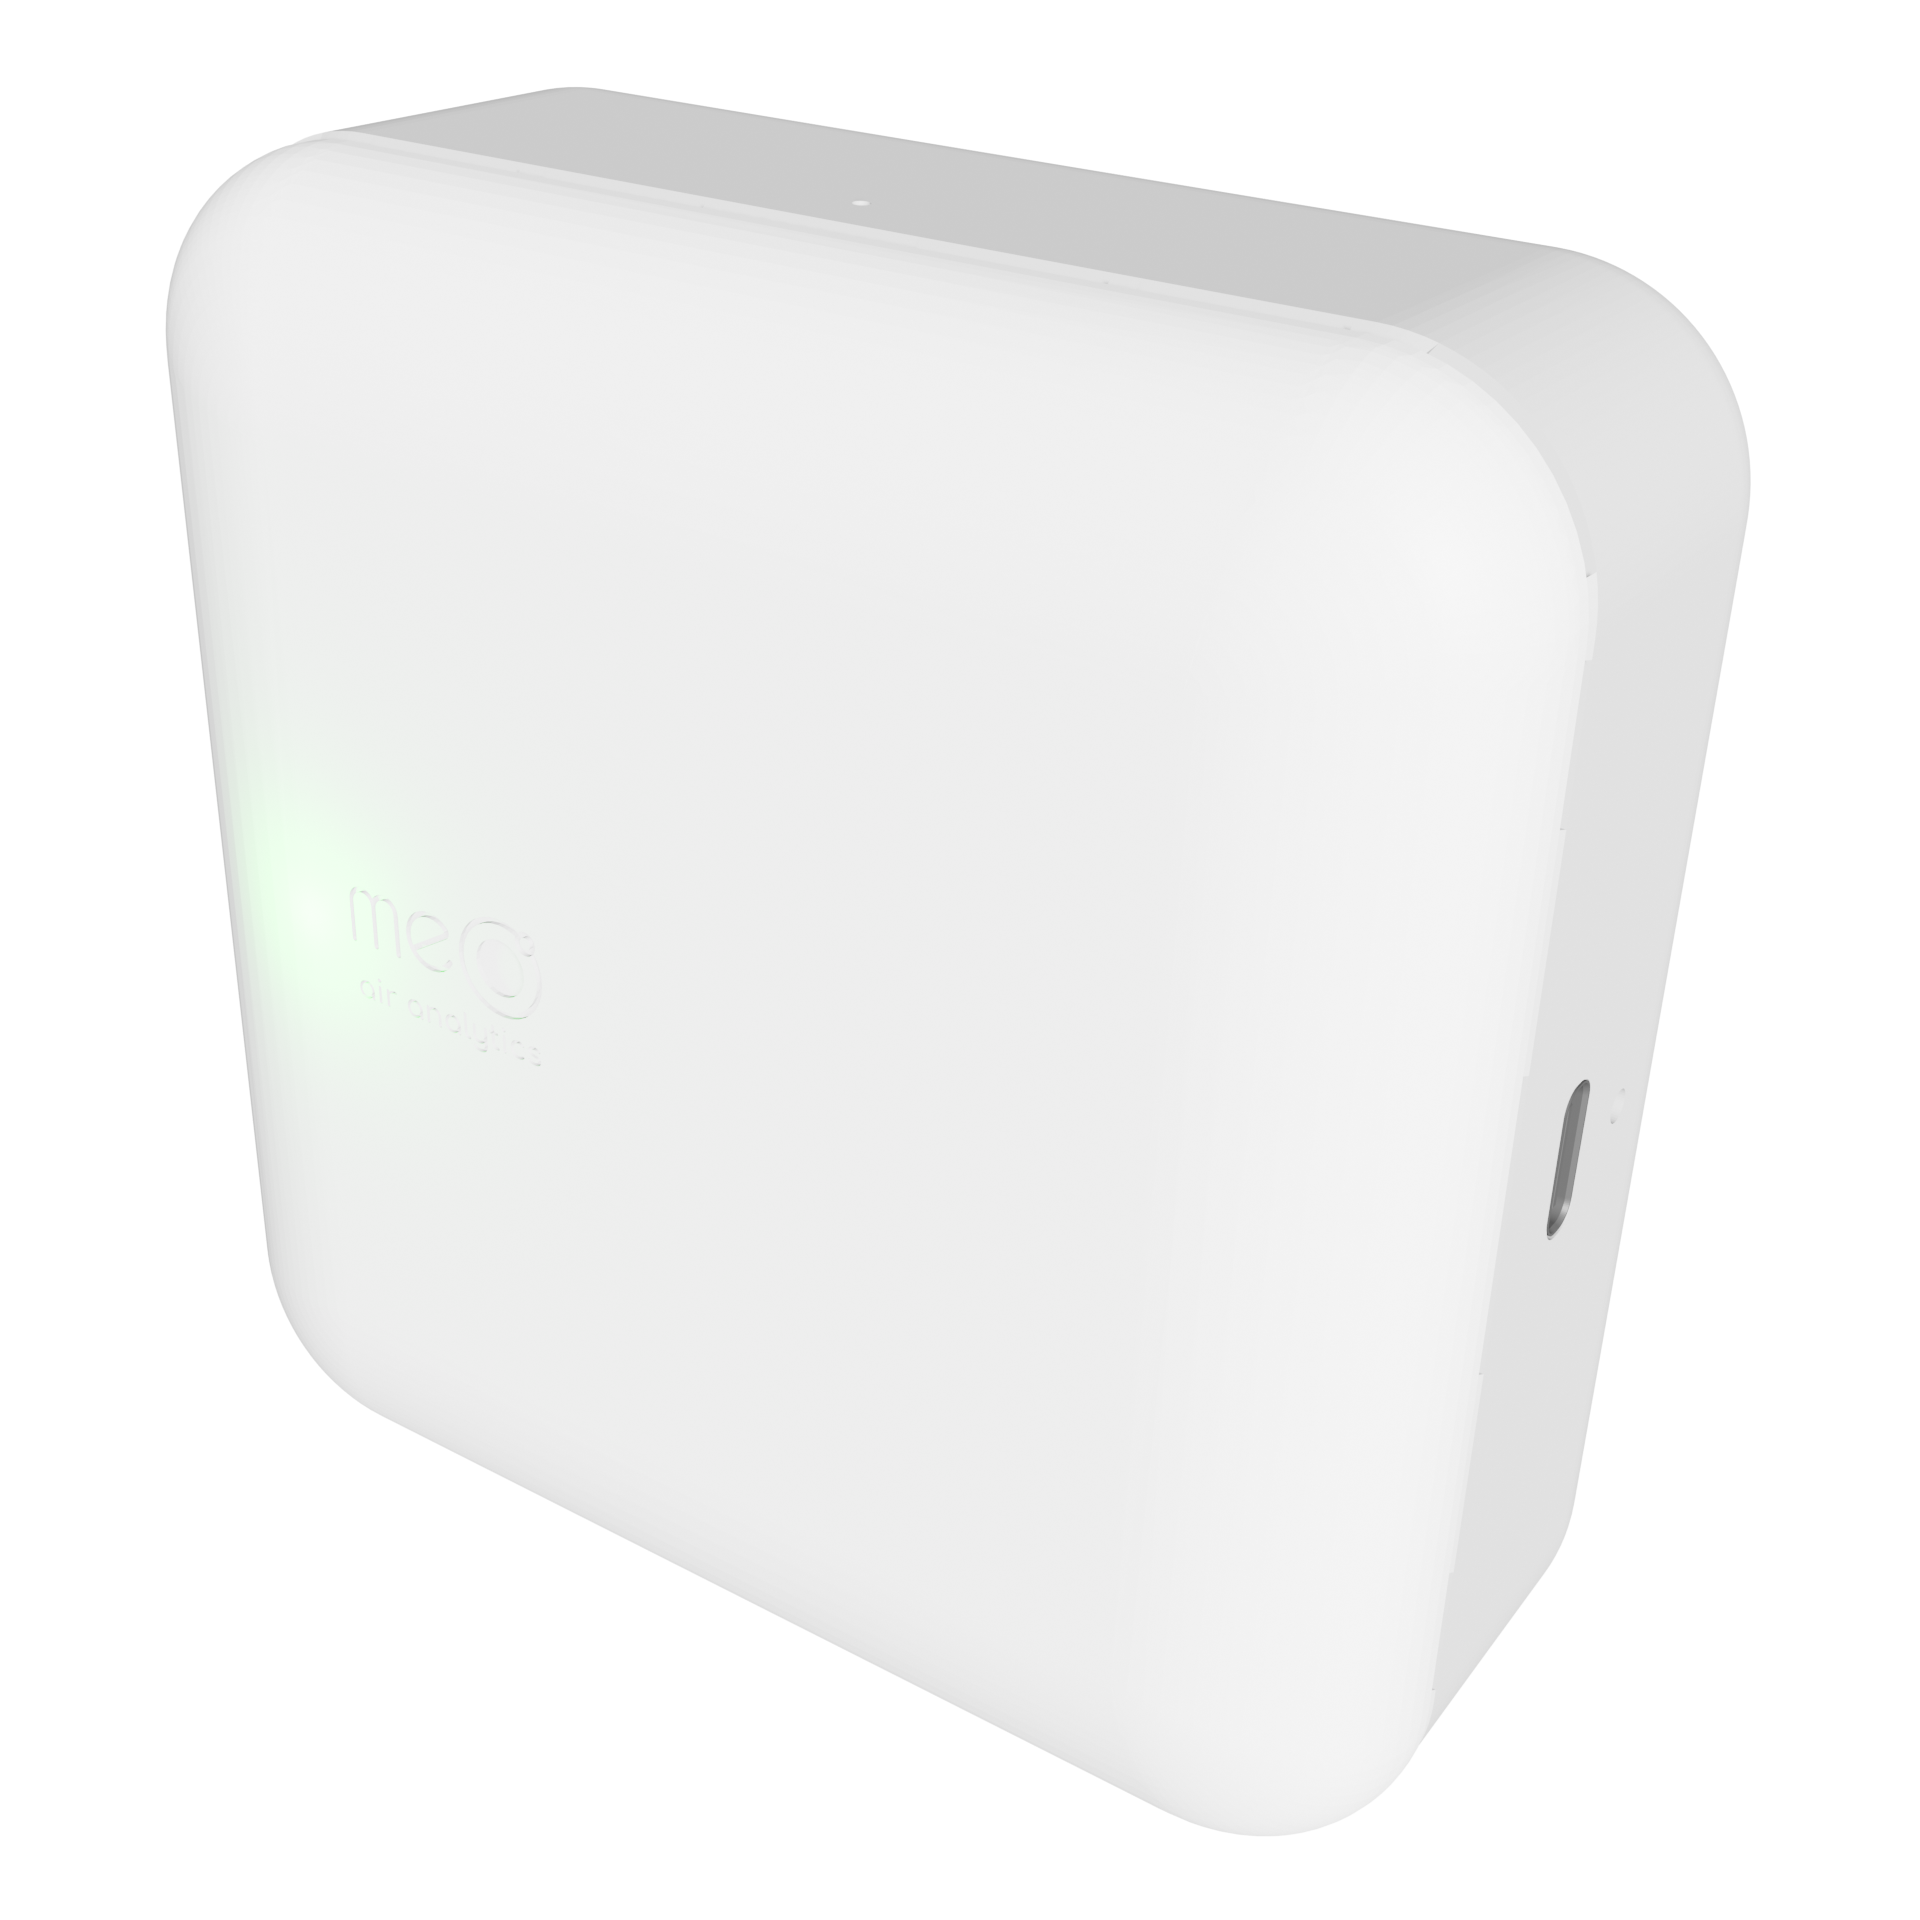
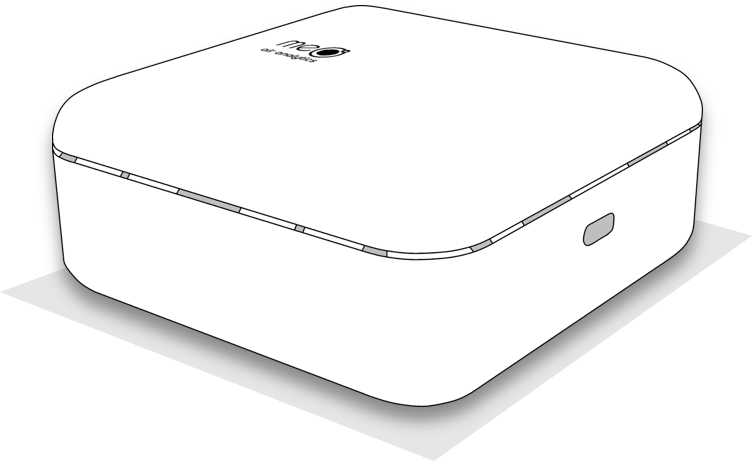
Front view
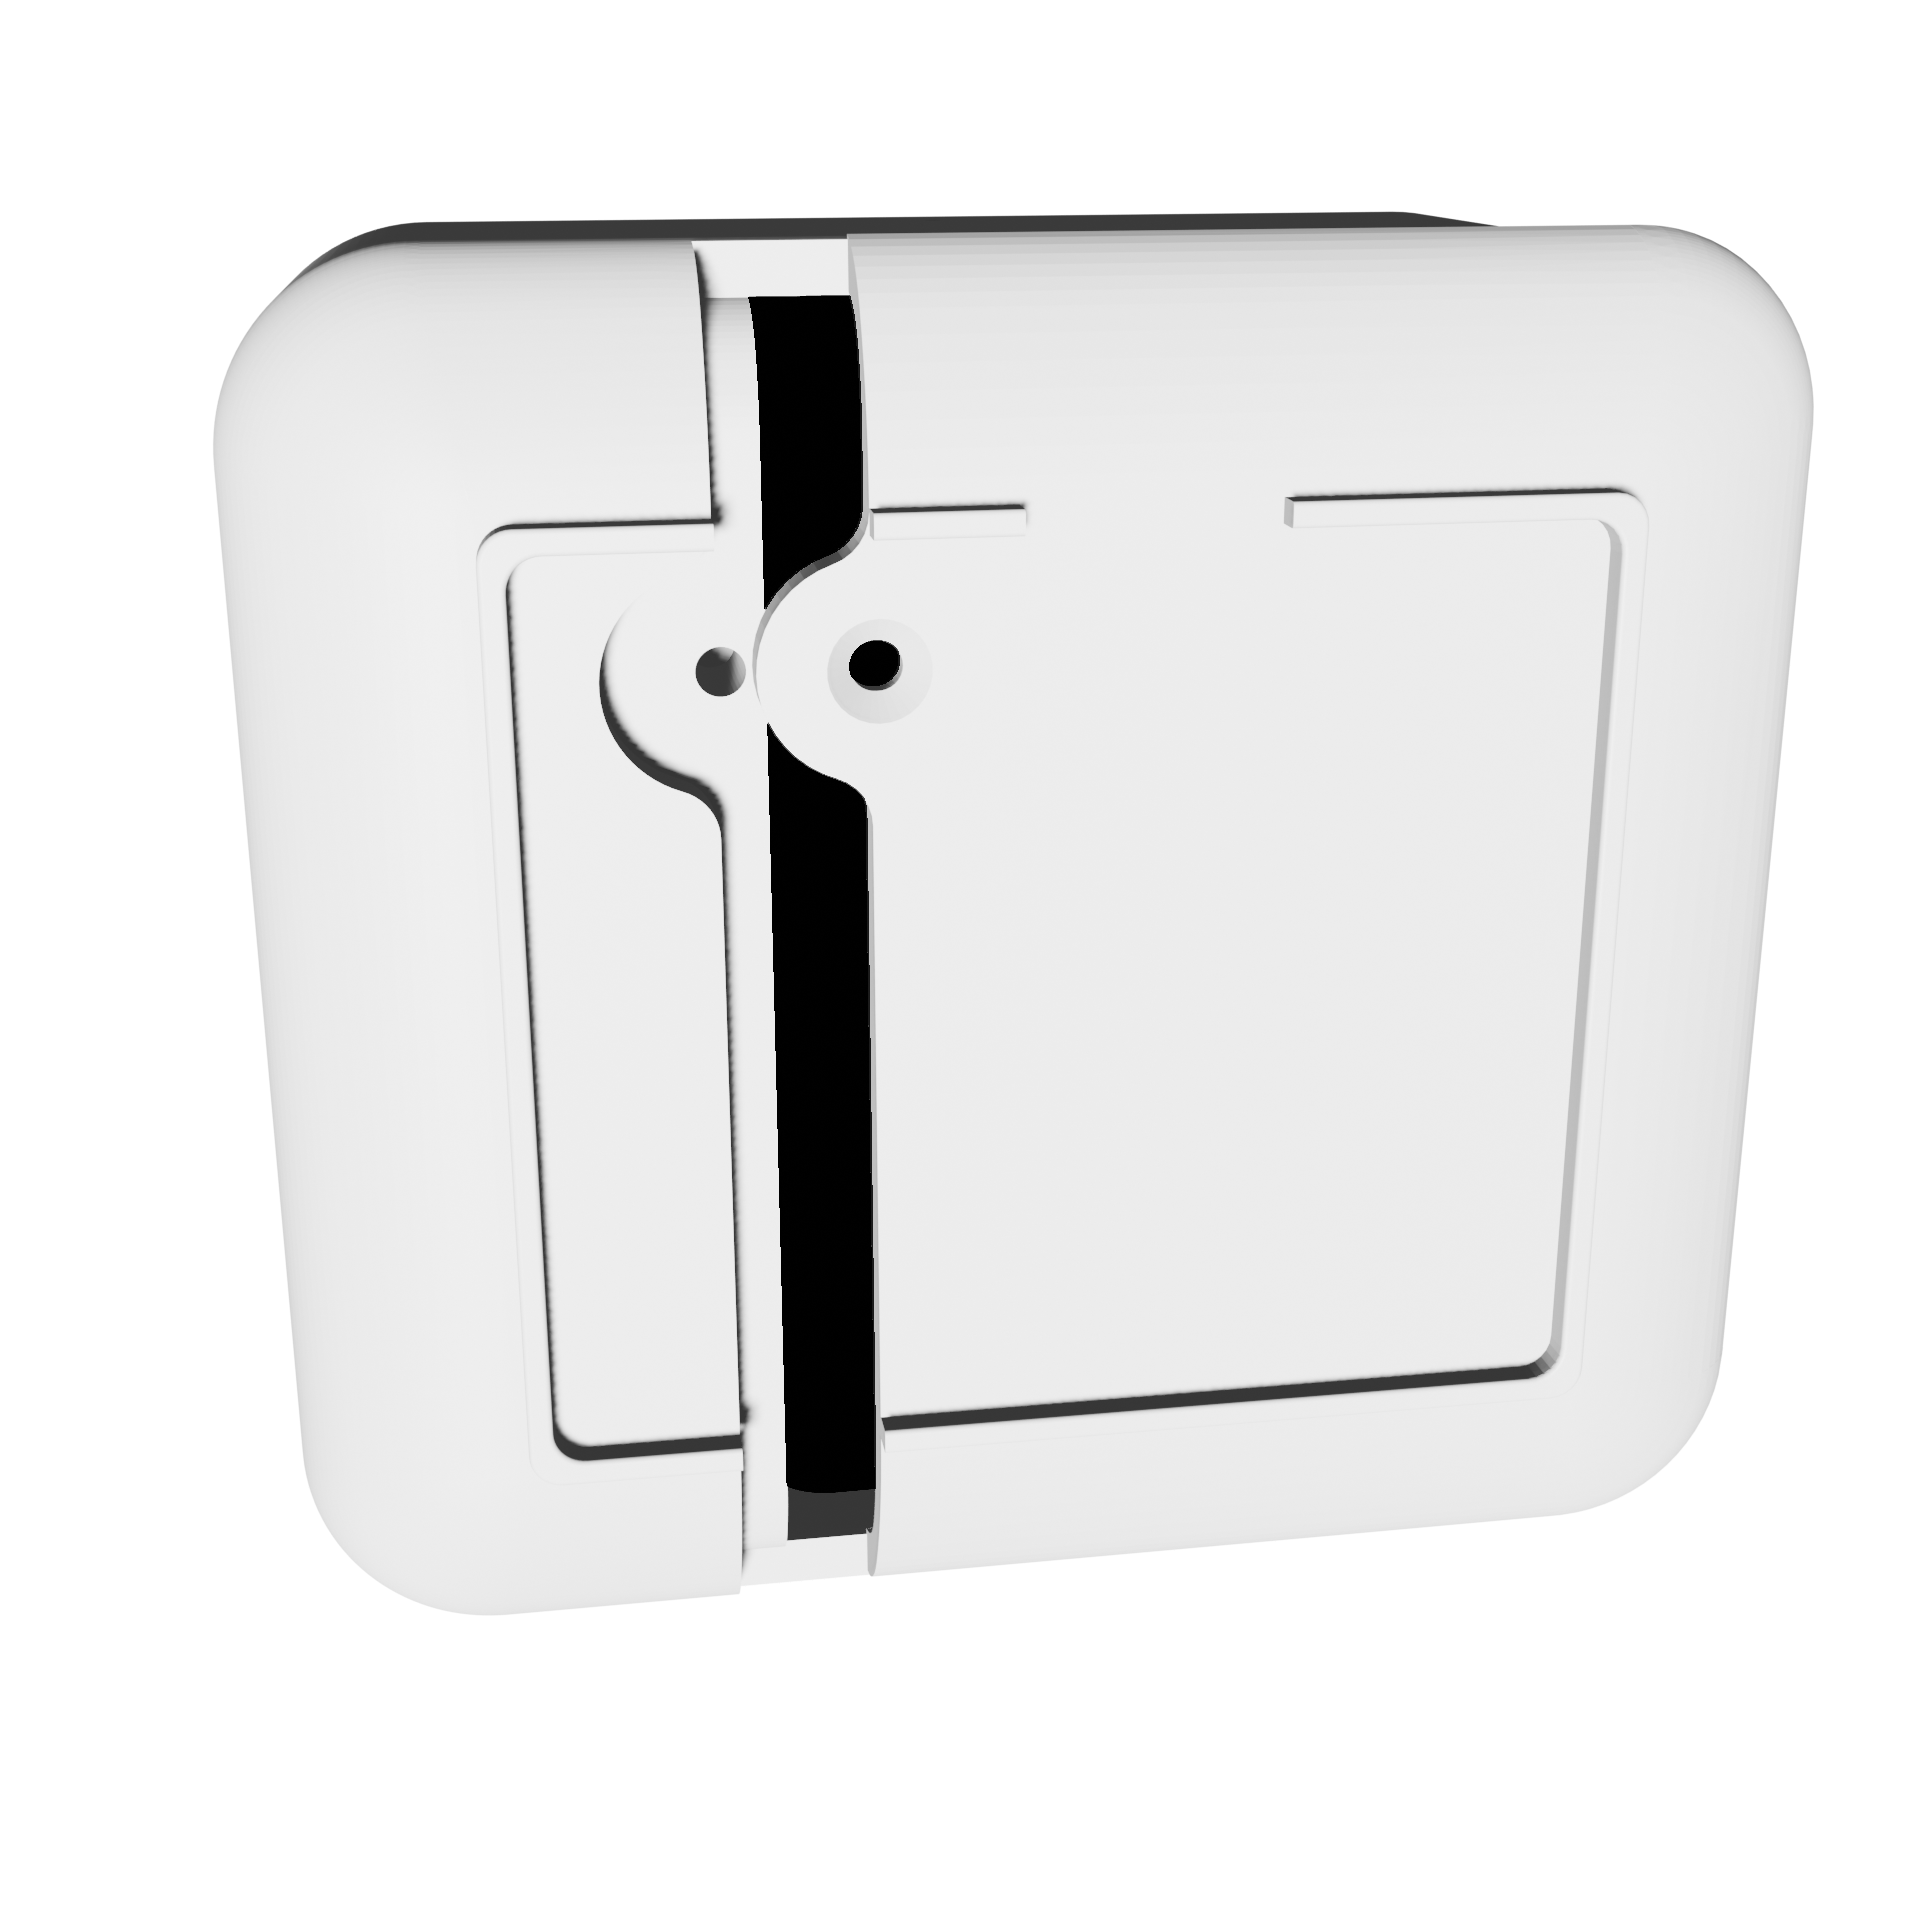
Back view
Power Choice
| USB-C |
| Unroll the supplied cable |
| Connect to monitor |
| Connect to an AC adapter (5V/1A) |
| Batteries (if available) |
| Unscrew the back |
| Place 3 type AA batteries |
| Screw the back plate |
Lights
● Air quality light
| LED color | Health impact | CO2 levels (ppm) |
| Green | Safe | up to 800 |
| Yellow | Moderate | up to 1000 |
| Orange | Slightly Unhealthy | up to 1500 |
| Red | Unhealthy |
Note: Above air quality colors and CO2 levels are the default settings. They can be customized in app.meo.life Settings by the admin.
Each default color is shown at startup.
Air quality color blinks when batteries must be replaced.
● System status light
| System status lights | Status | User action |
| OFF | Normal | None |
| White | Boot / Button | None |
| Yellow | Calibration error / Button | Reboot and retry |
| Blue | Cellular error, due to low signal | Move to other location and check SIM card |
| Magenta | Data loss, due to storage full after cellular error | Move to other location and check SIM card |
| Red | Monitor error | Wait for reboot |
Package Content
- meo mini/maxi monitor
- USB-C Cable
- Wall Mount Kit
- Activation Card
- User Guide
You can register either
● with your smartphone, or
with your smartphone
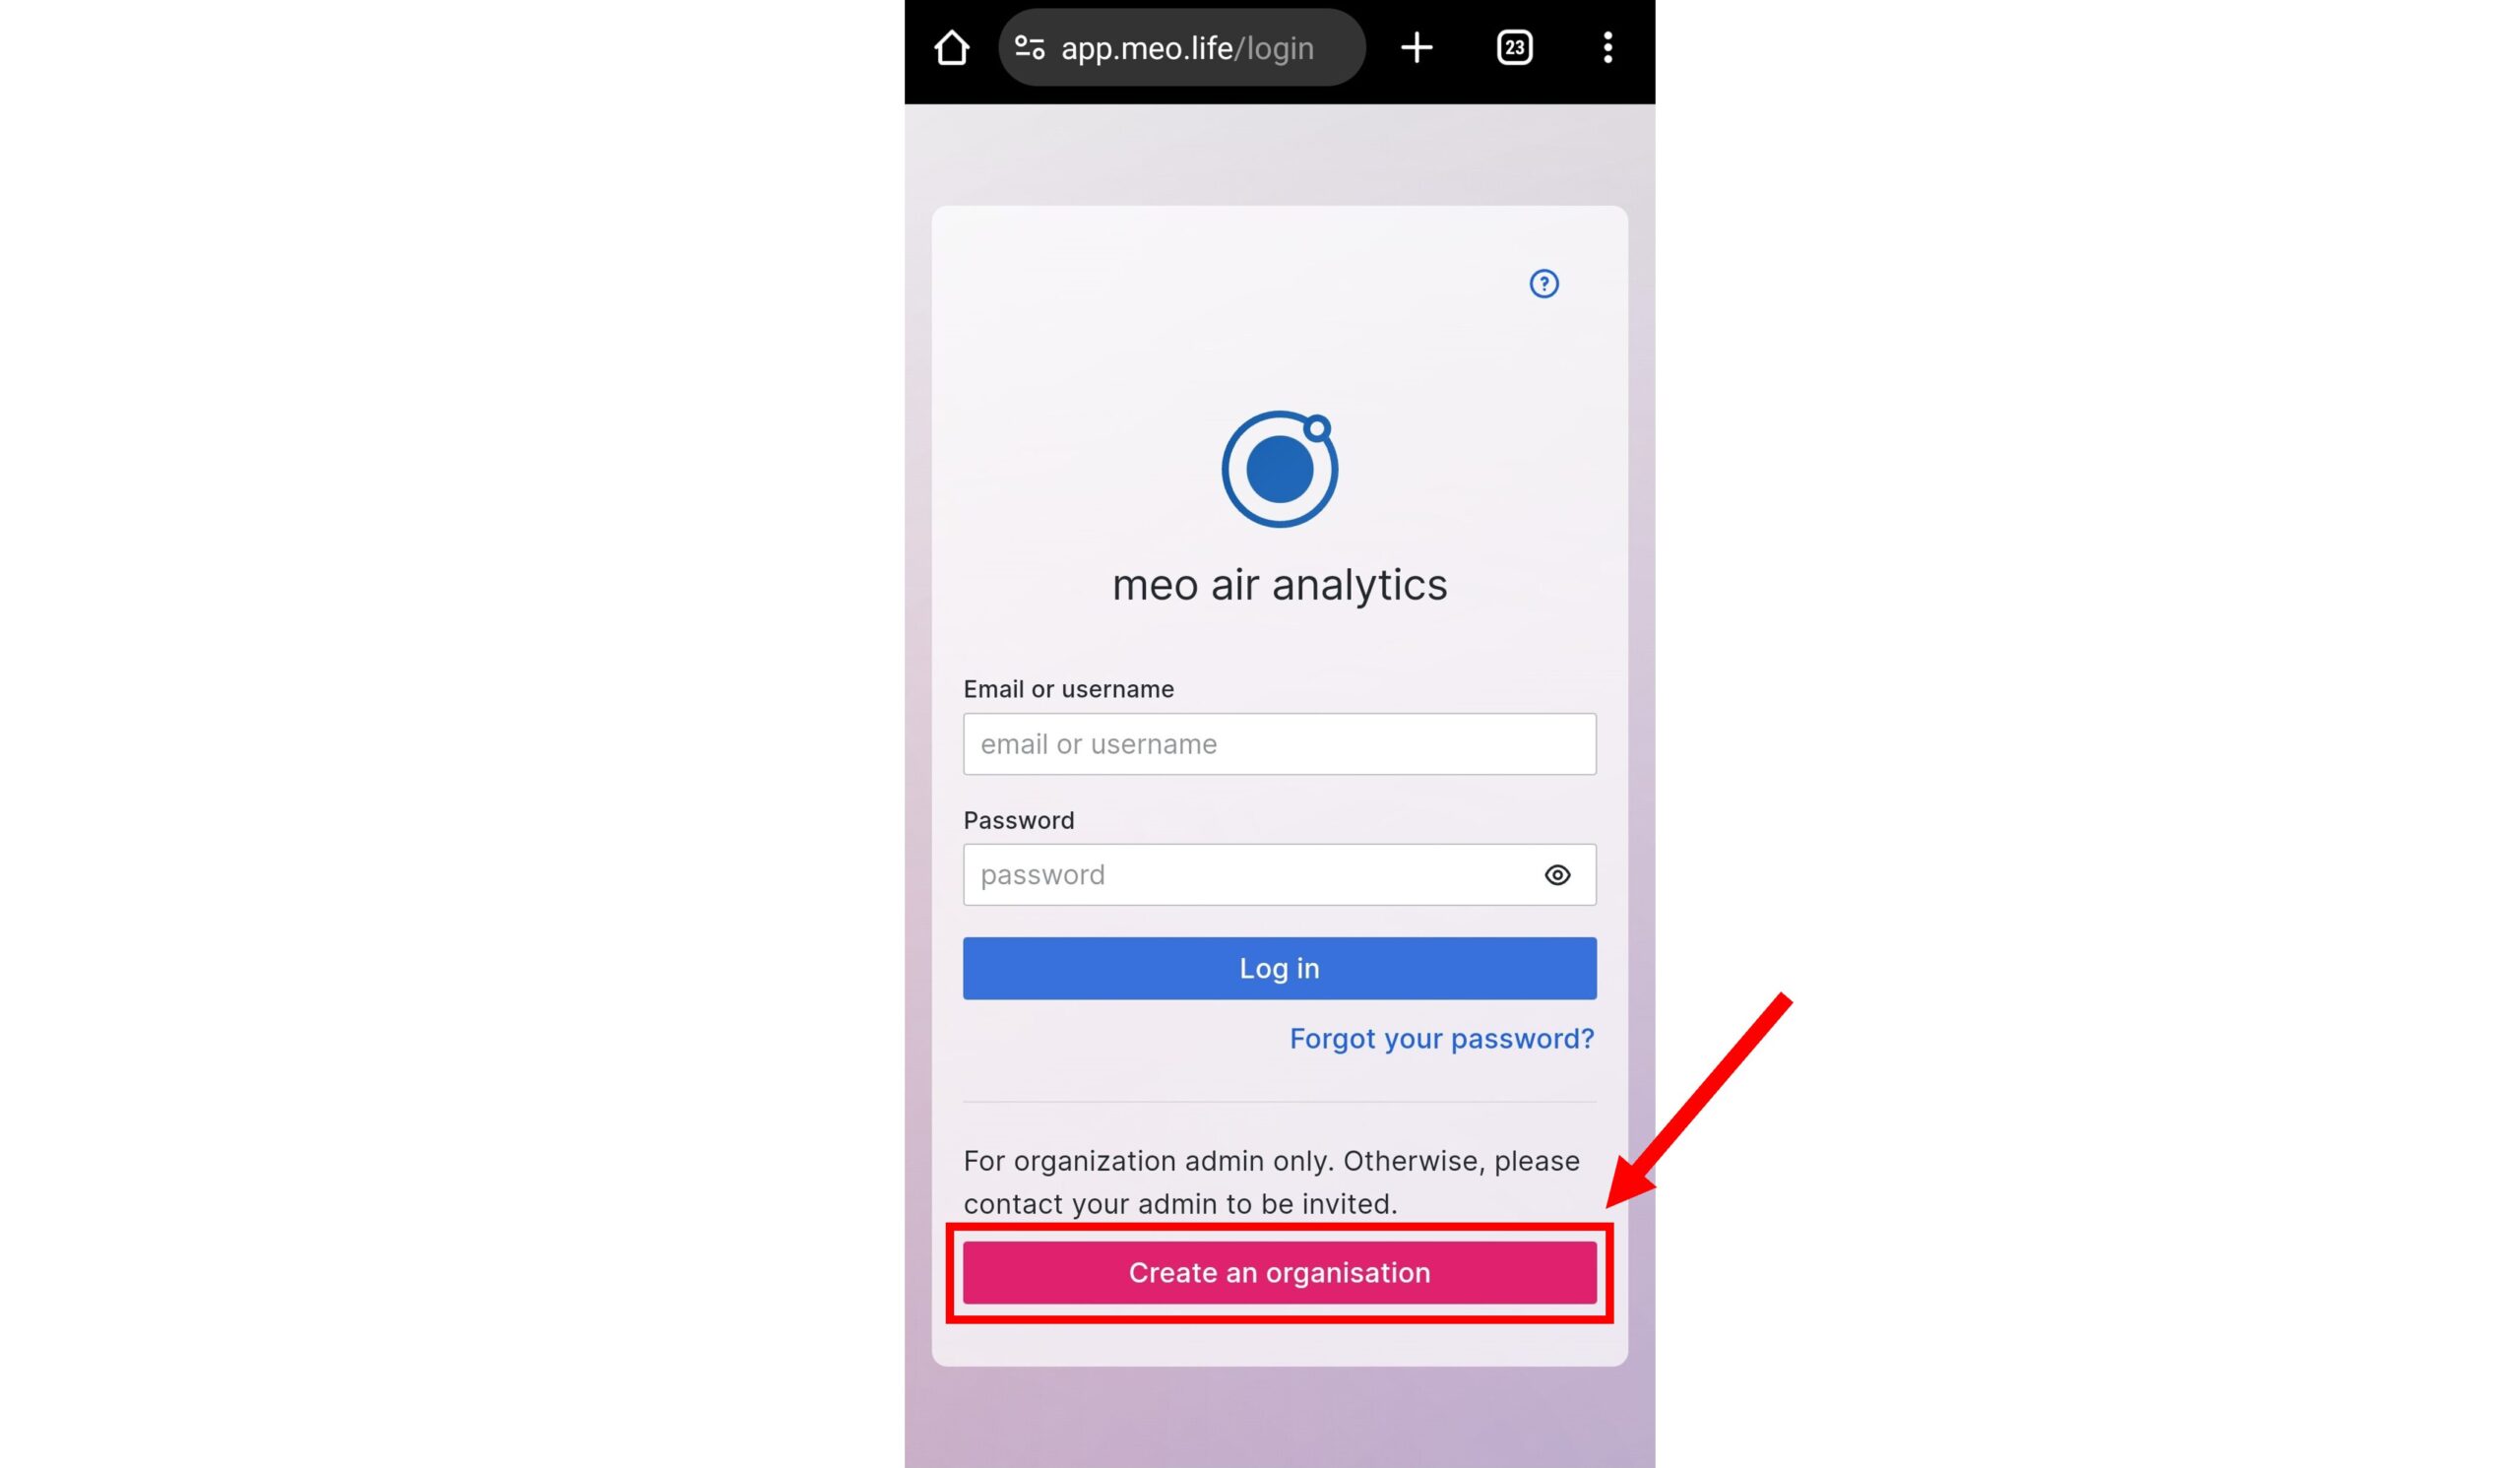
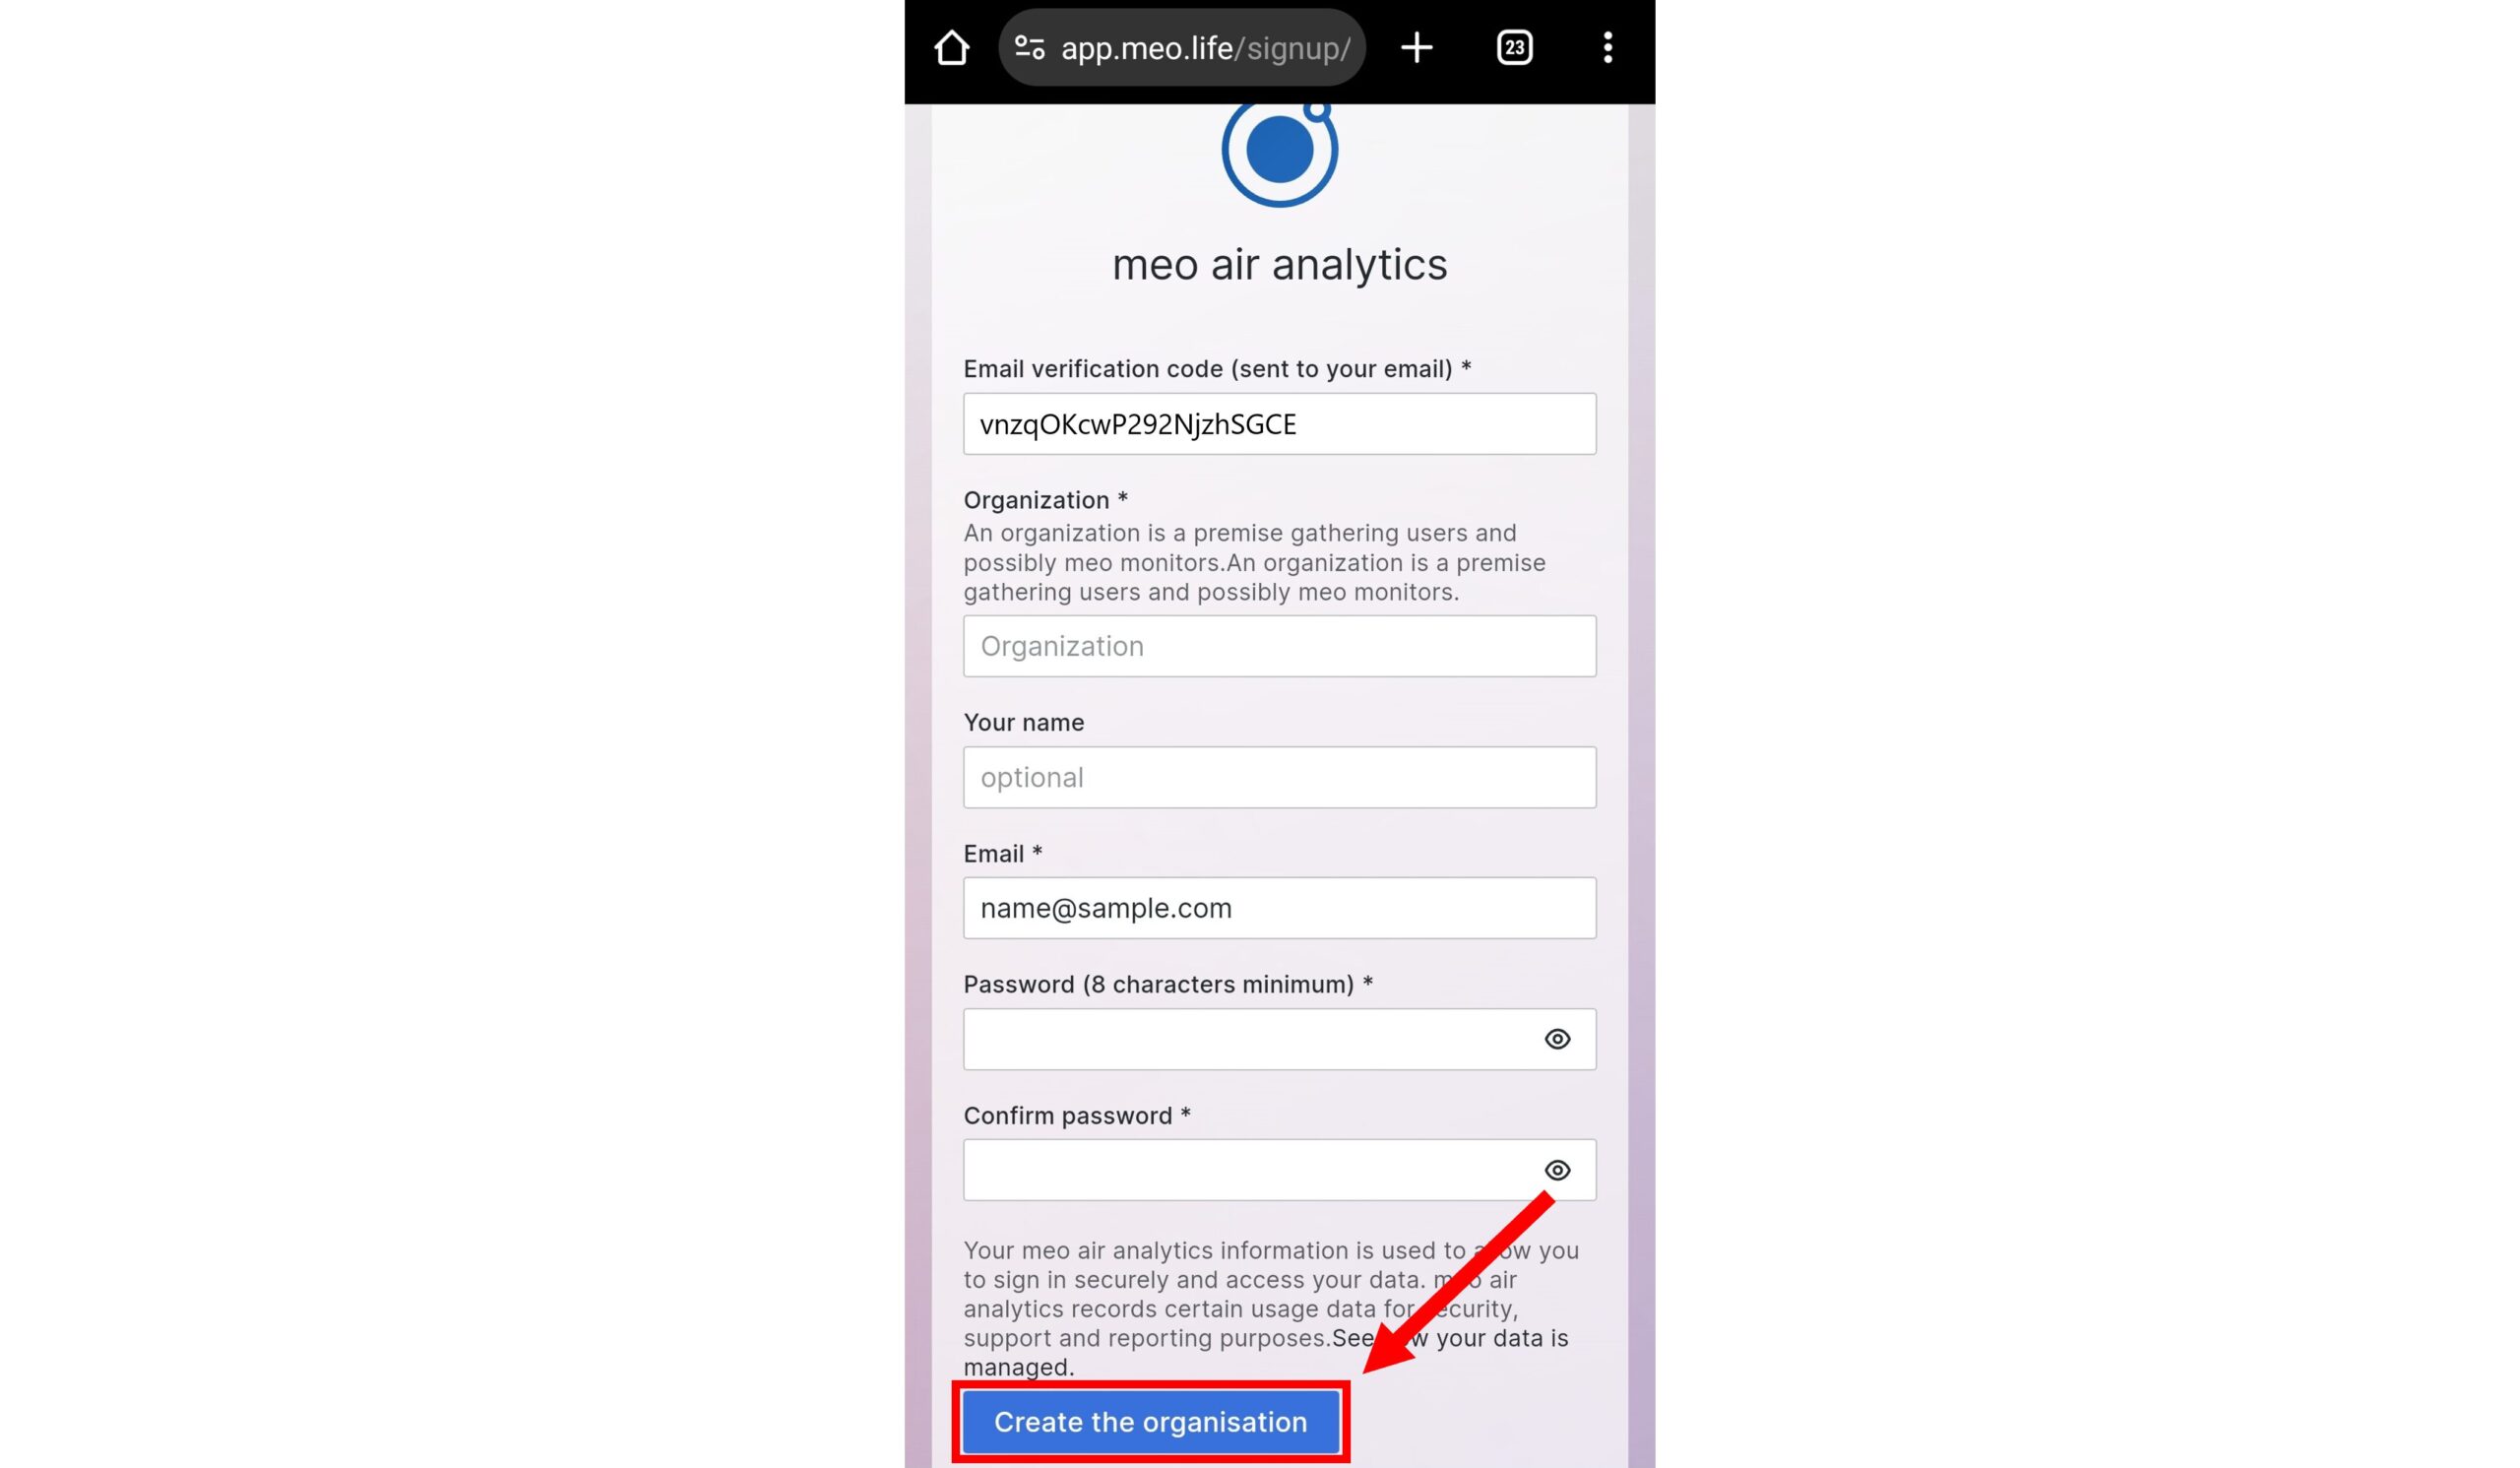
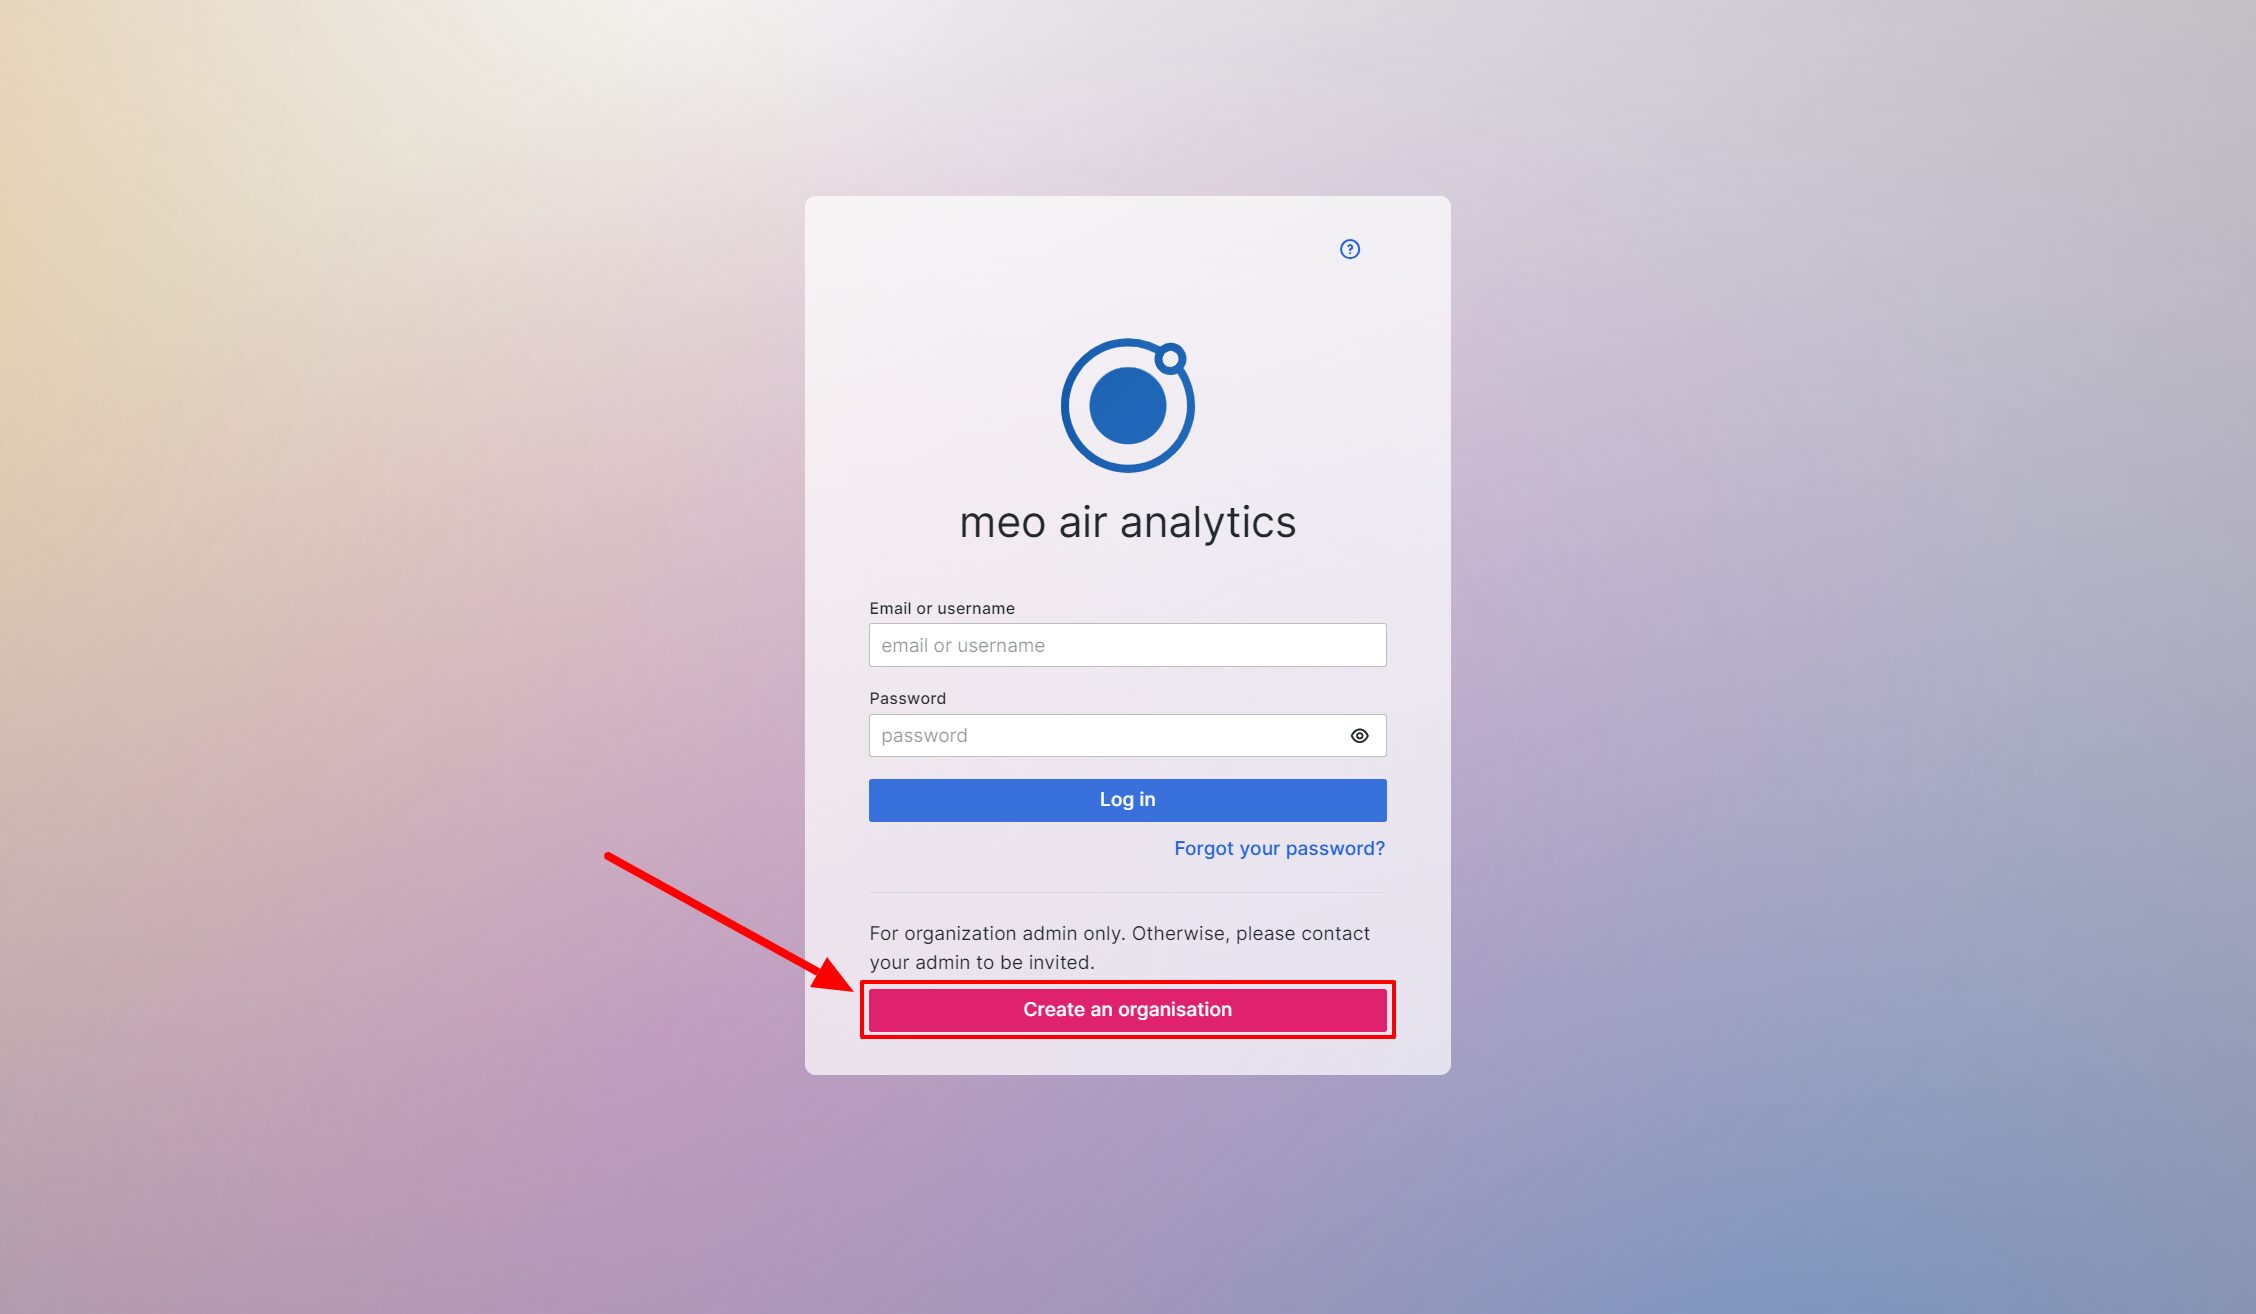
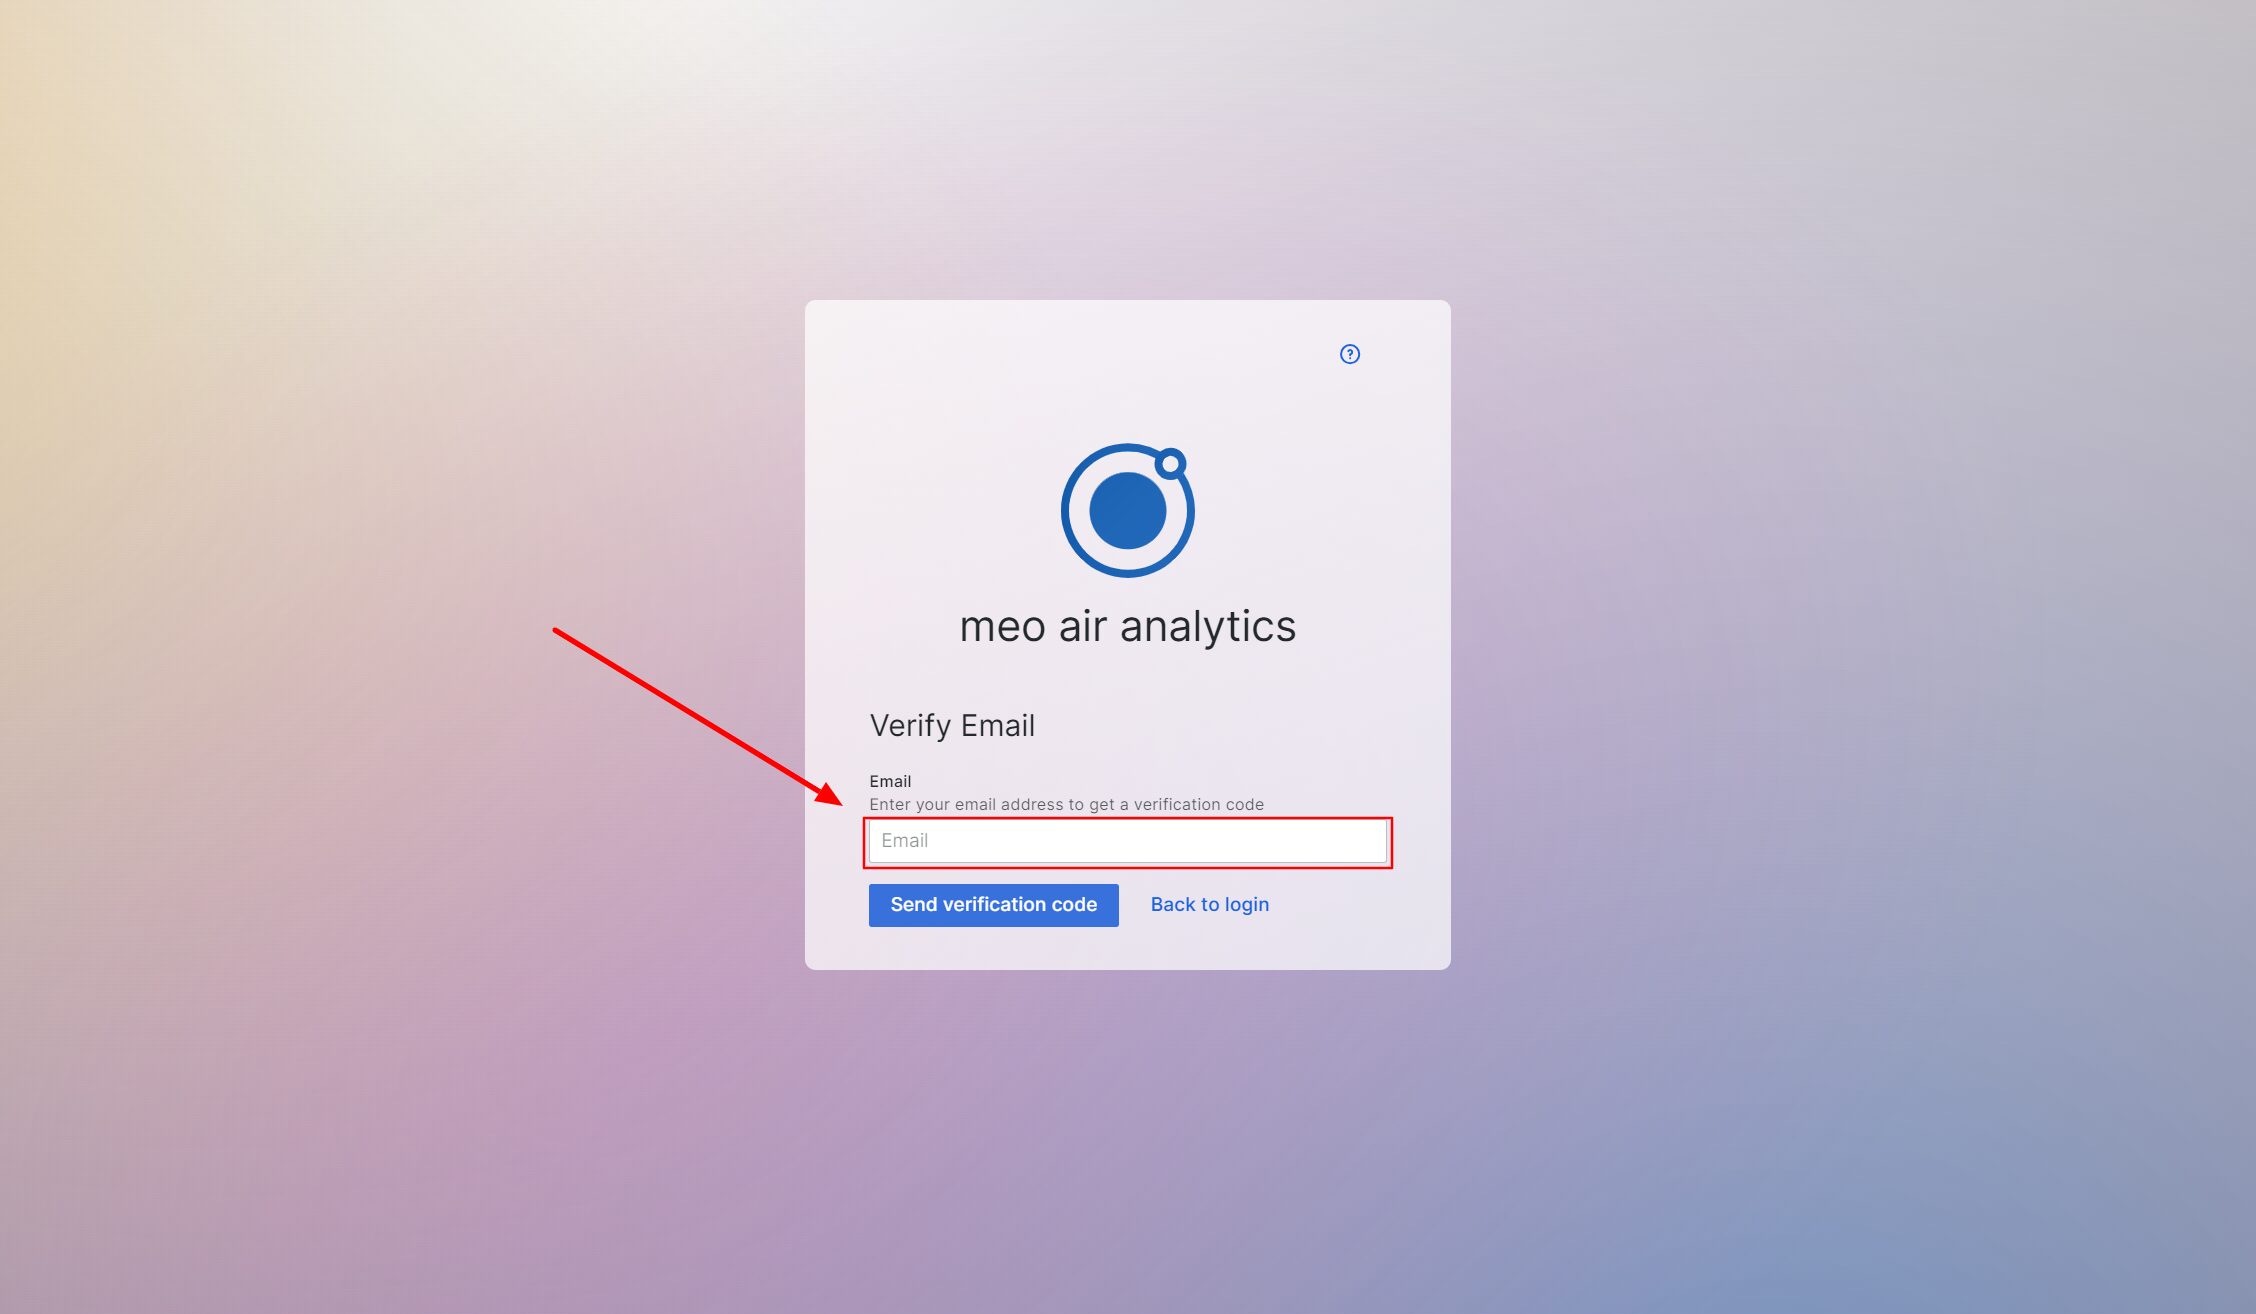
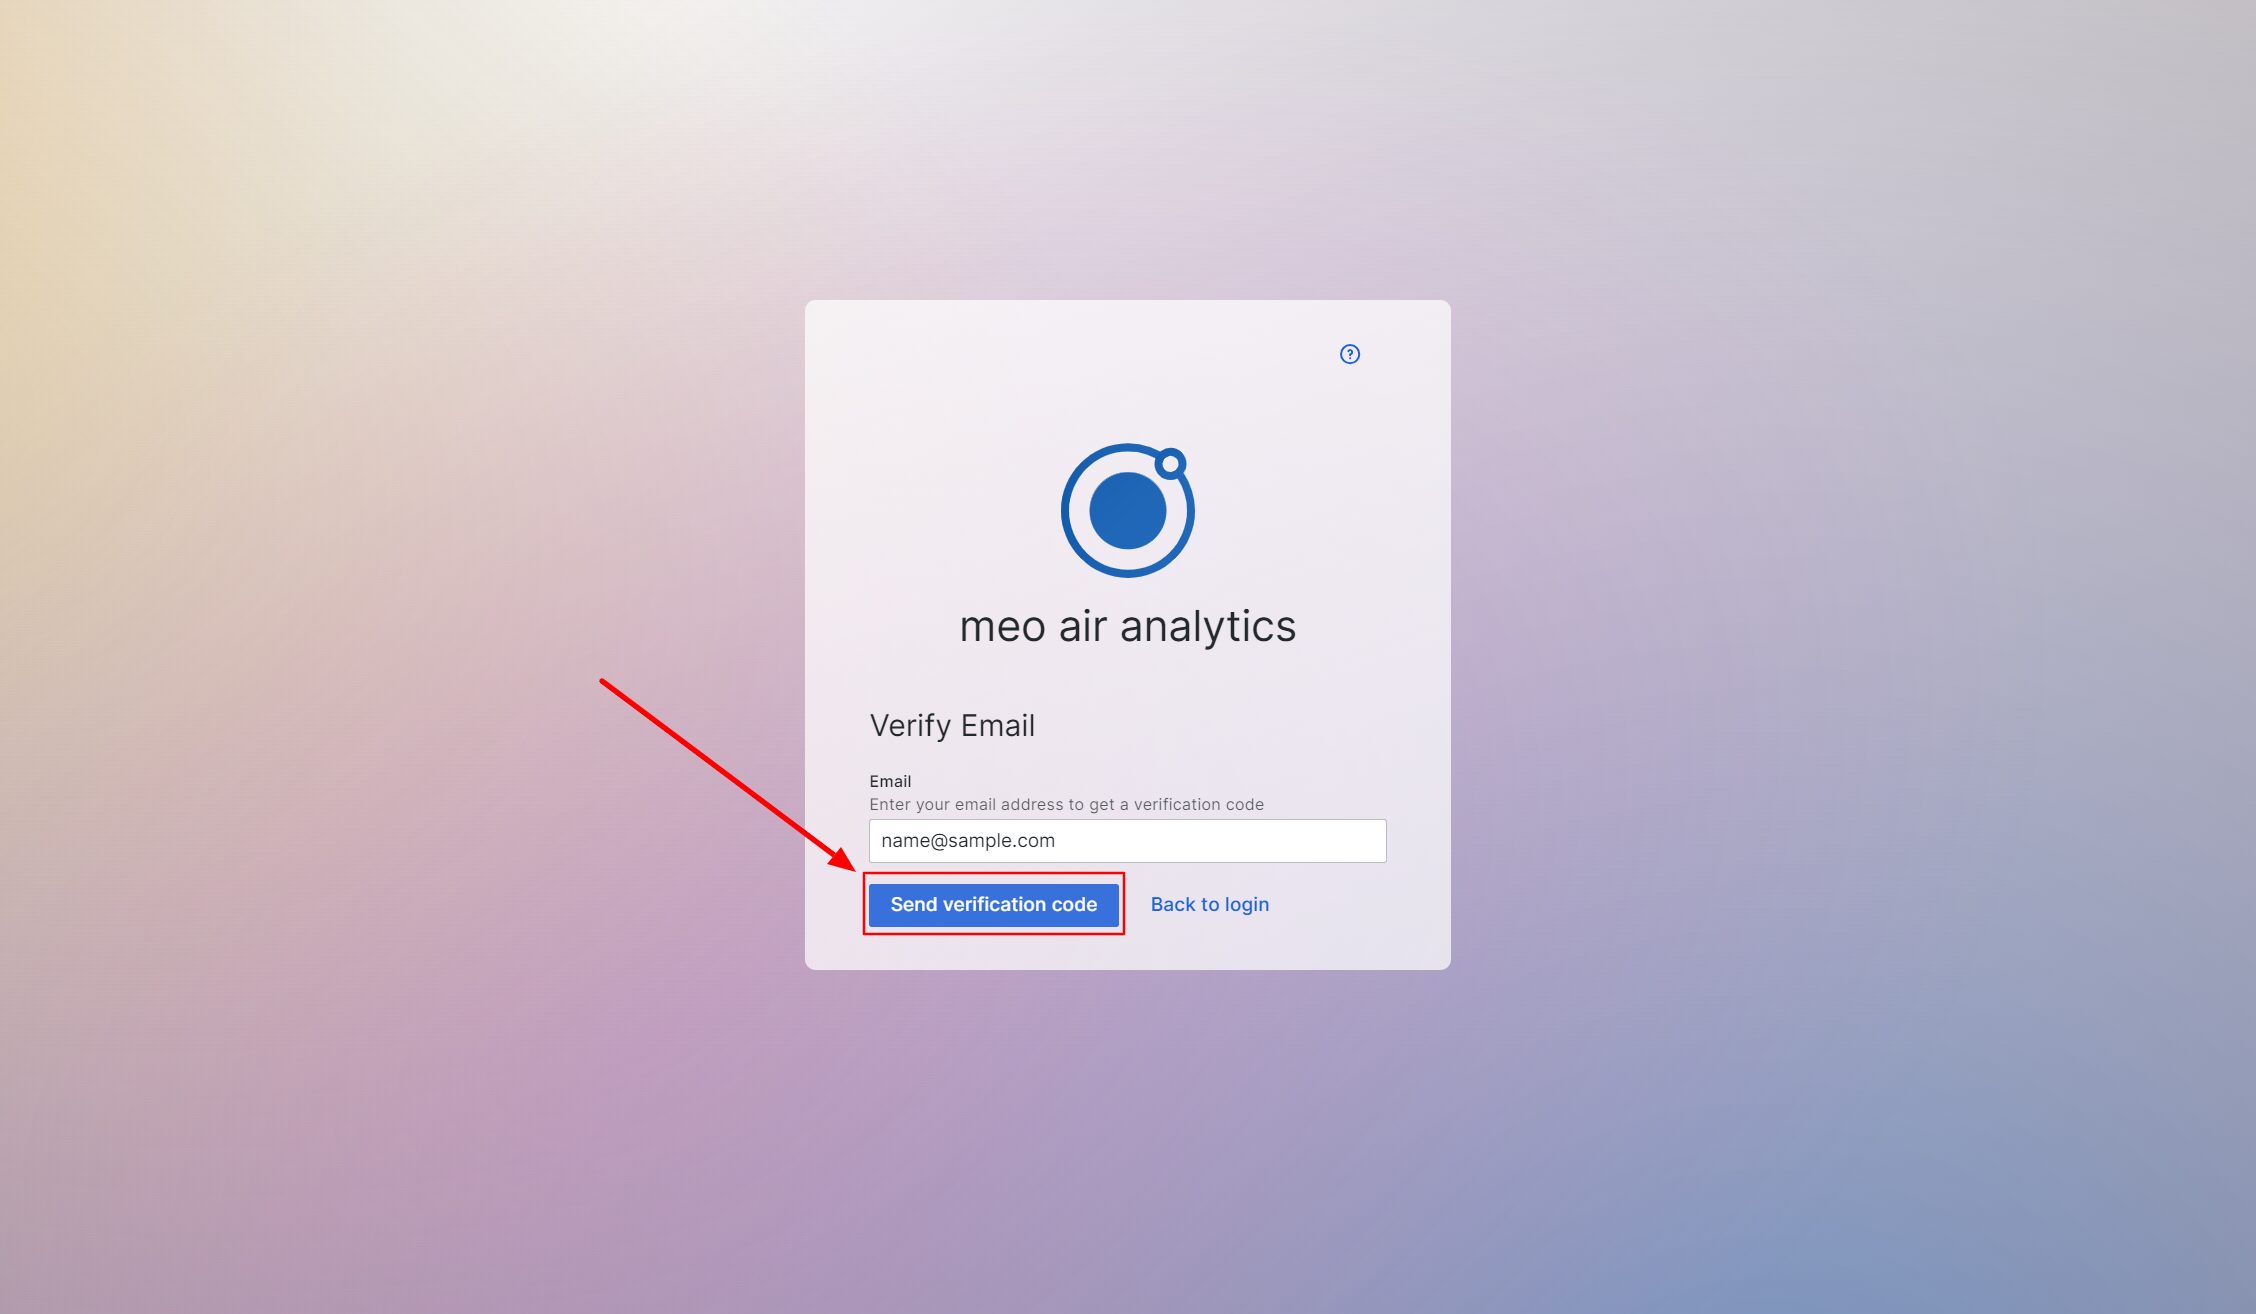
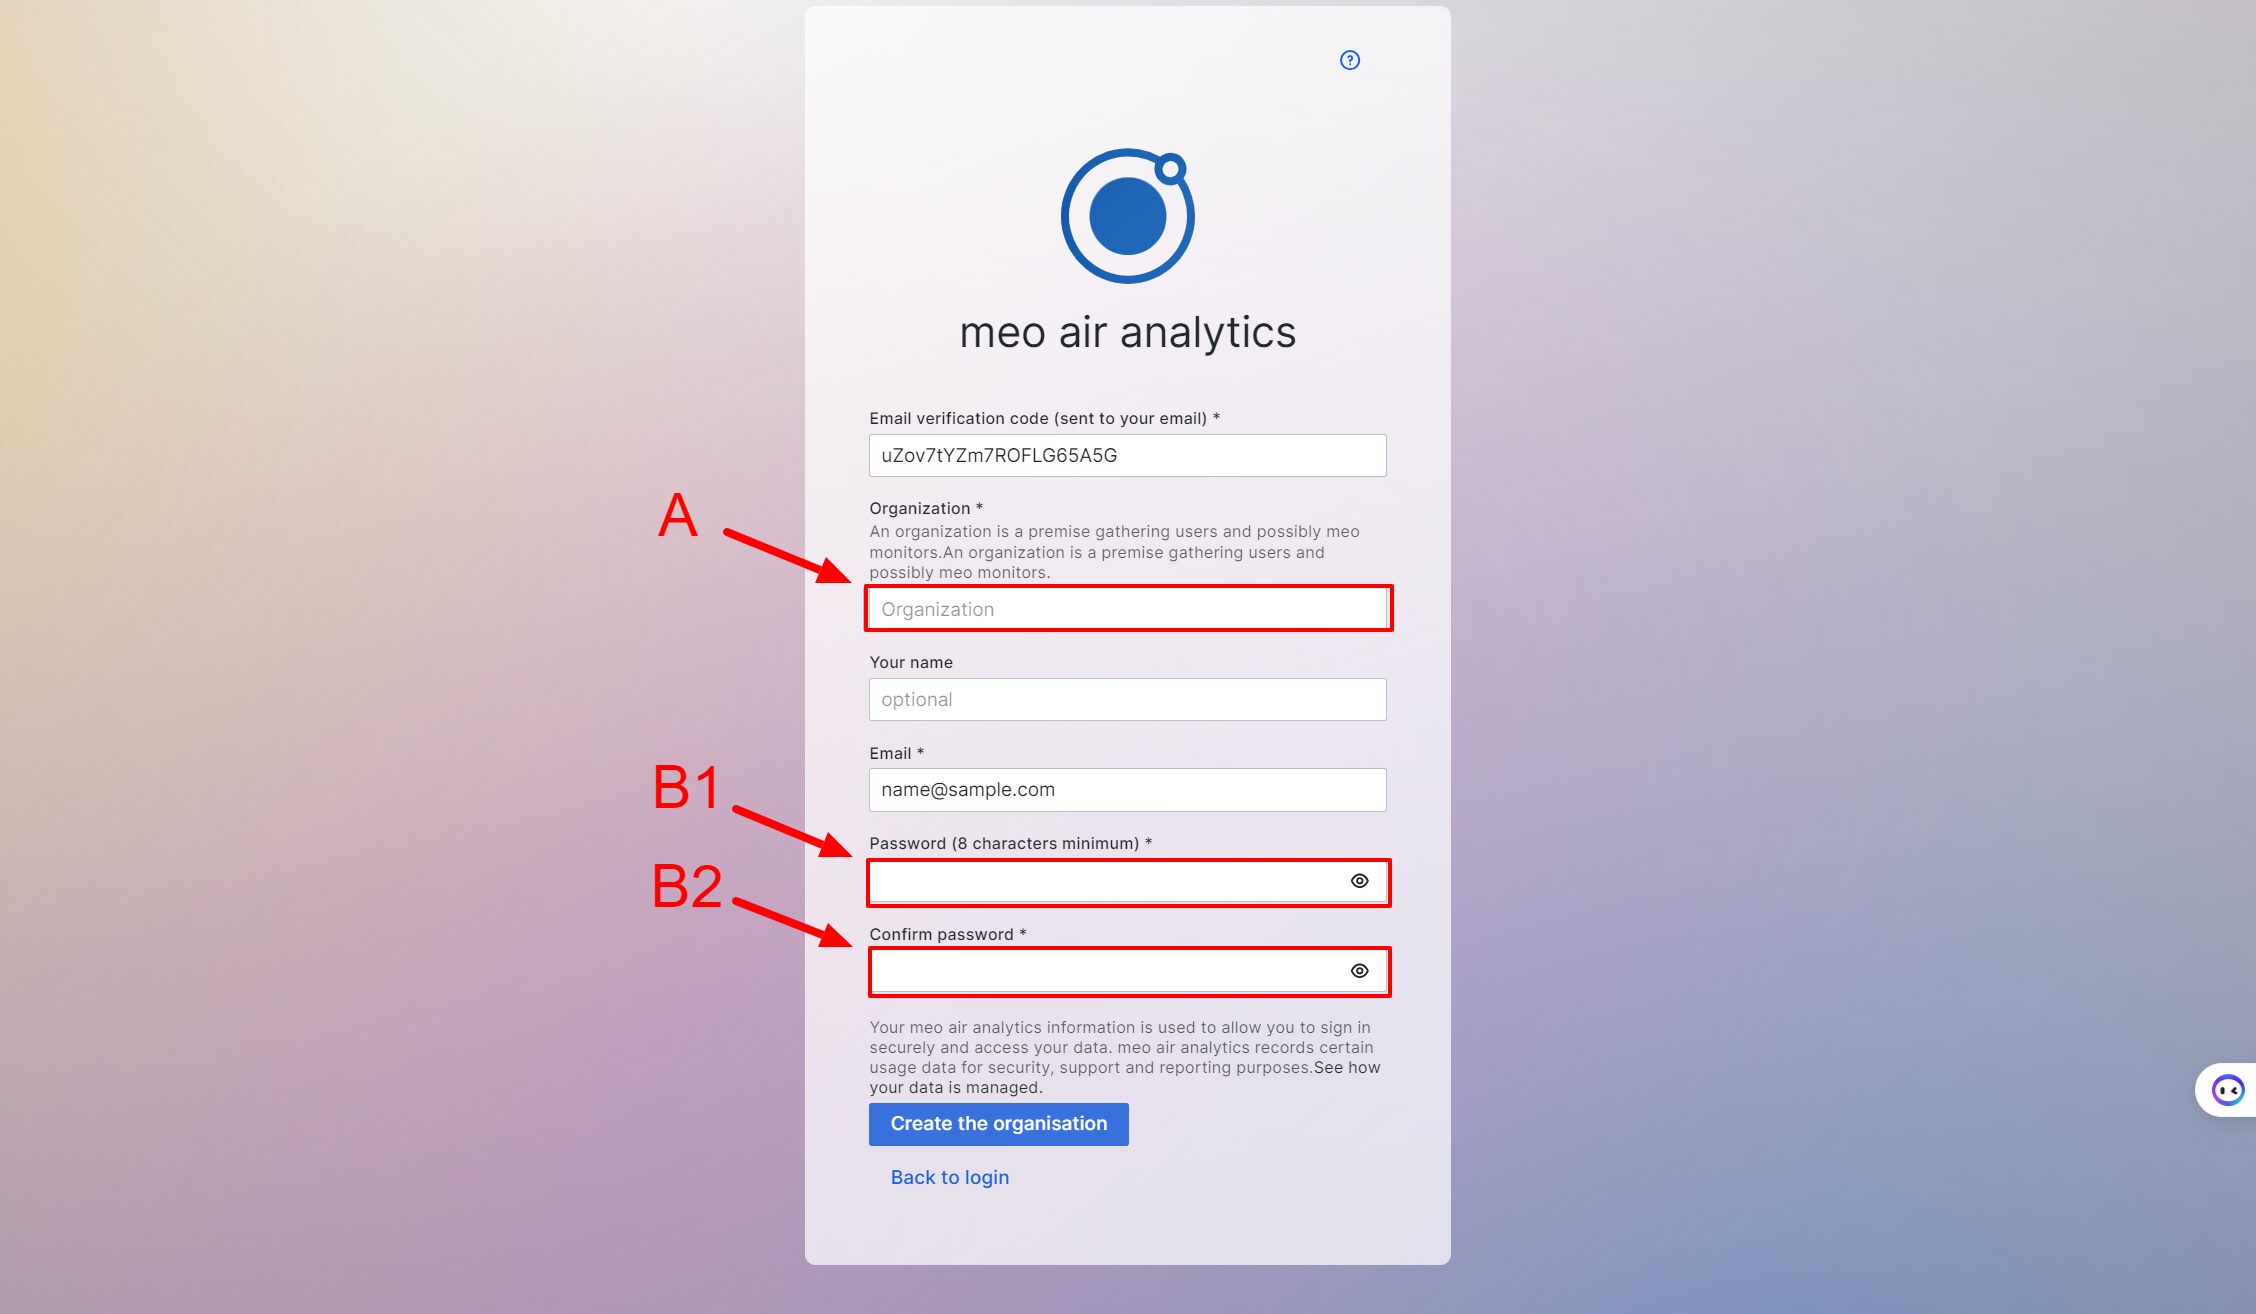
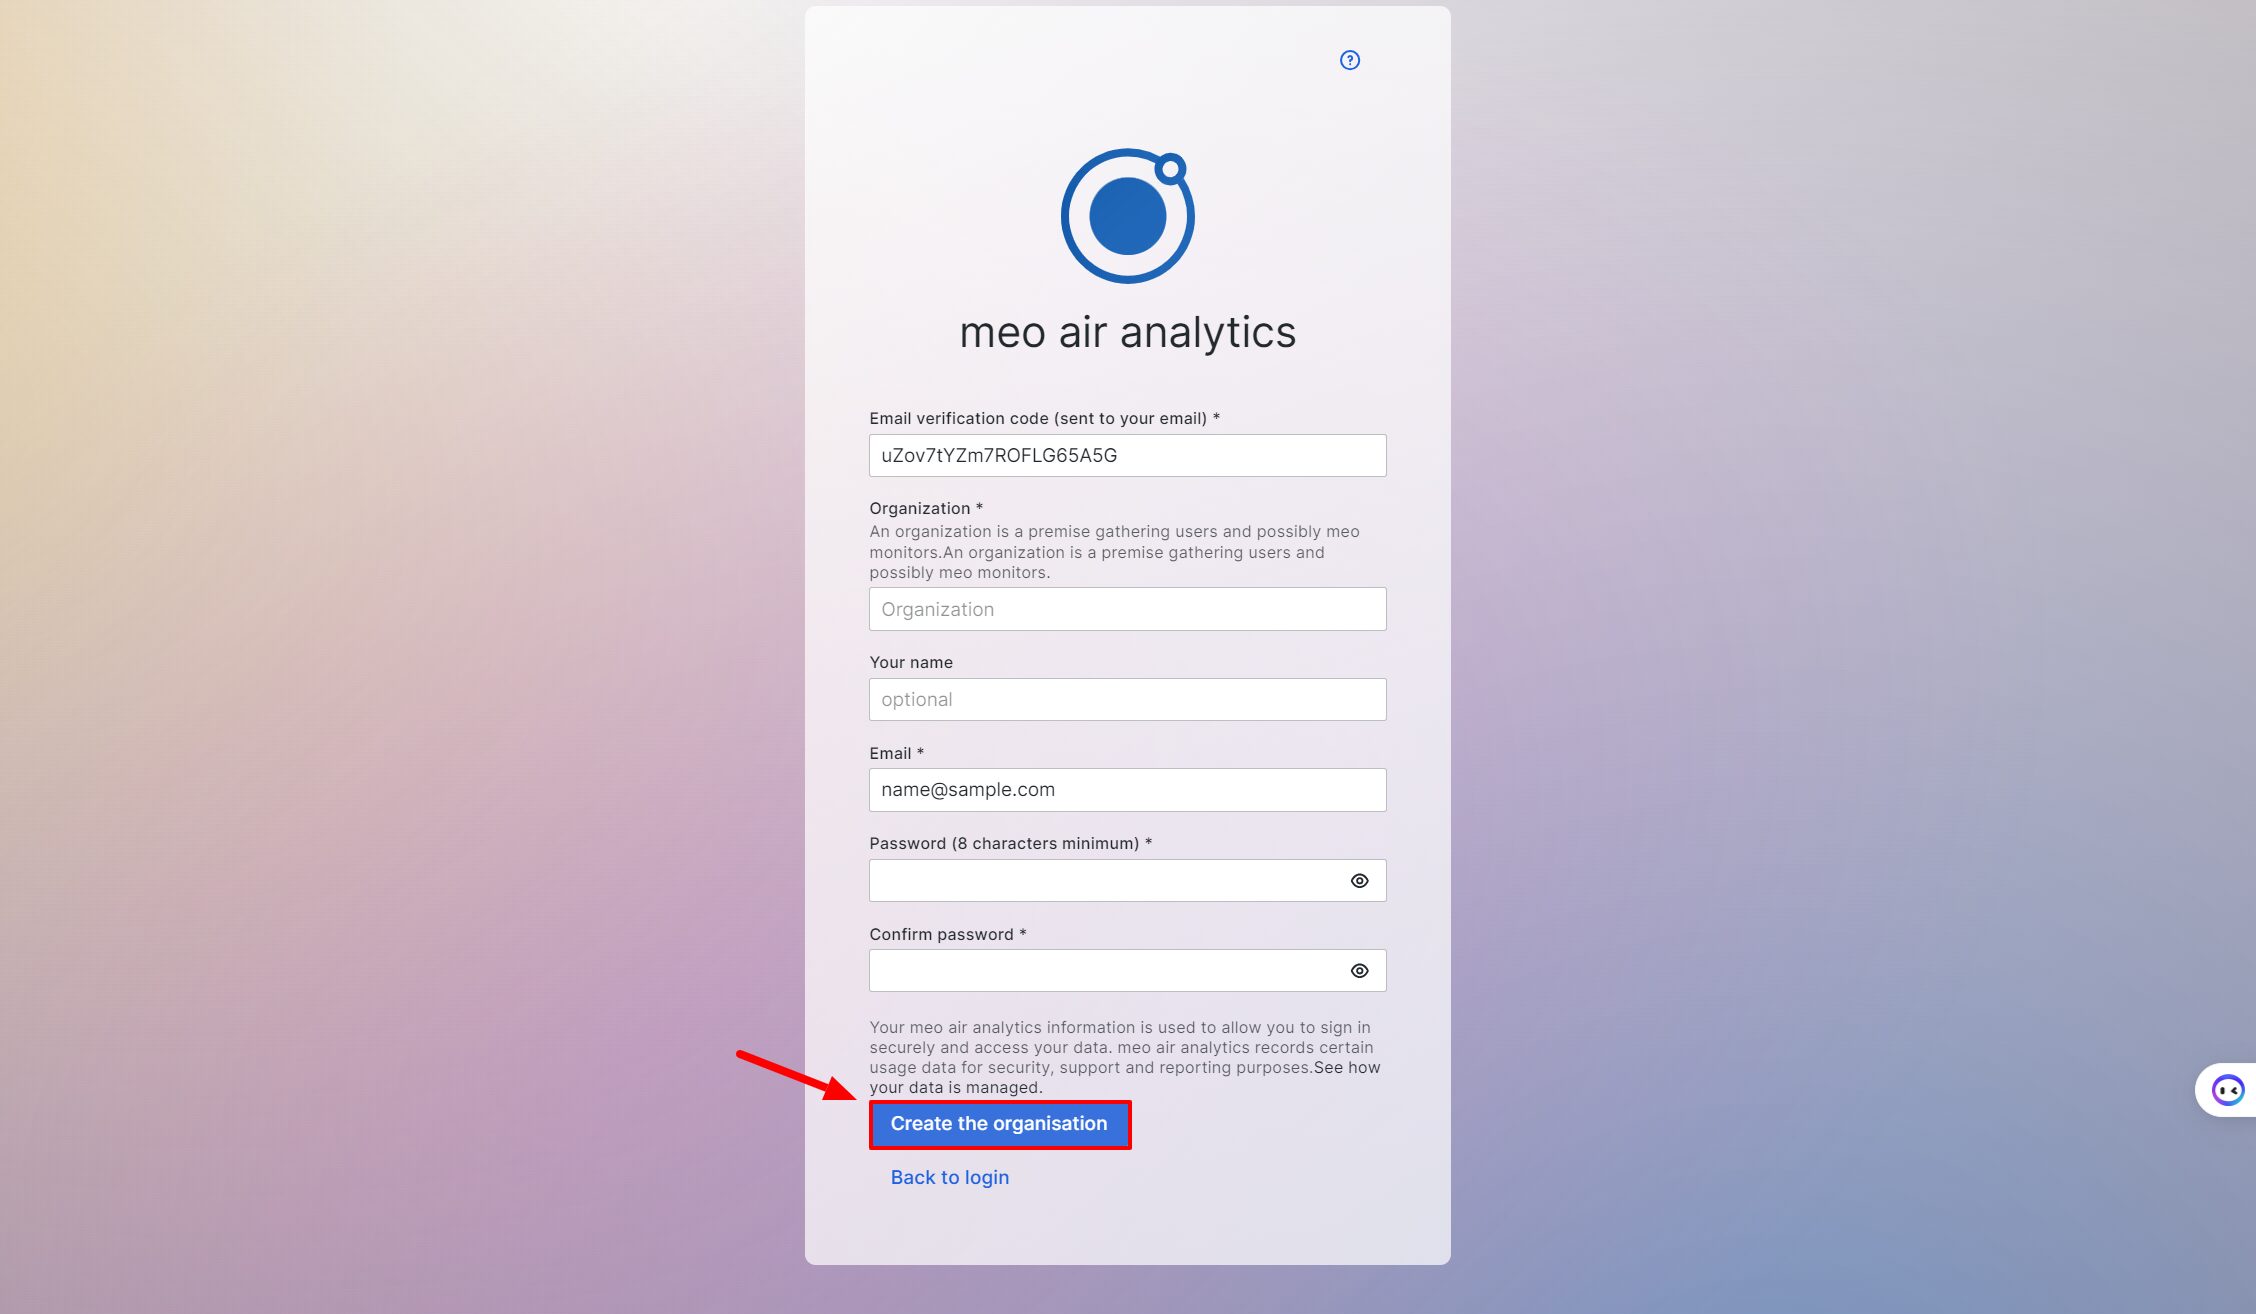
Create an organisation (aka SignUp)
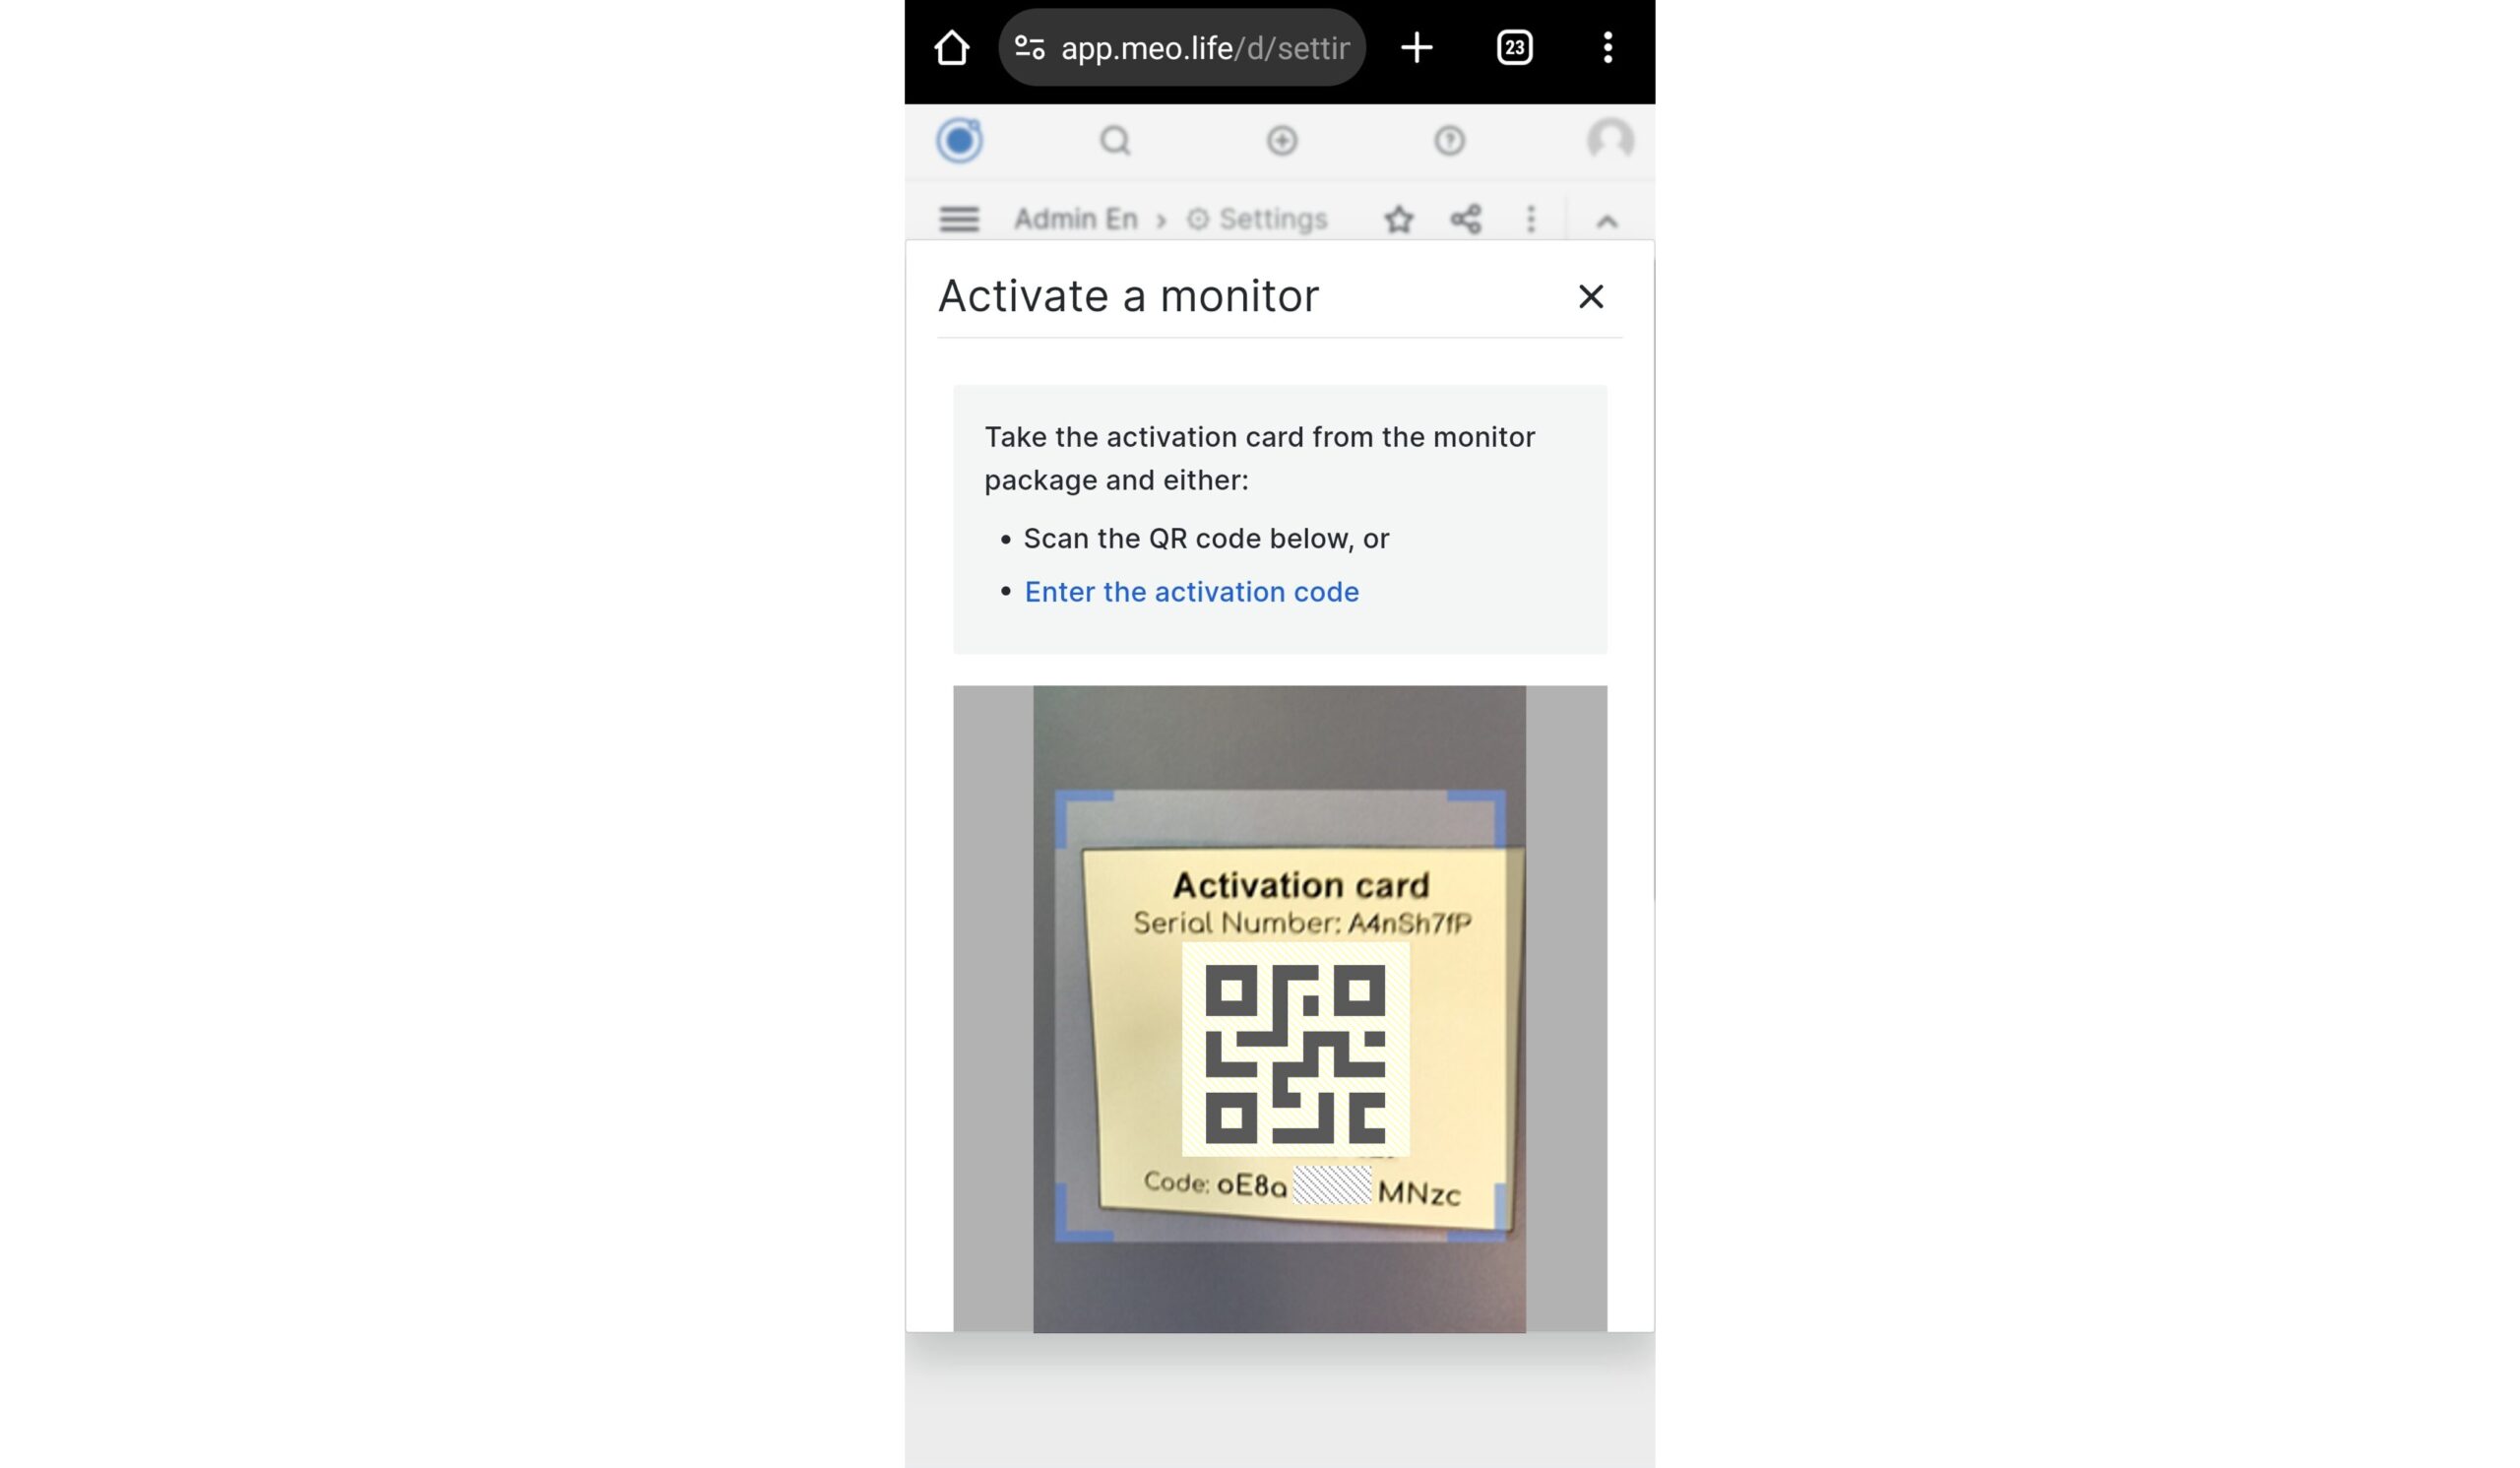
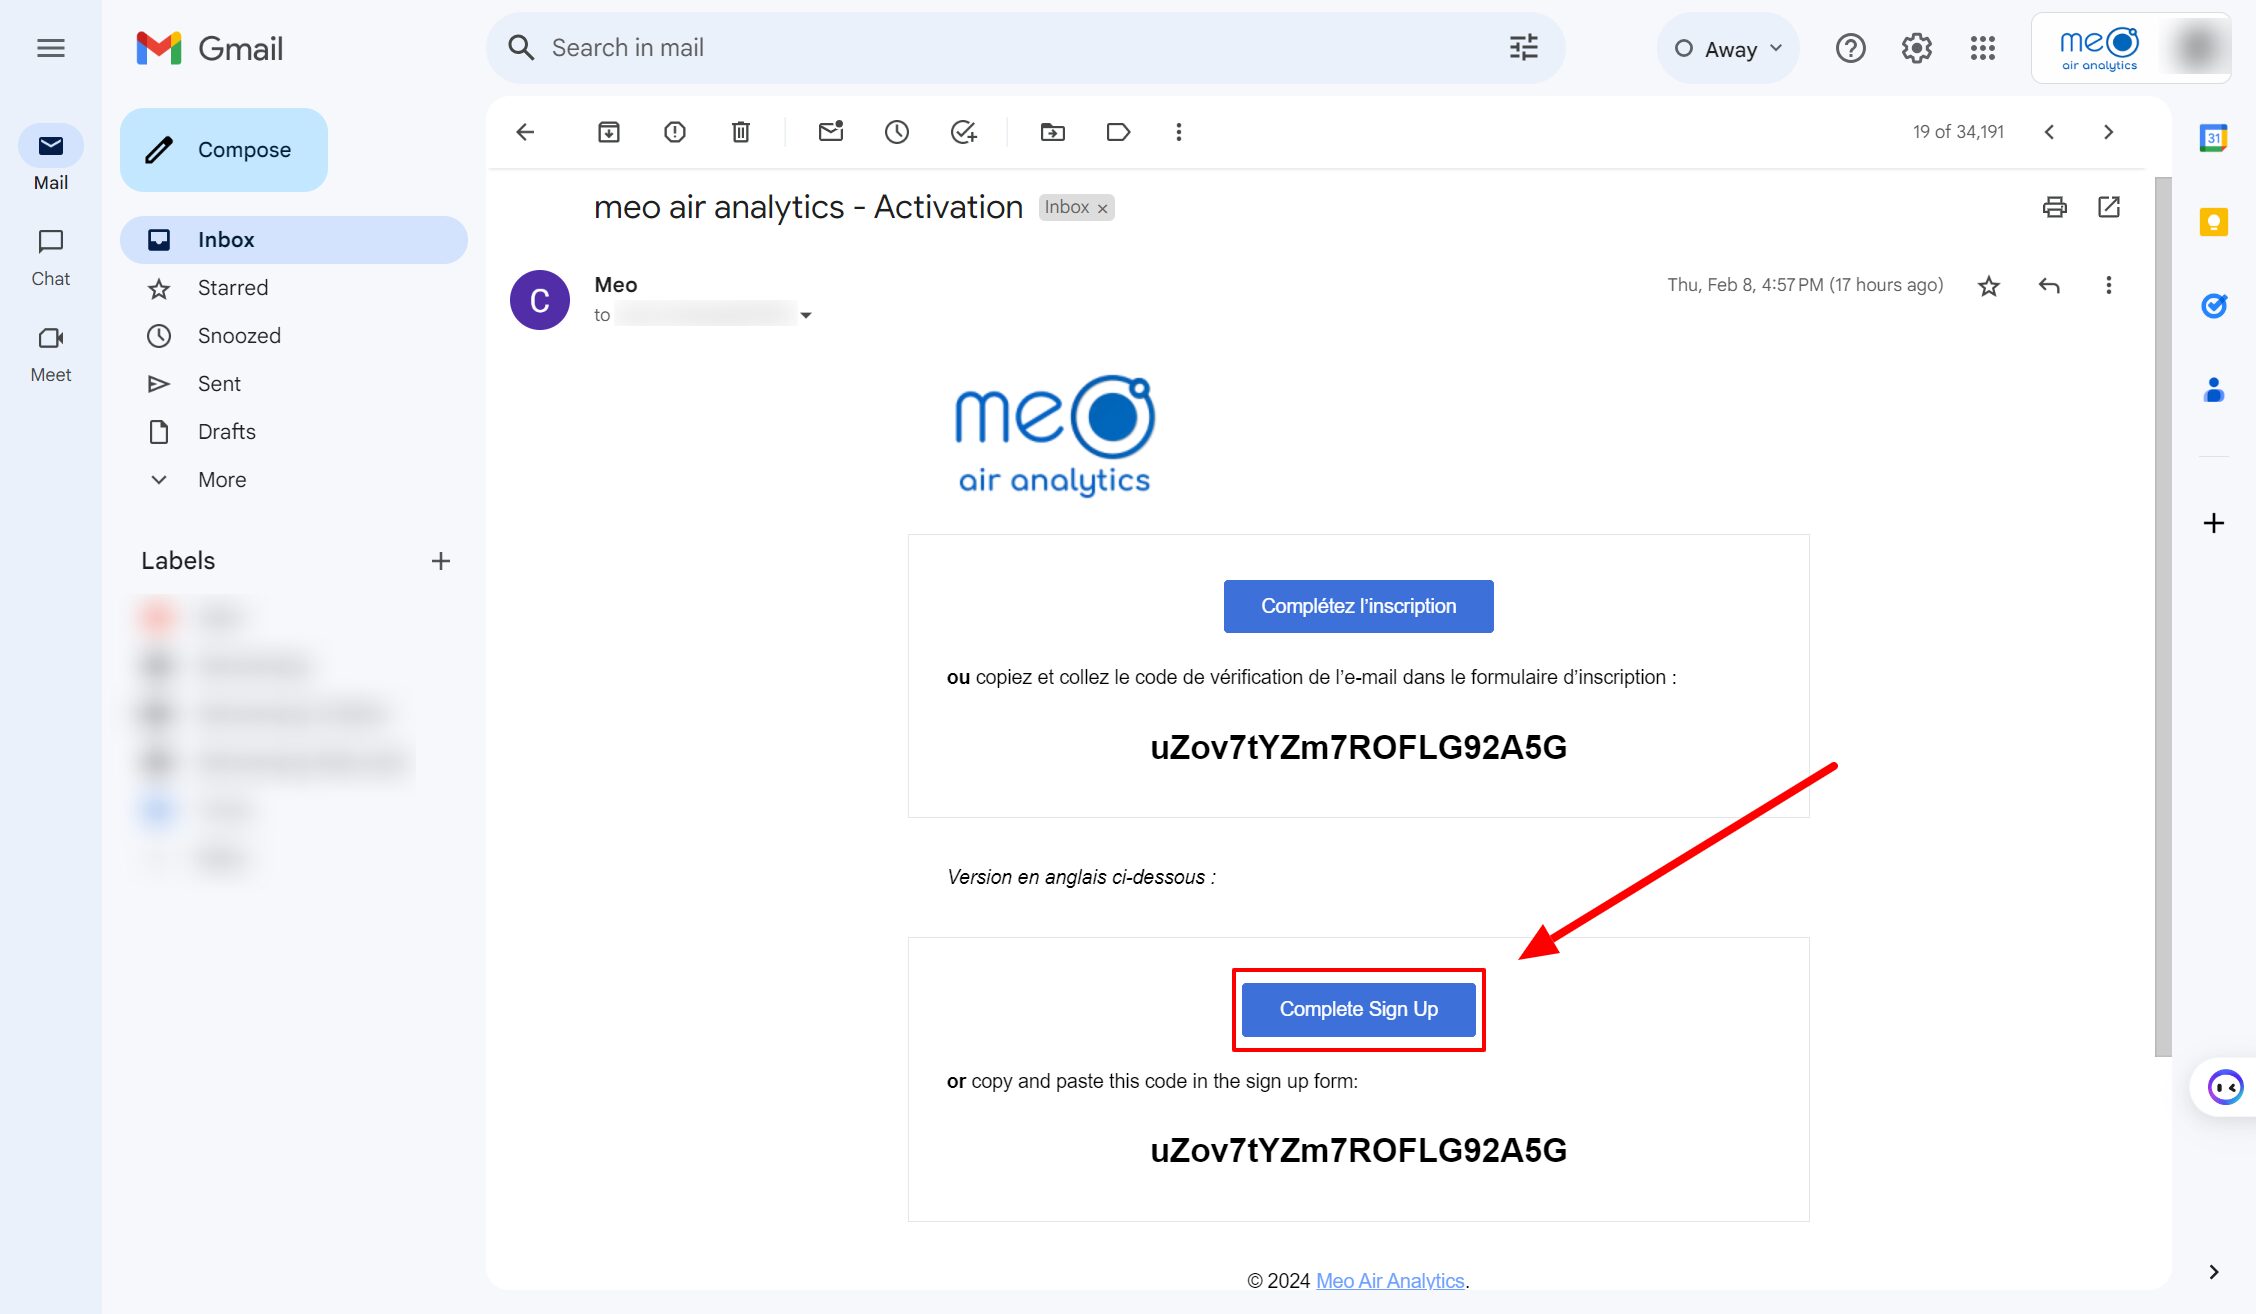
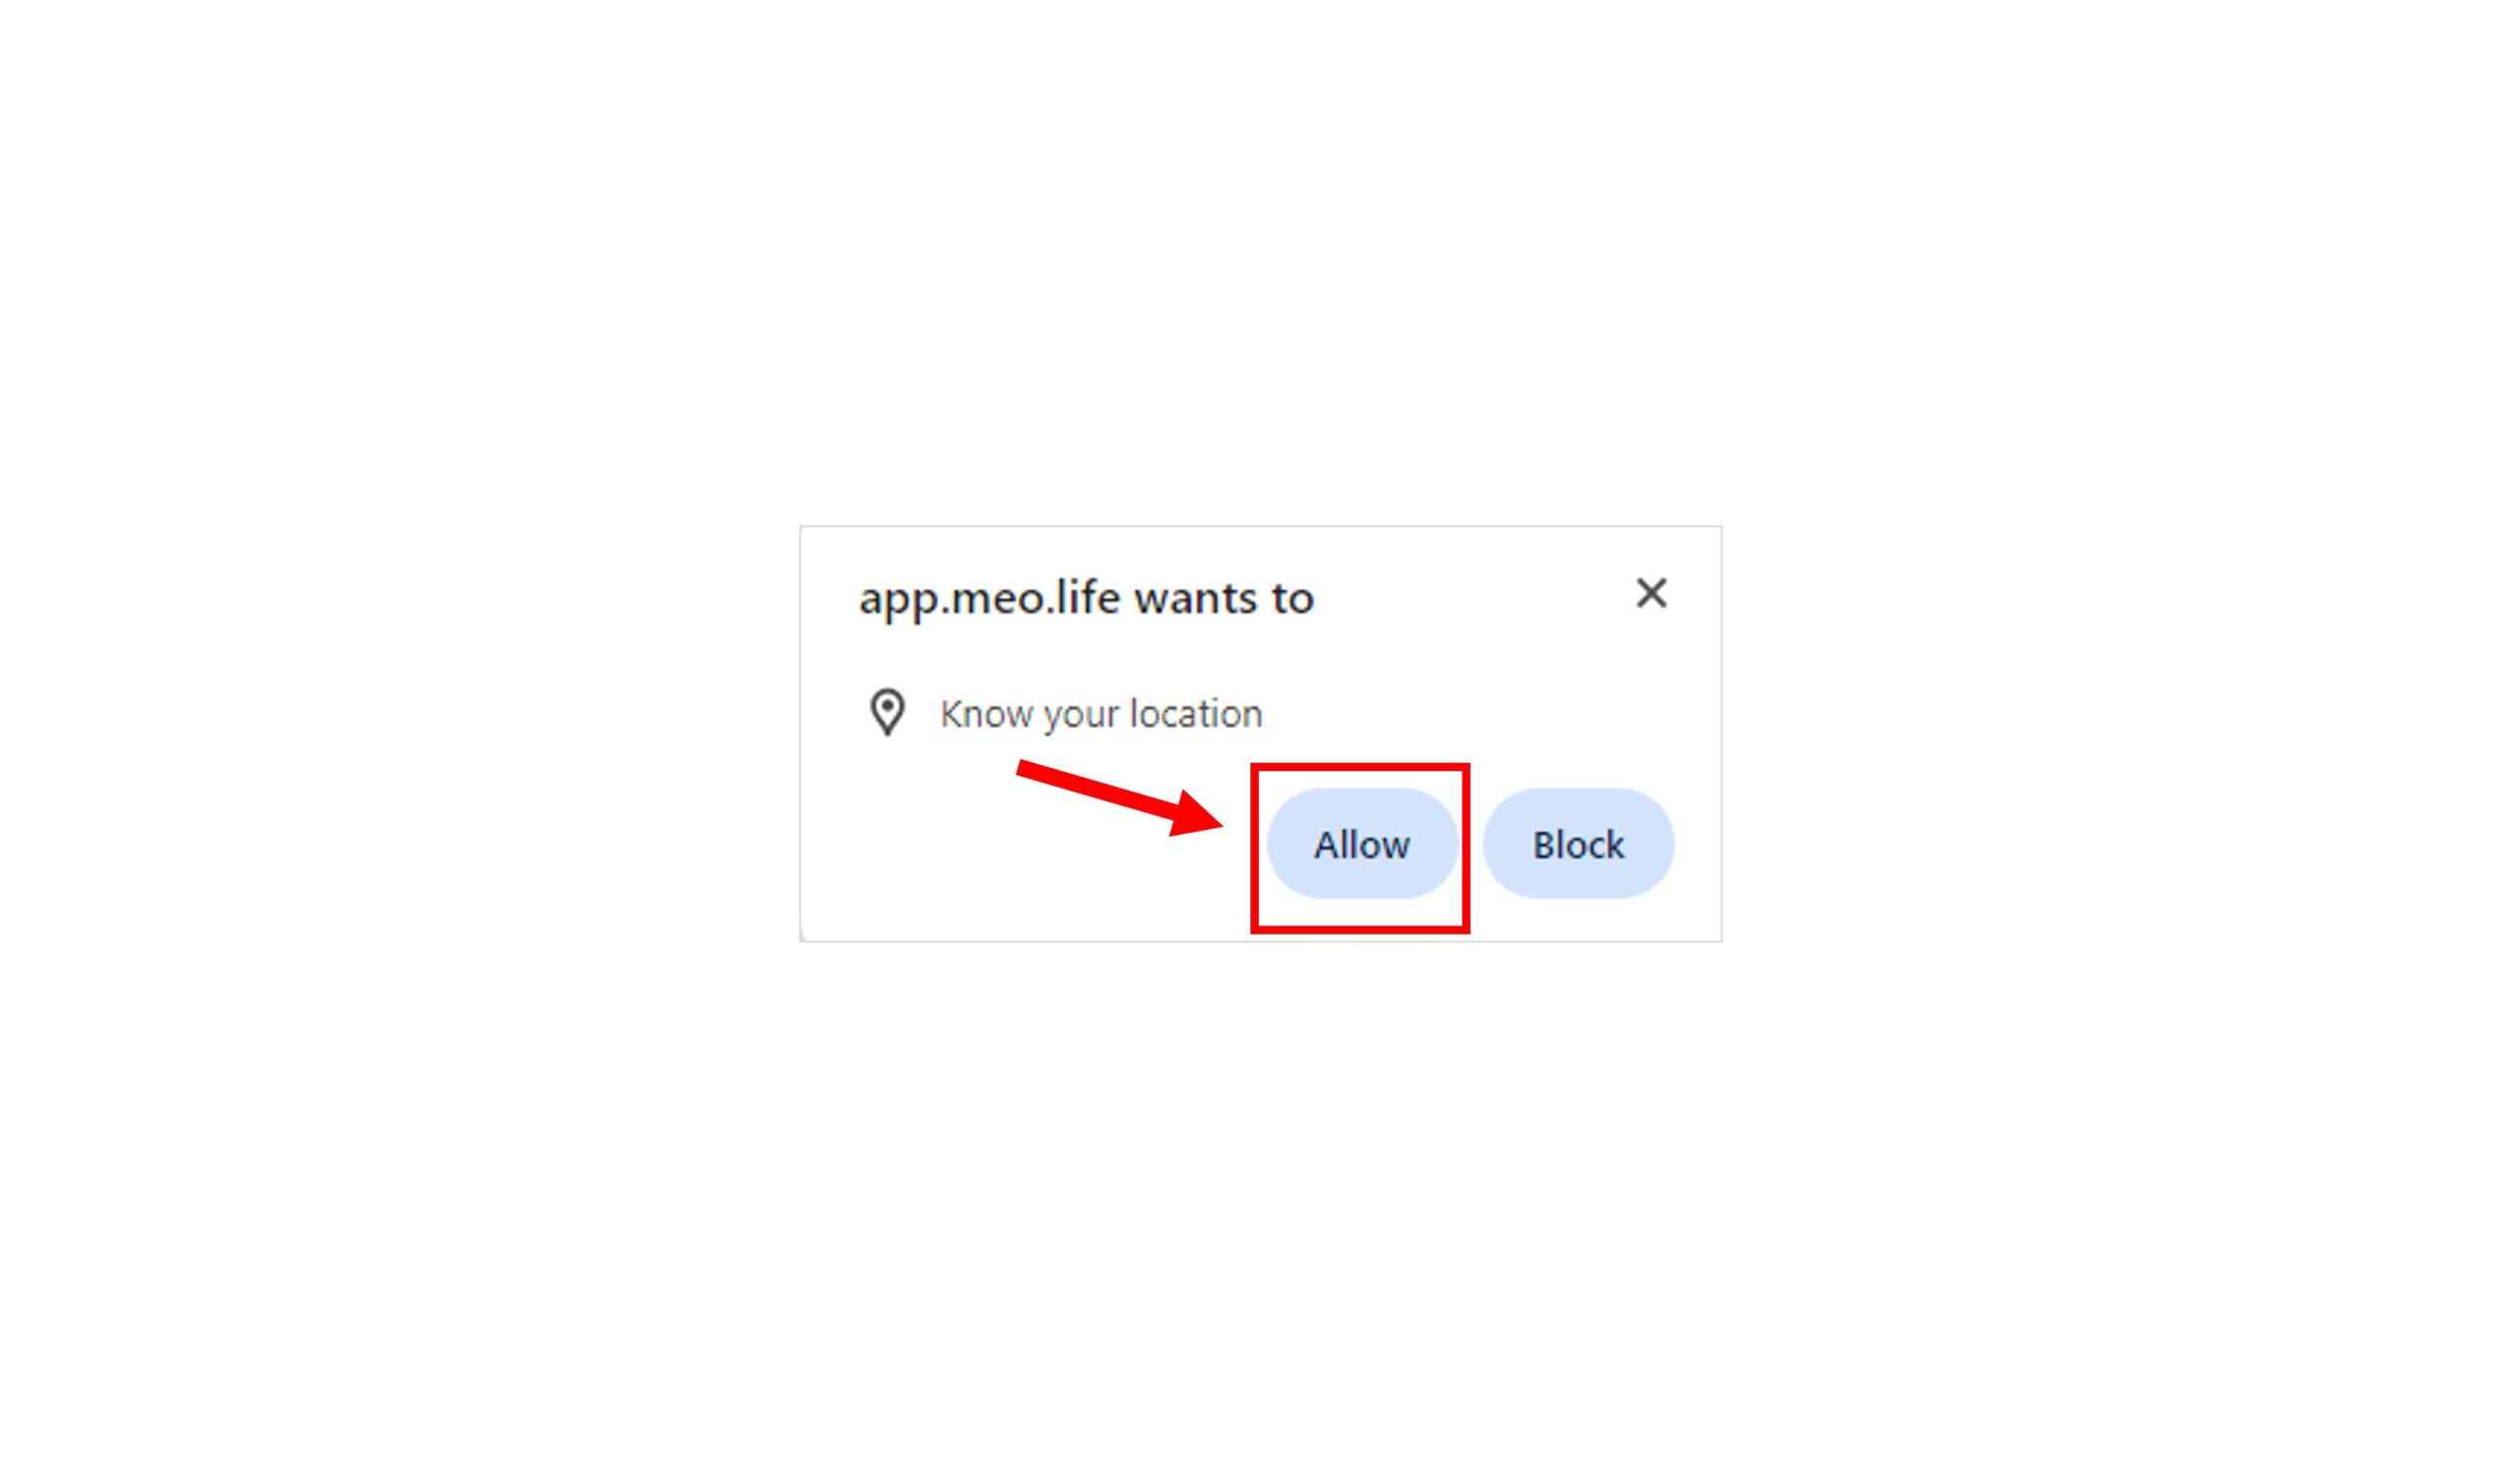
- Scan the QR code of the Activation card, with your smartphone camera or any QR code scanner
– OR –
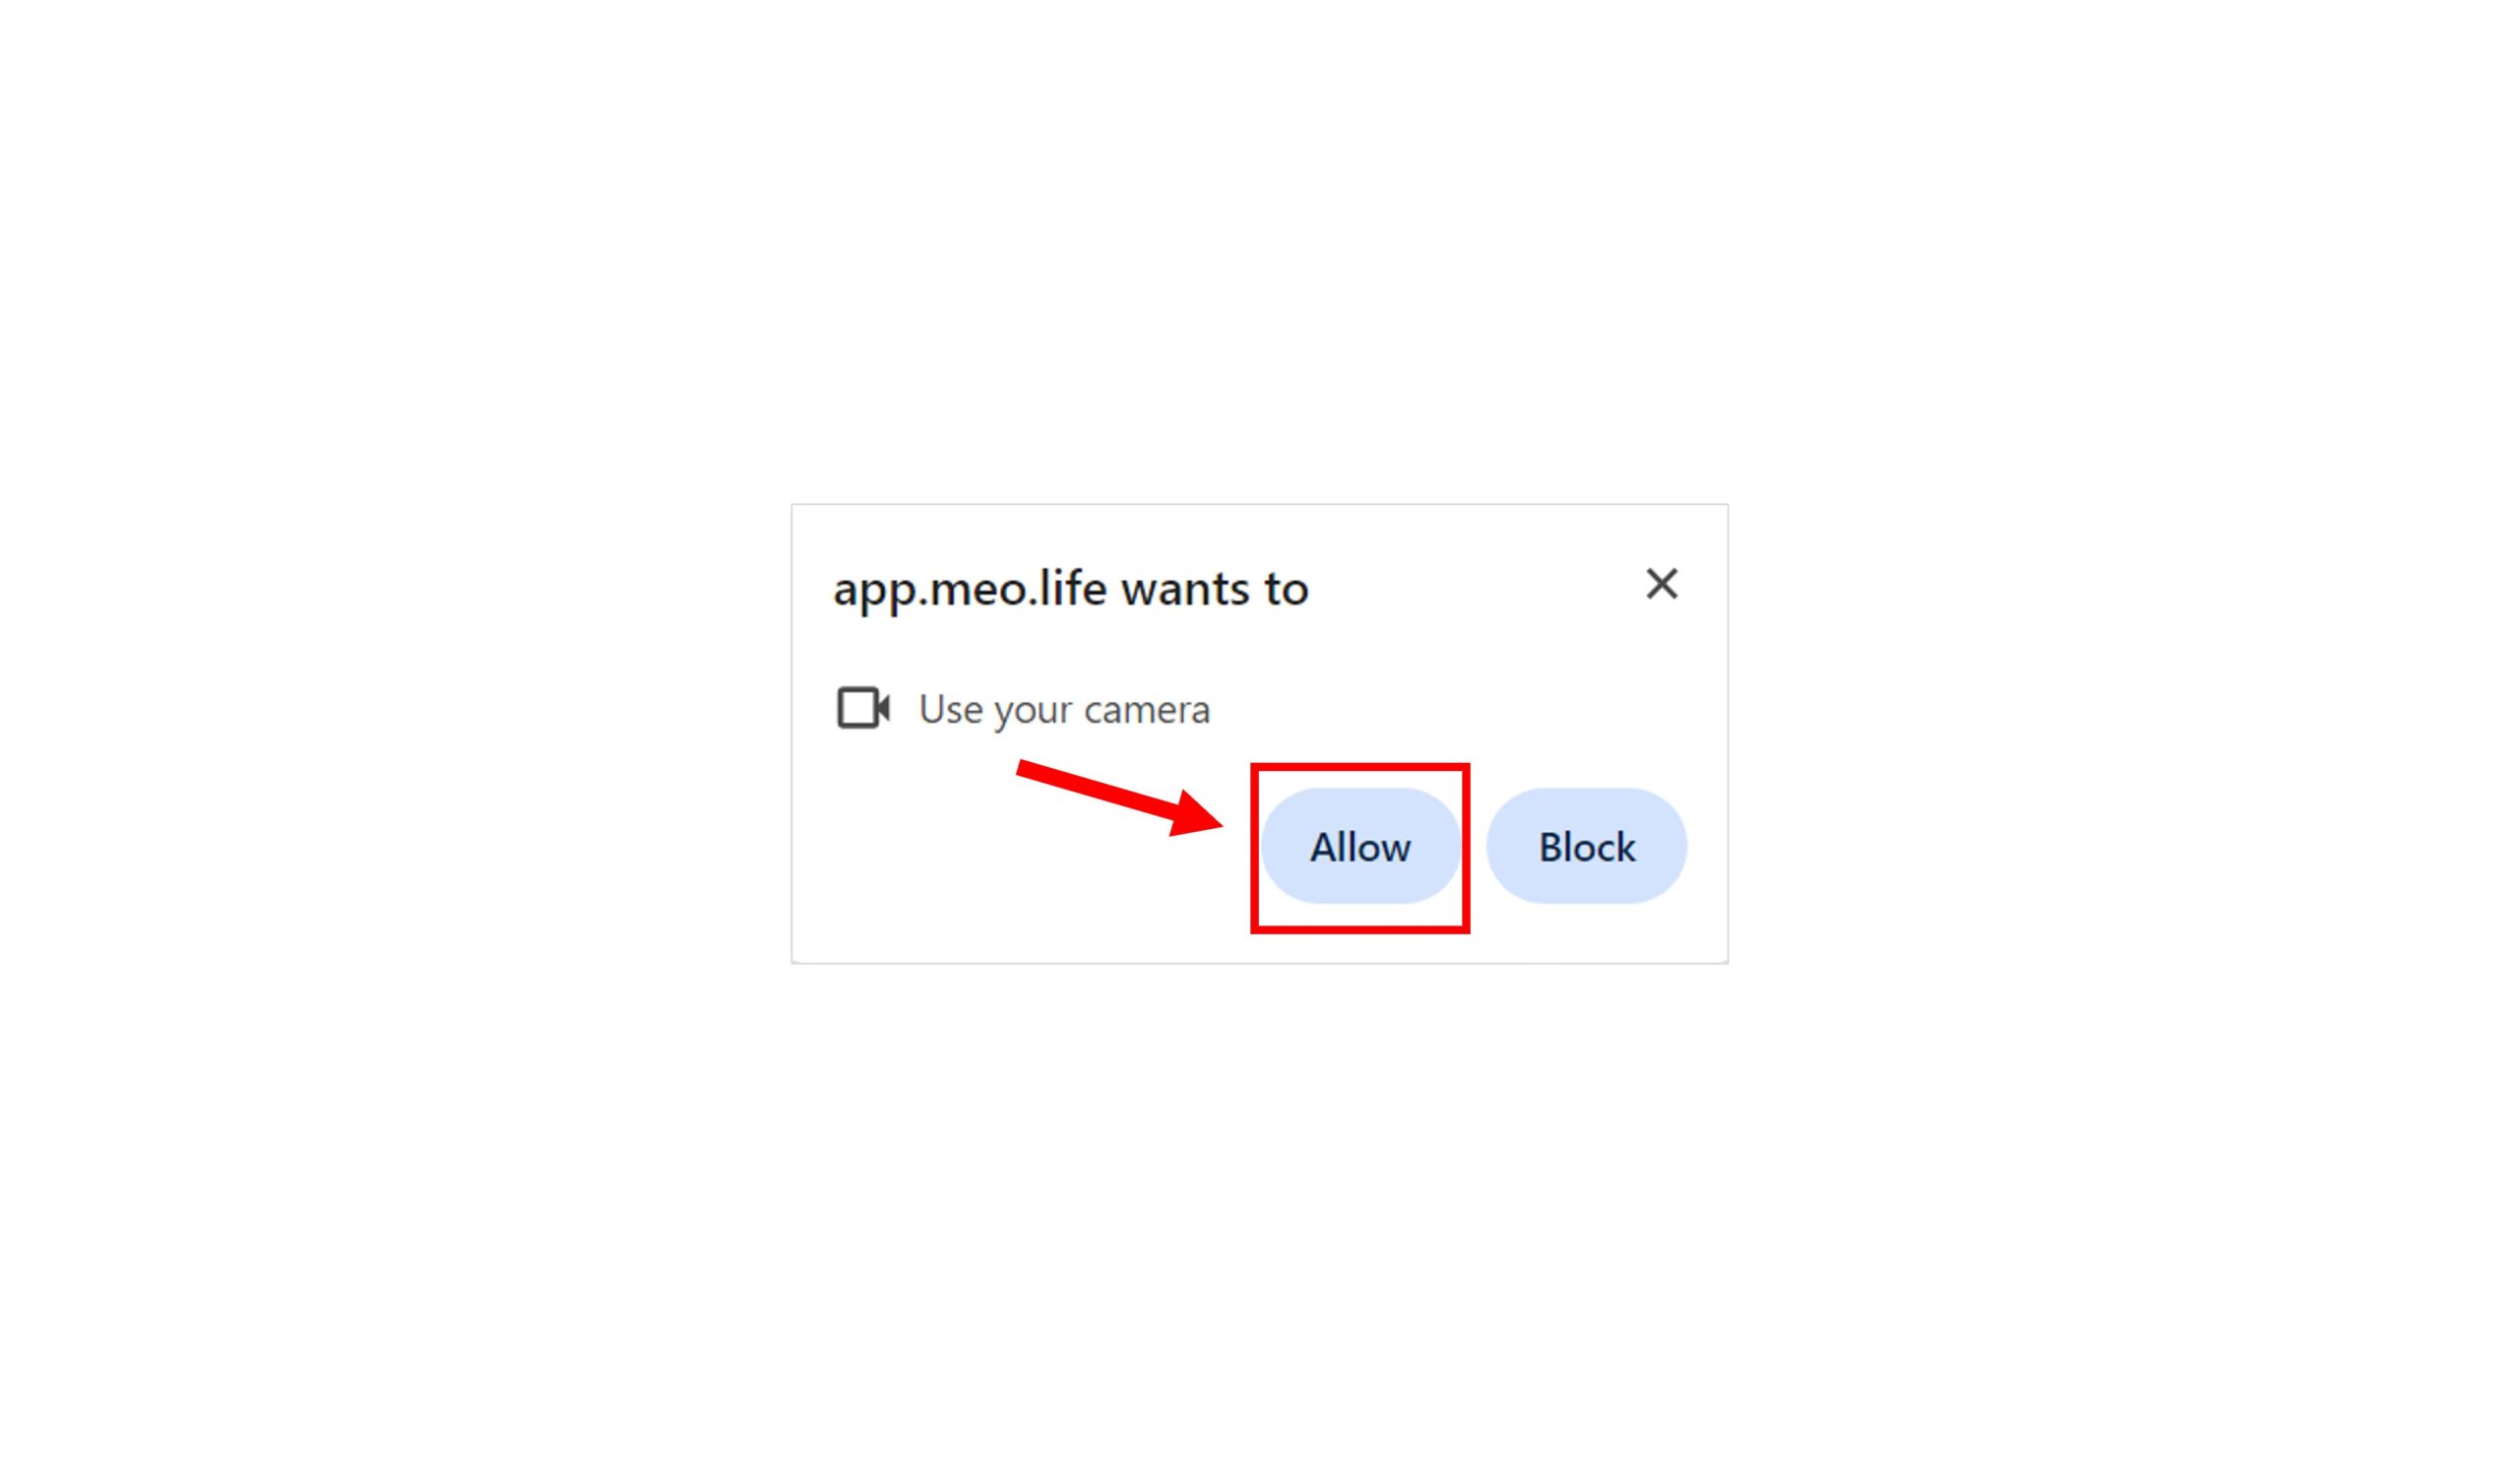
Open a browser on app.meo.life
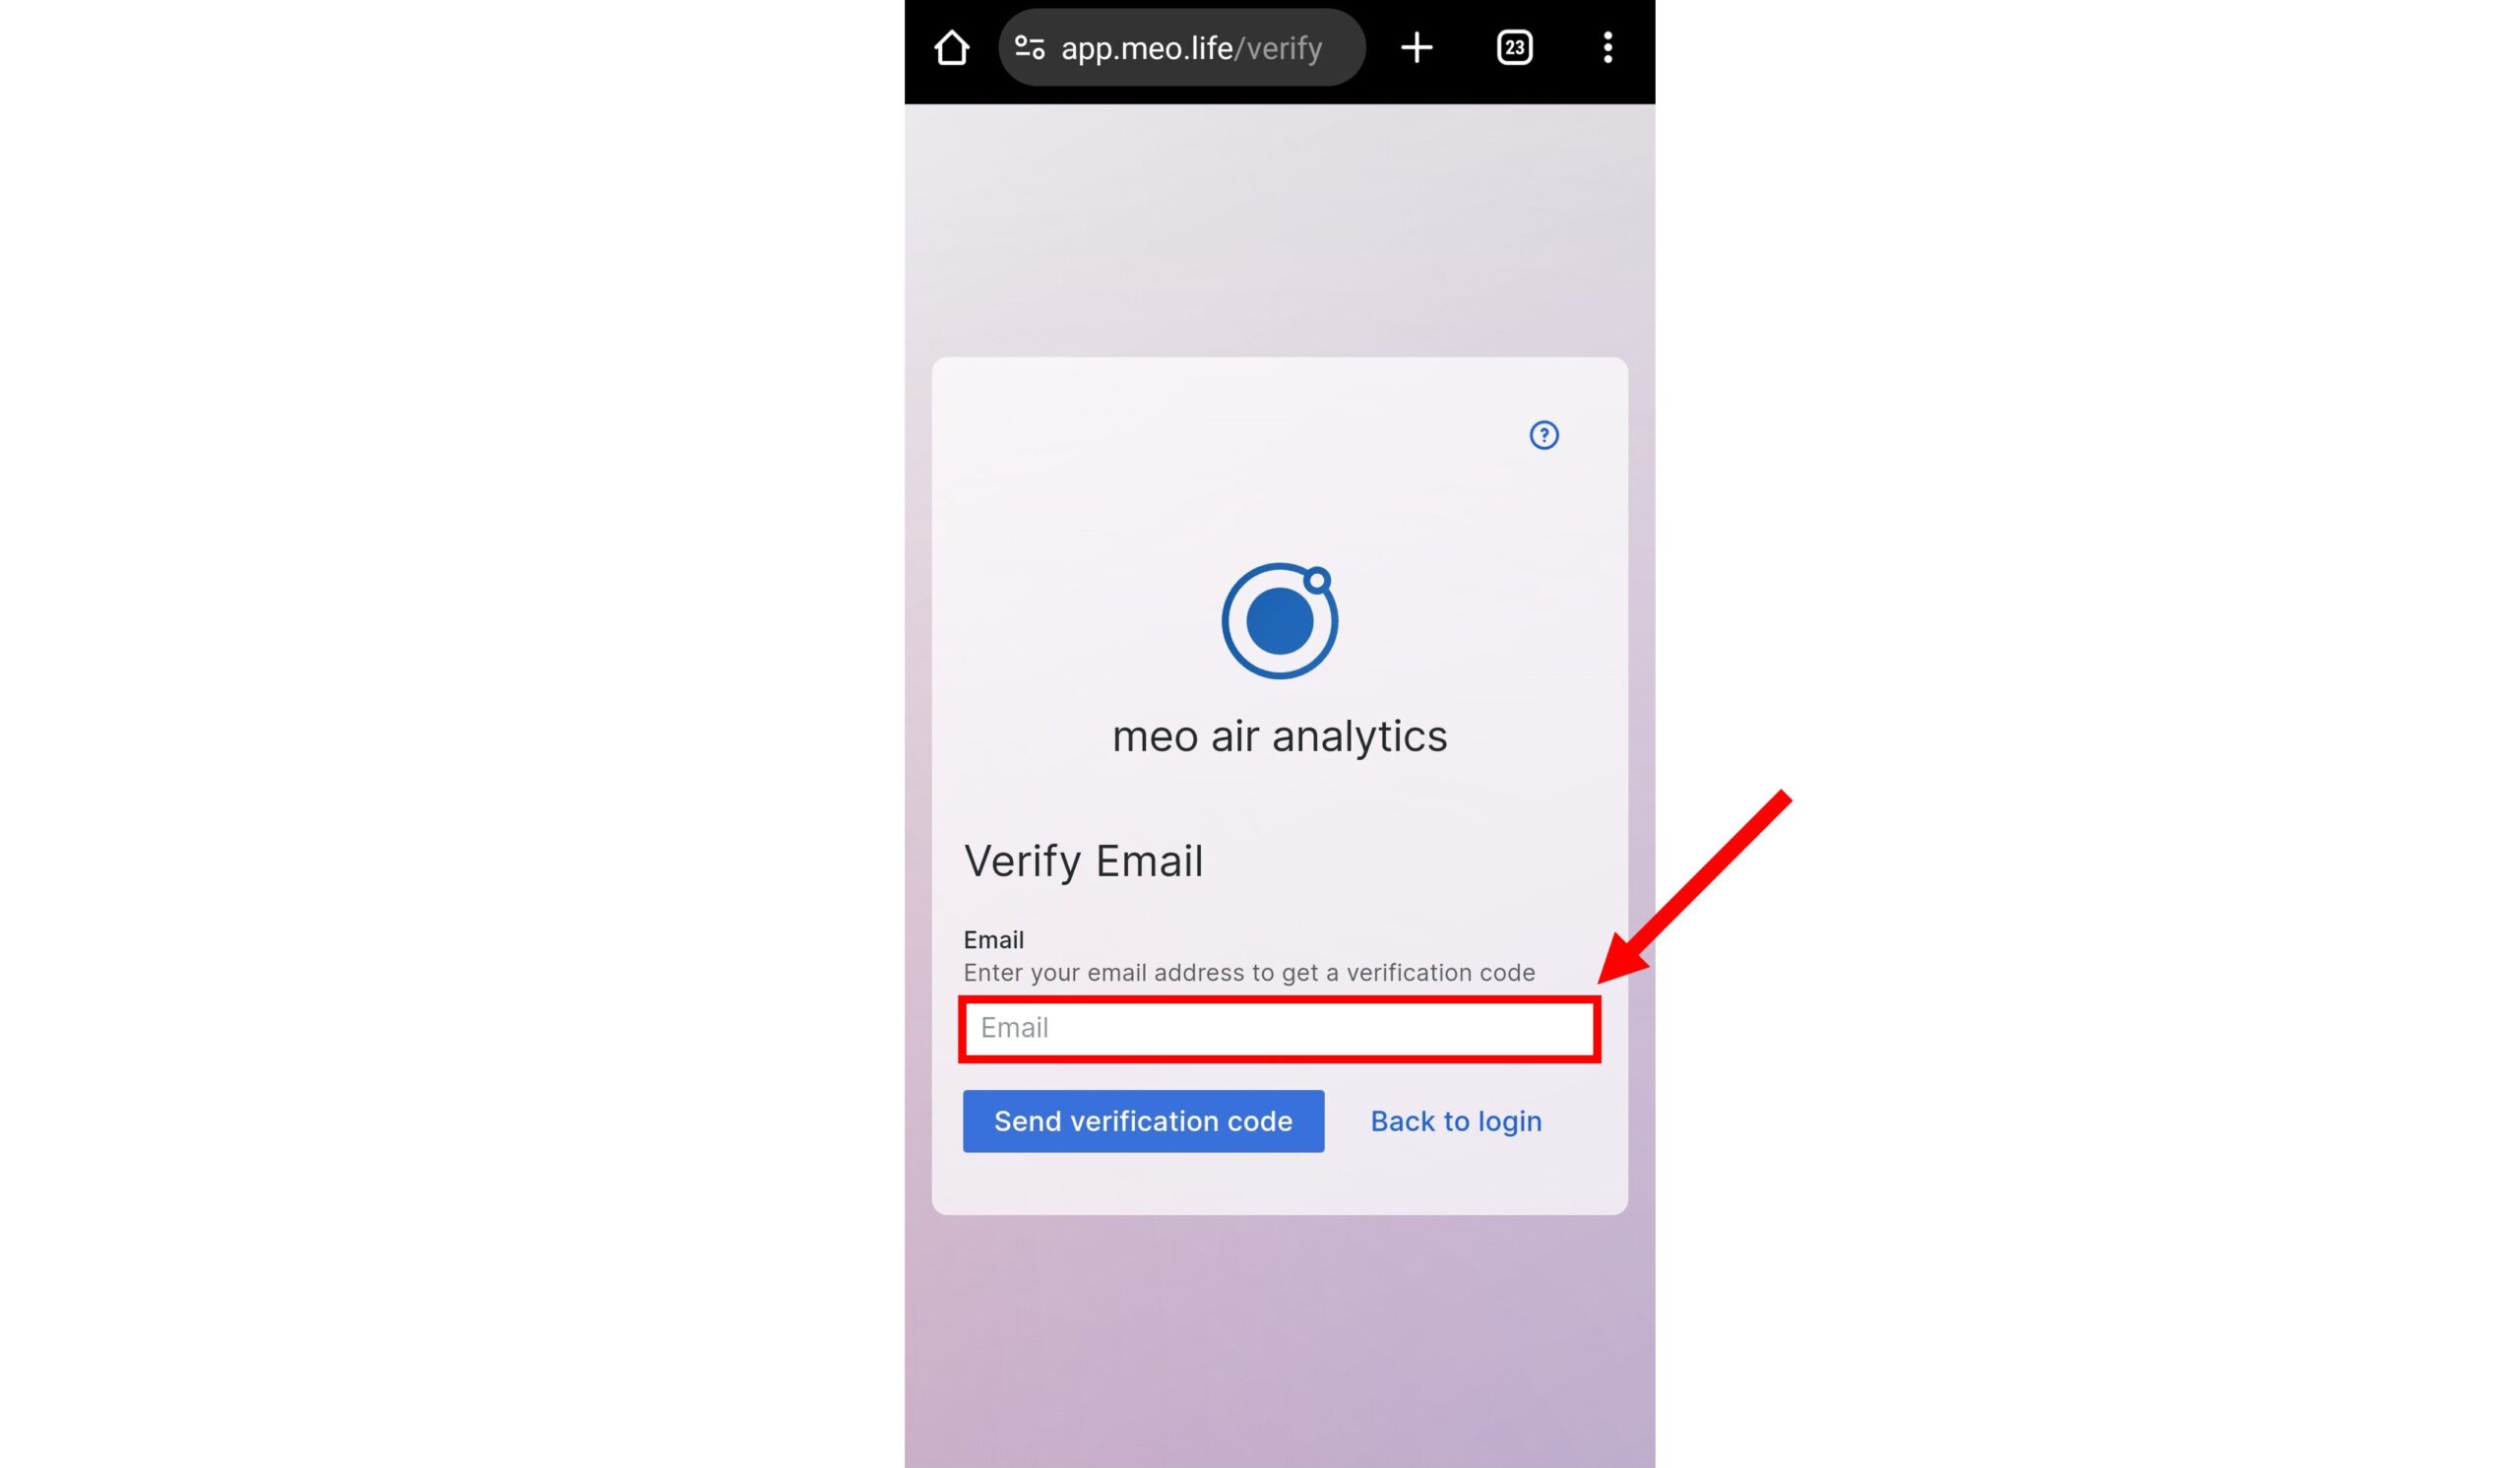
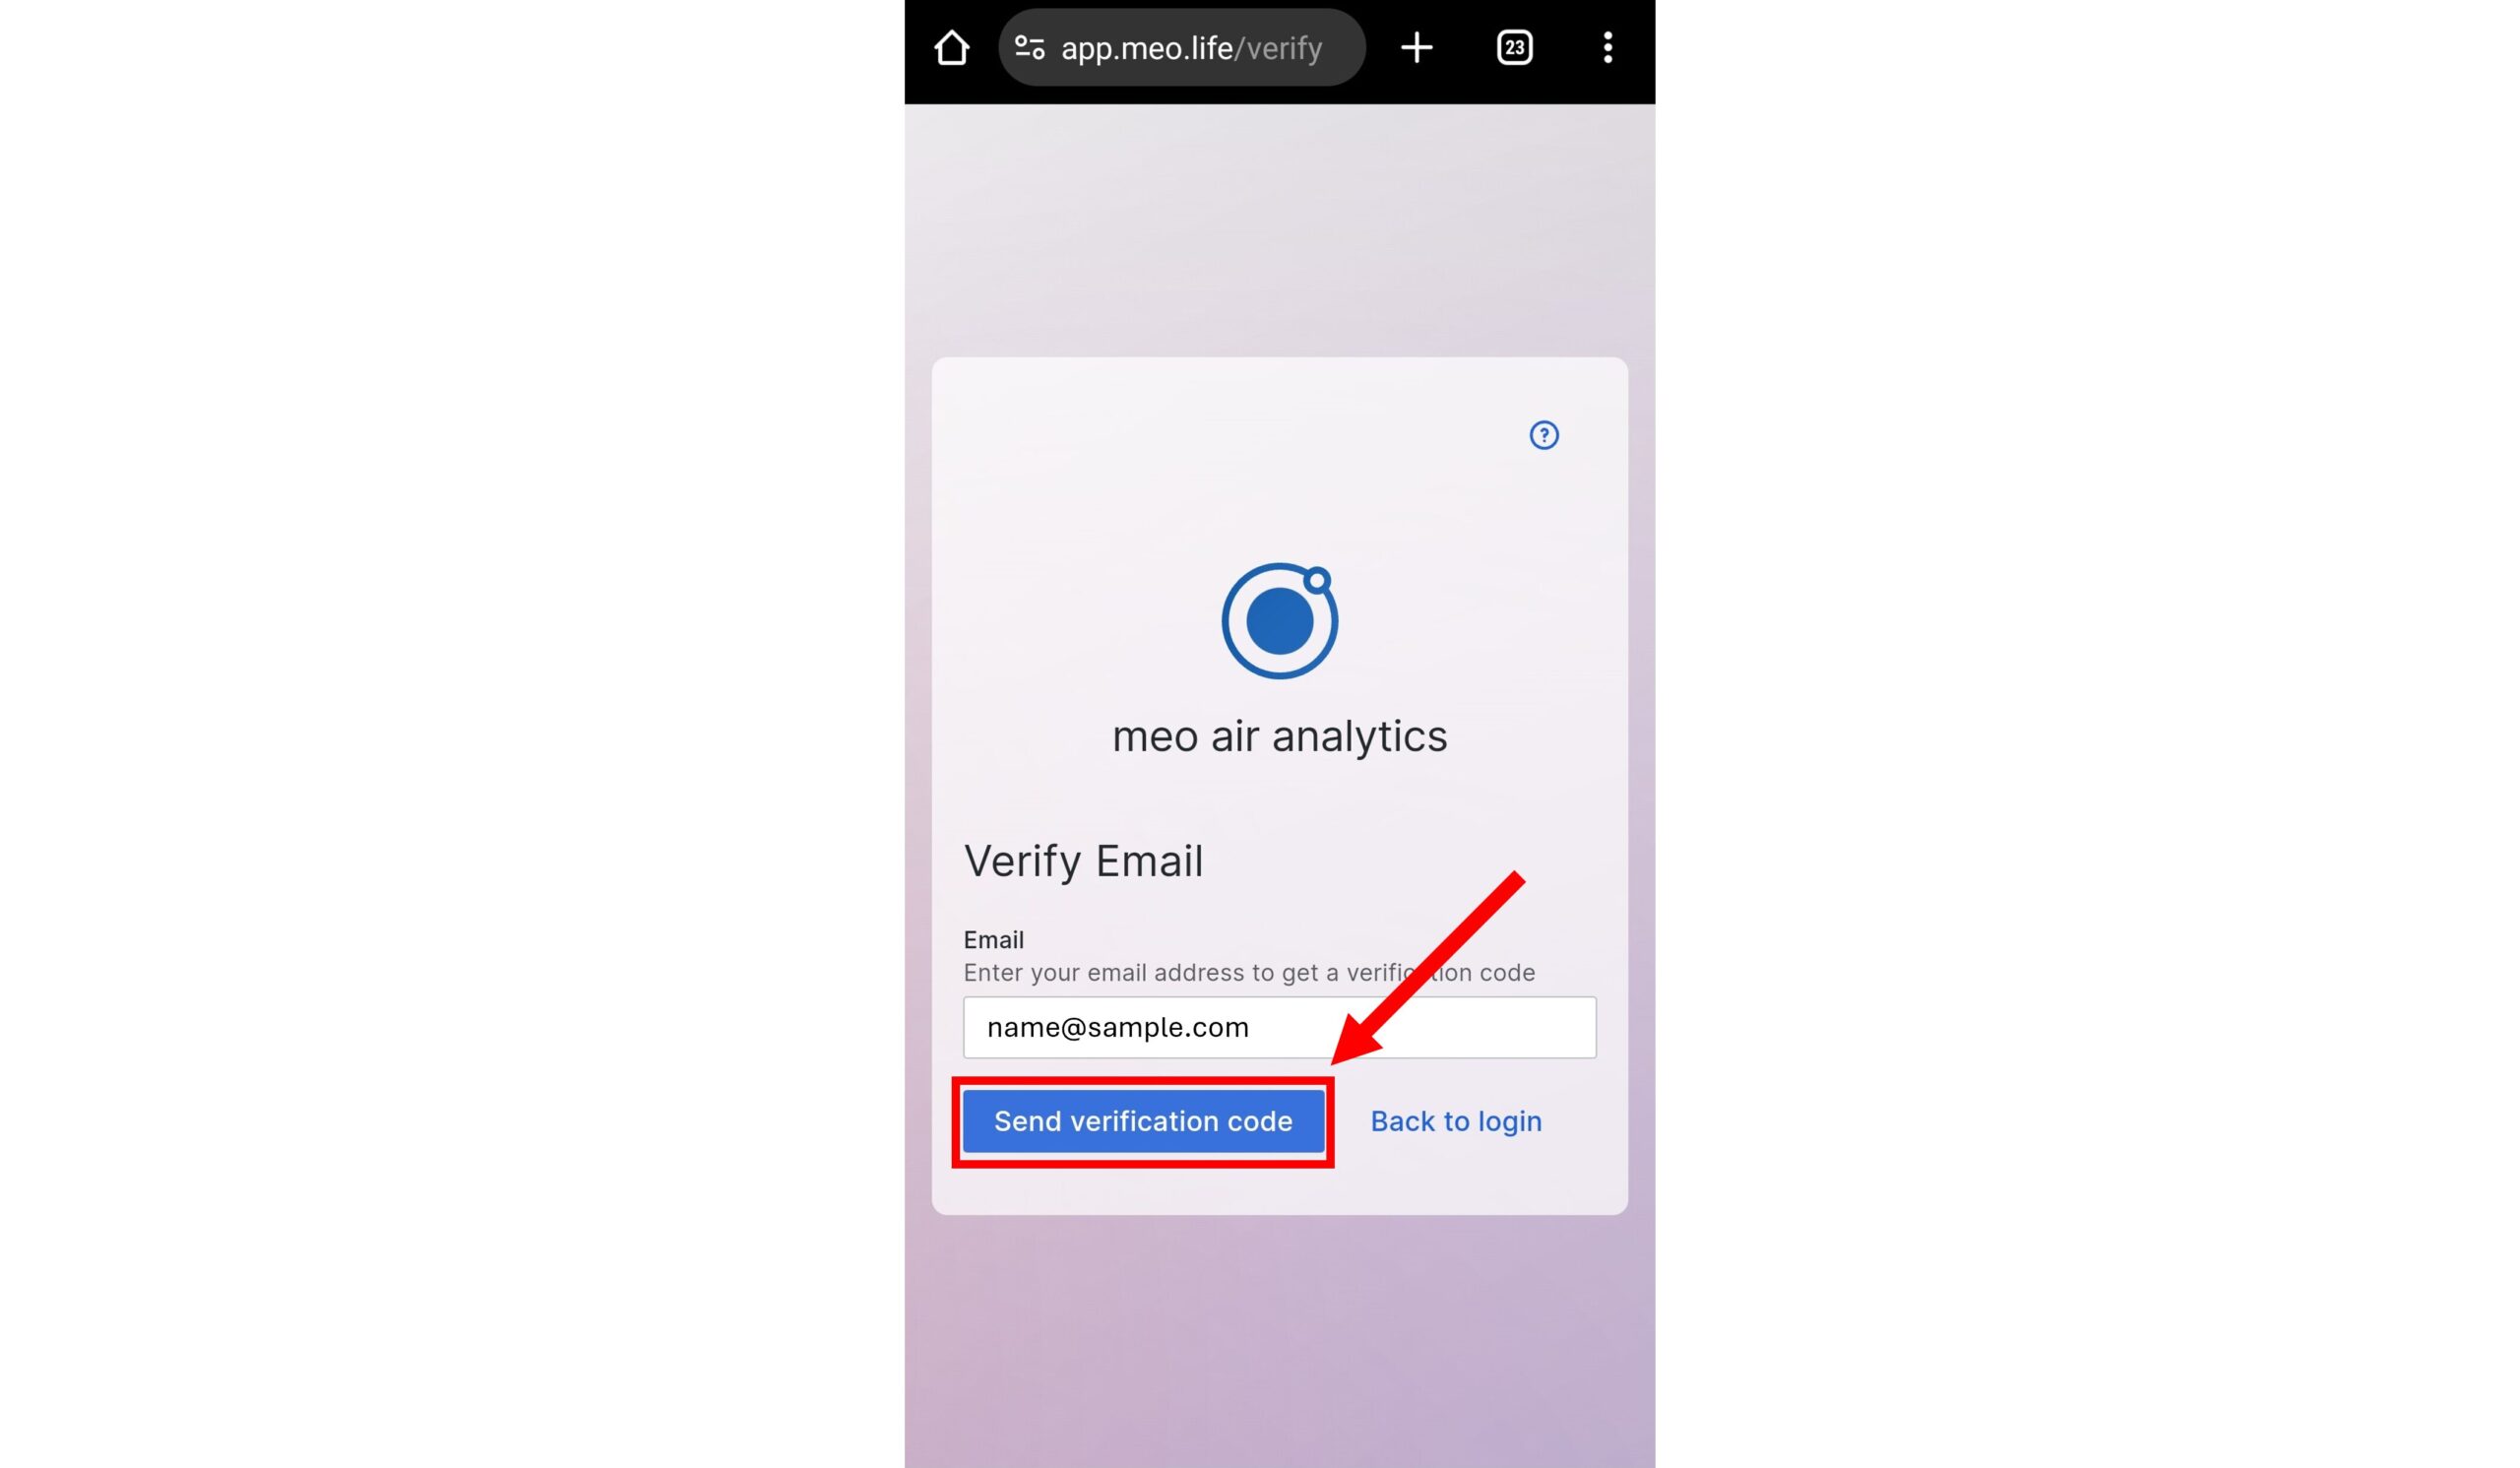
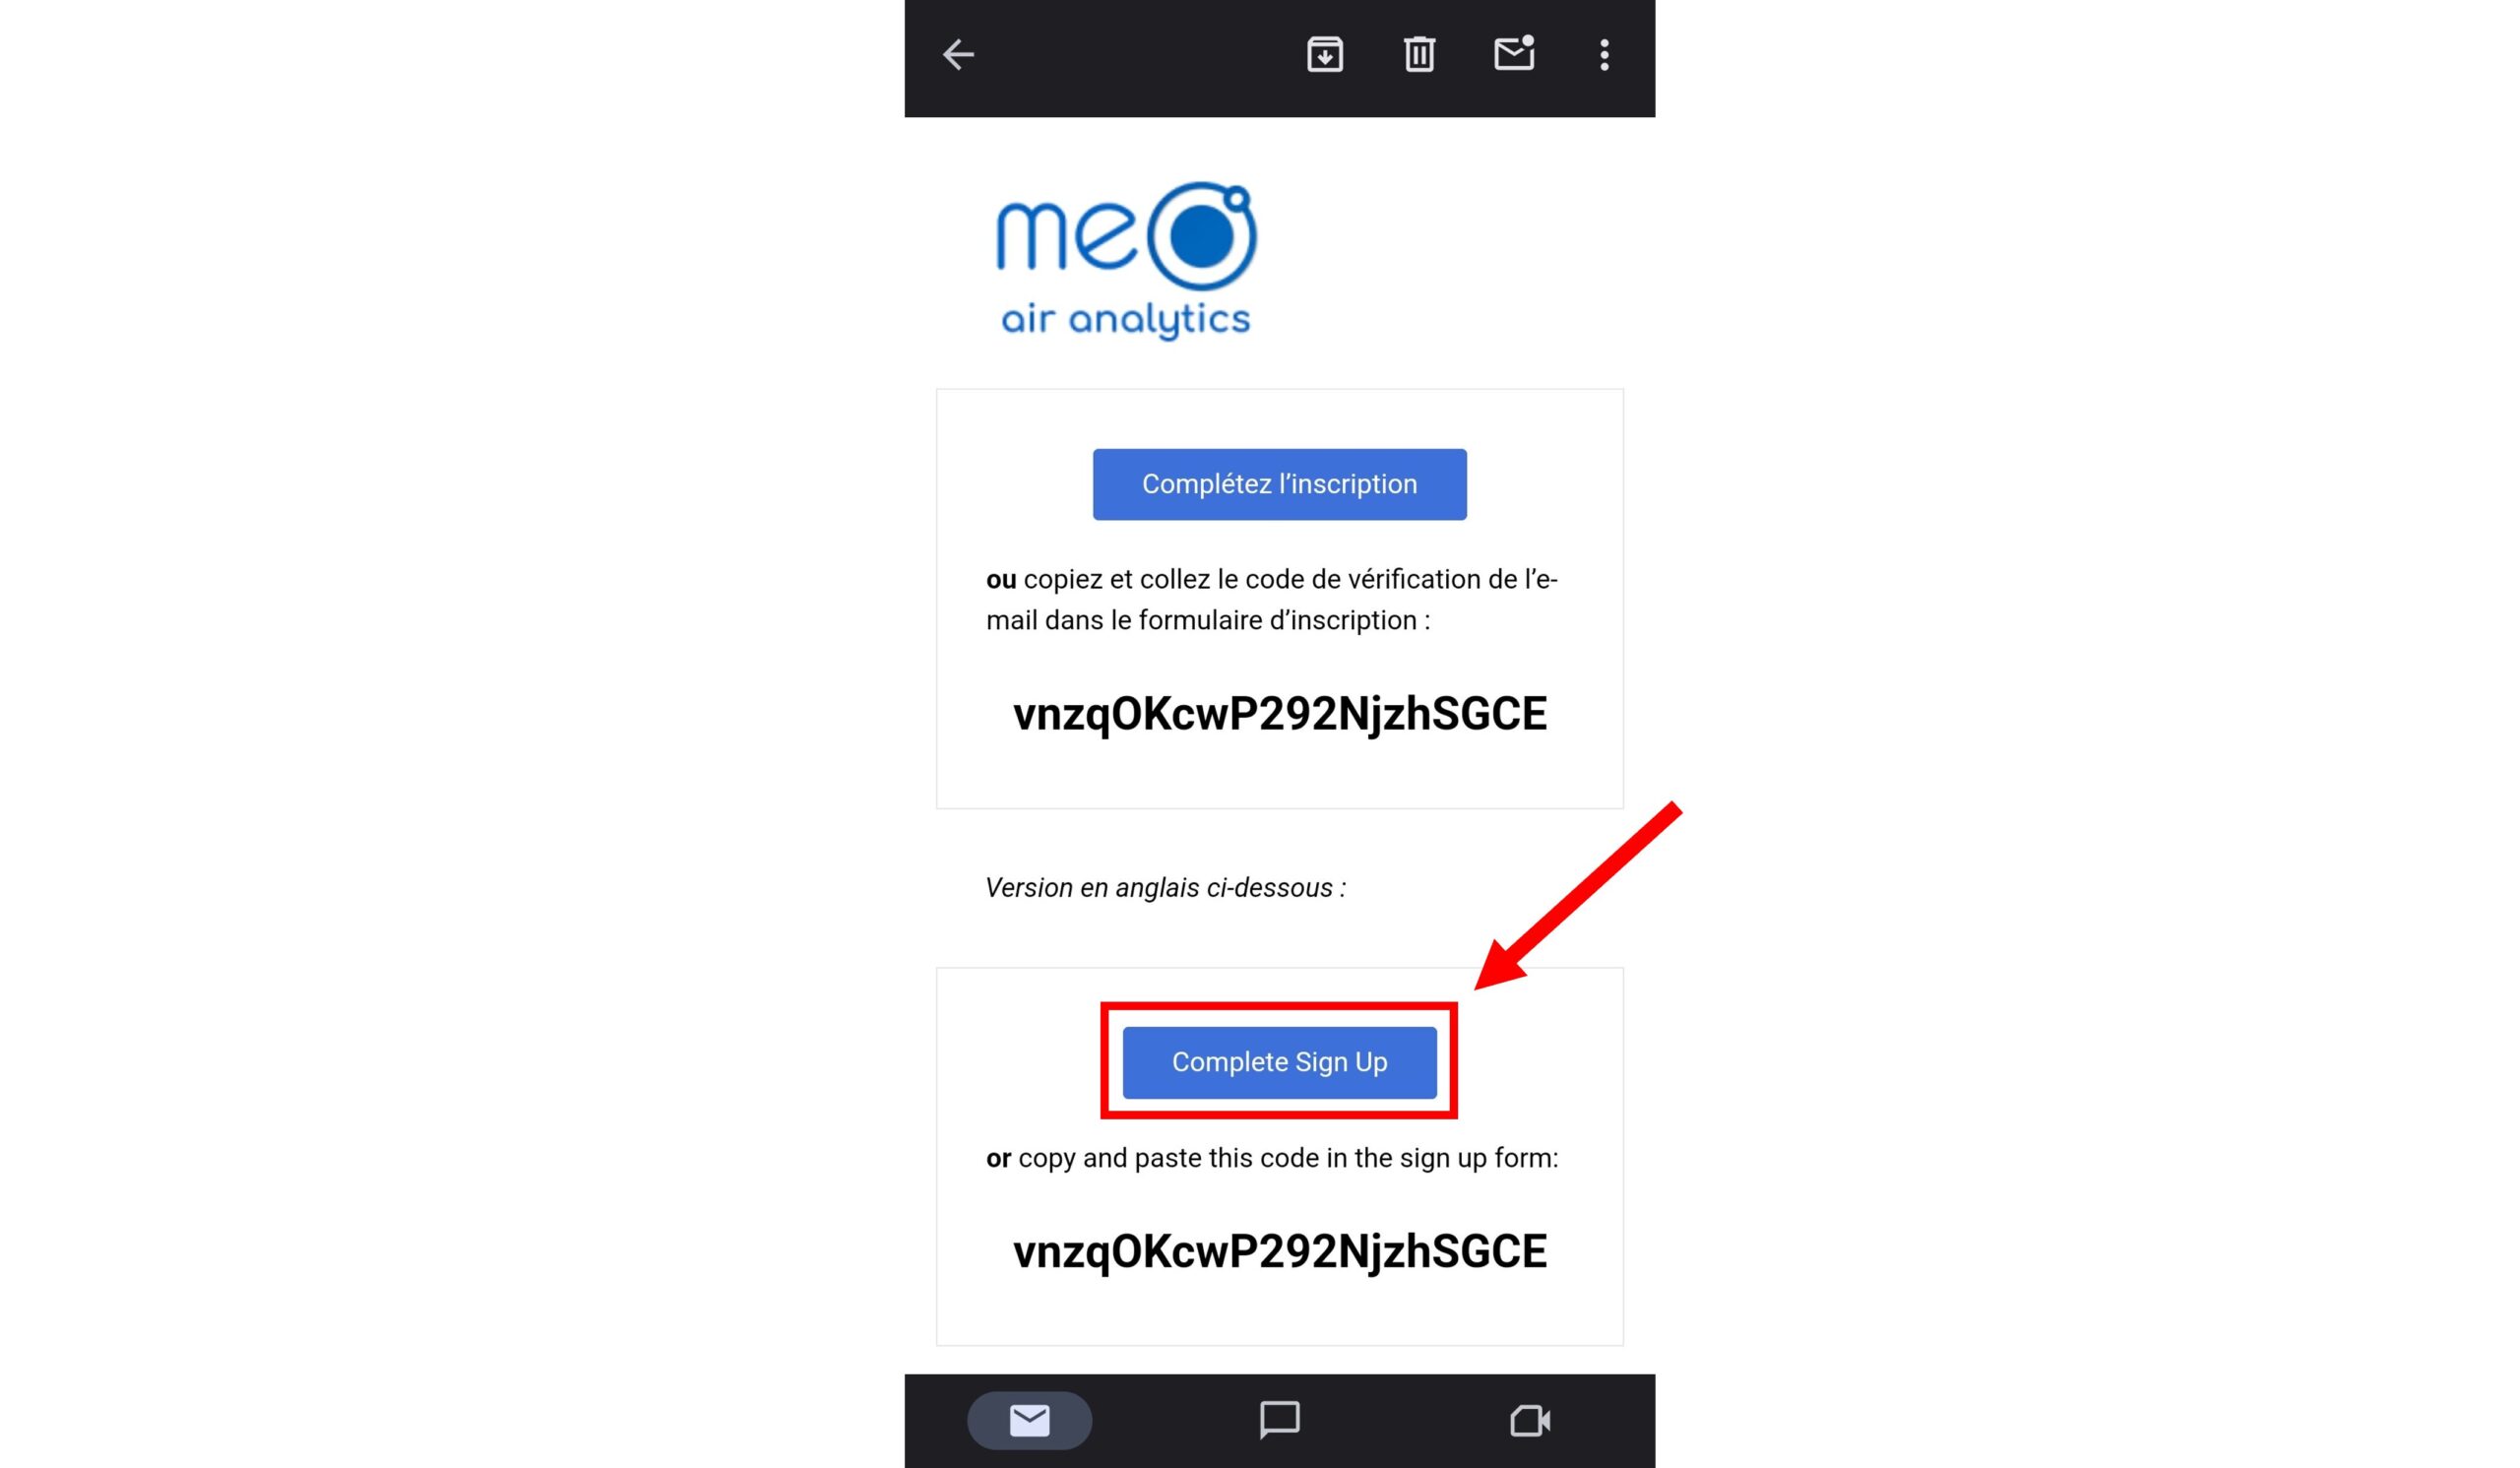
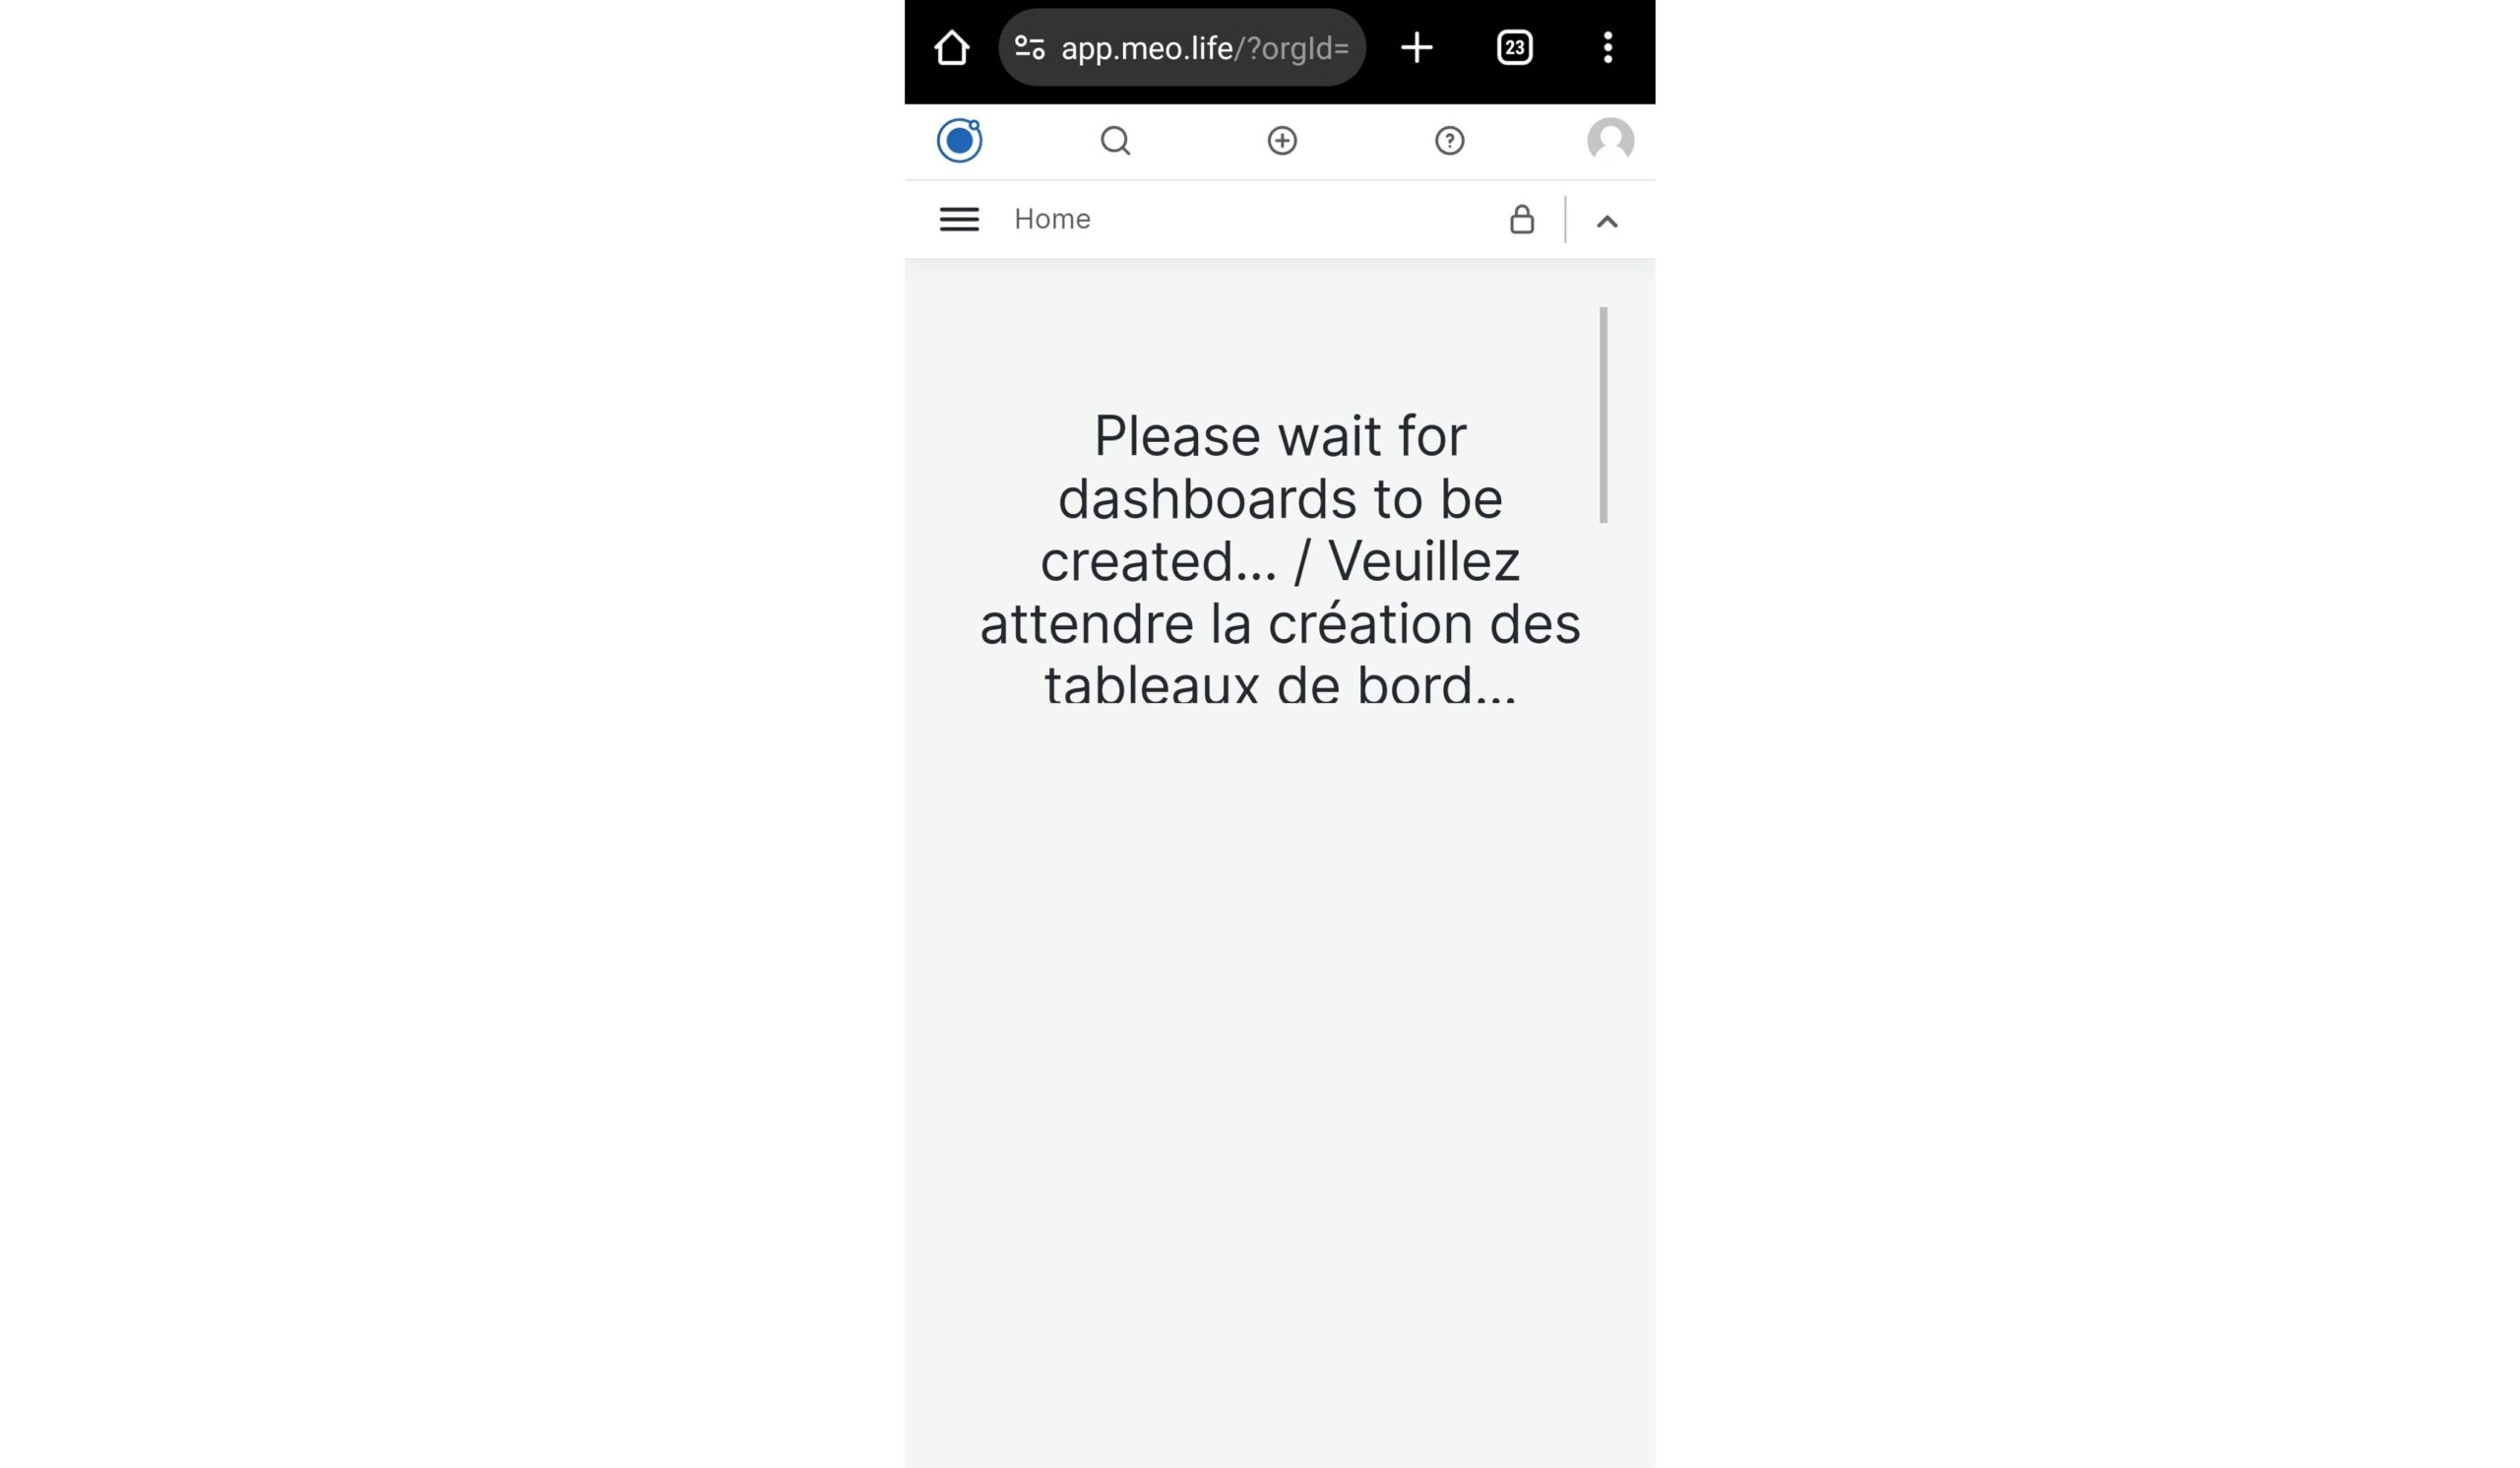

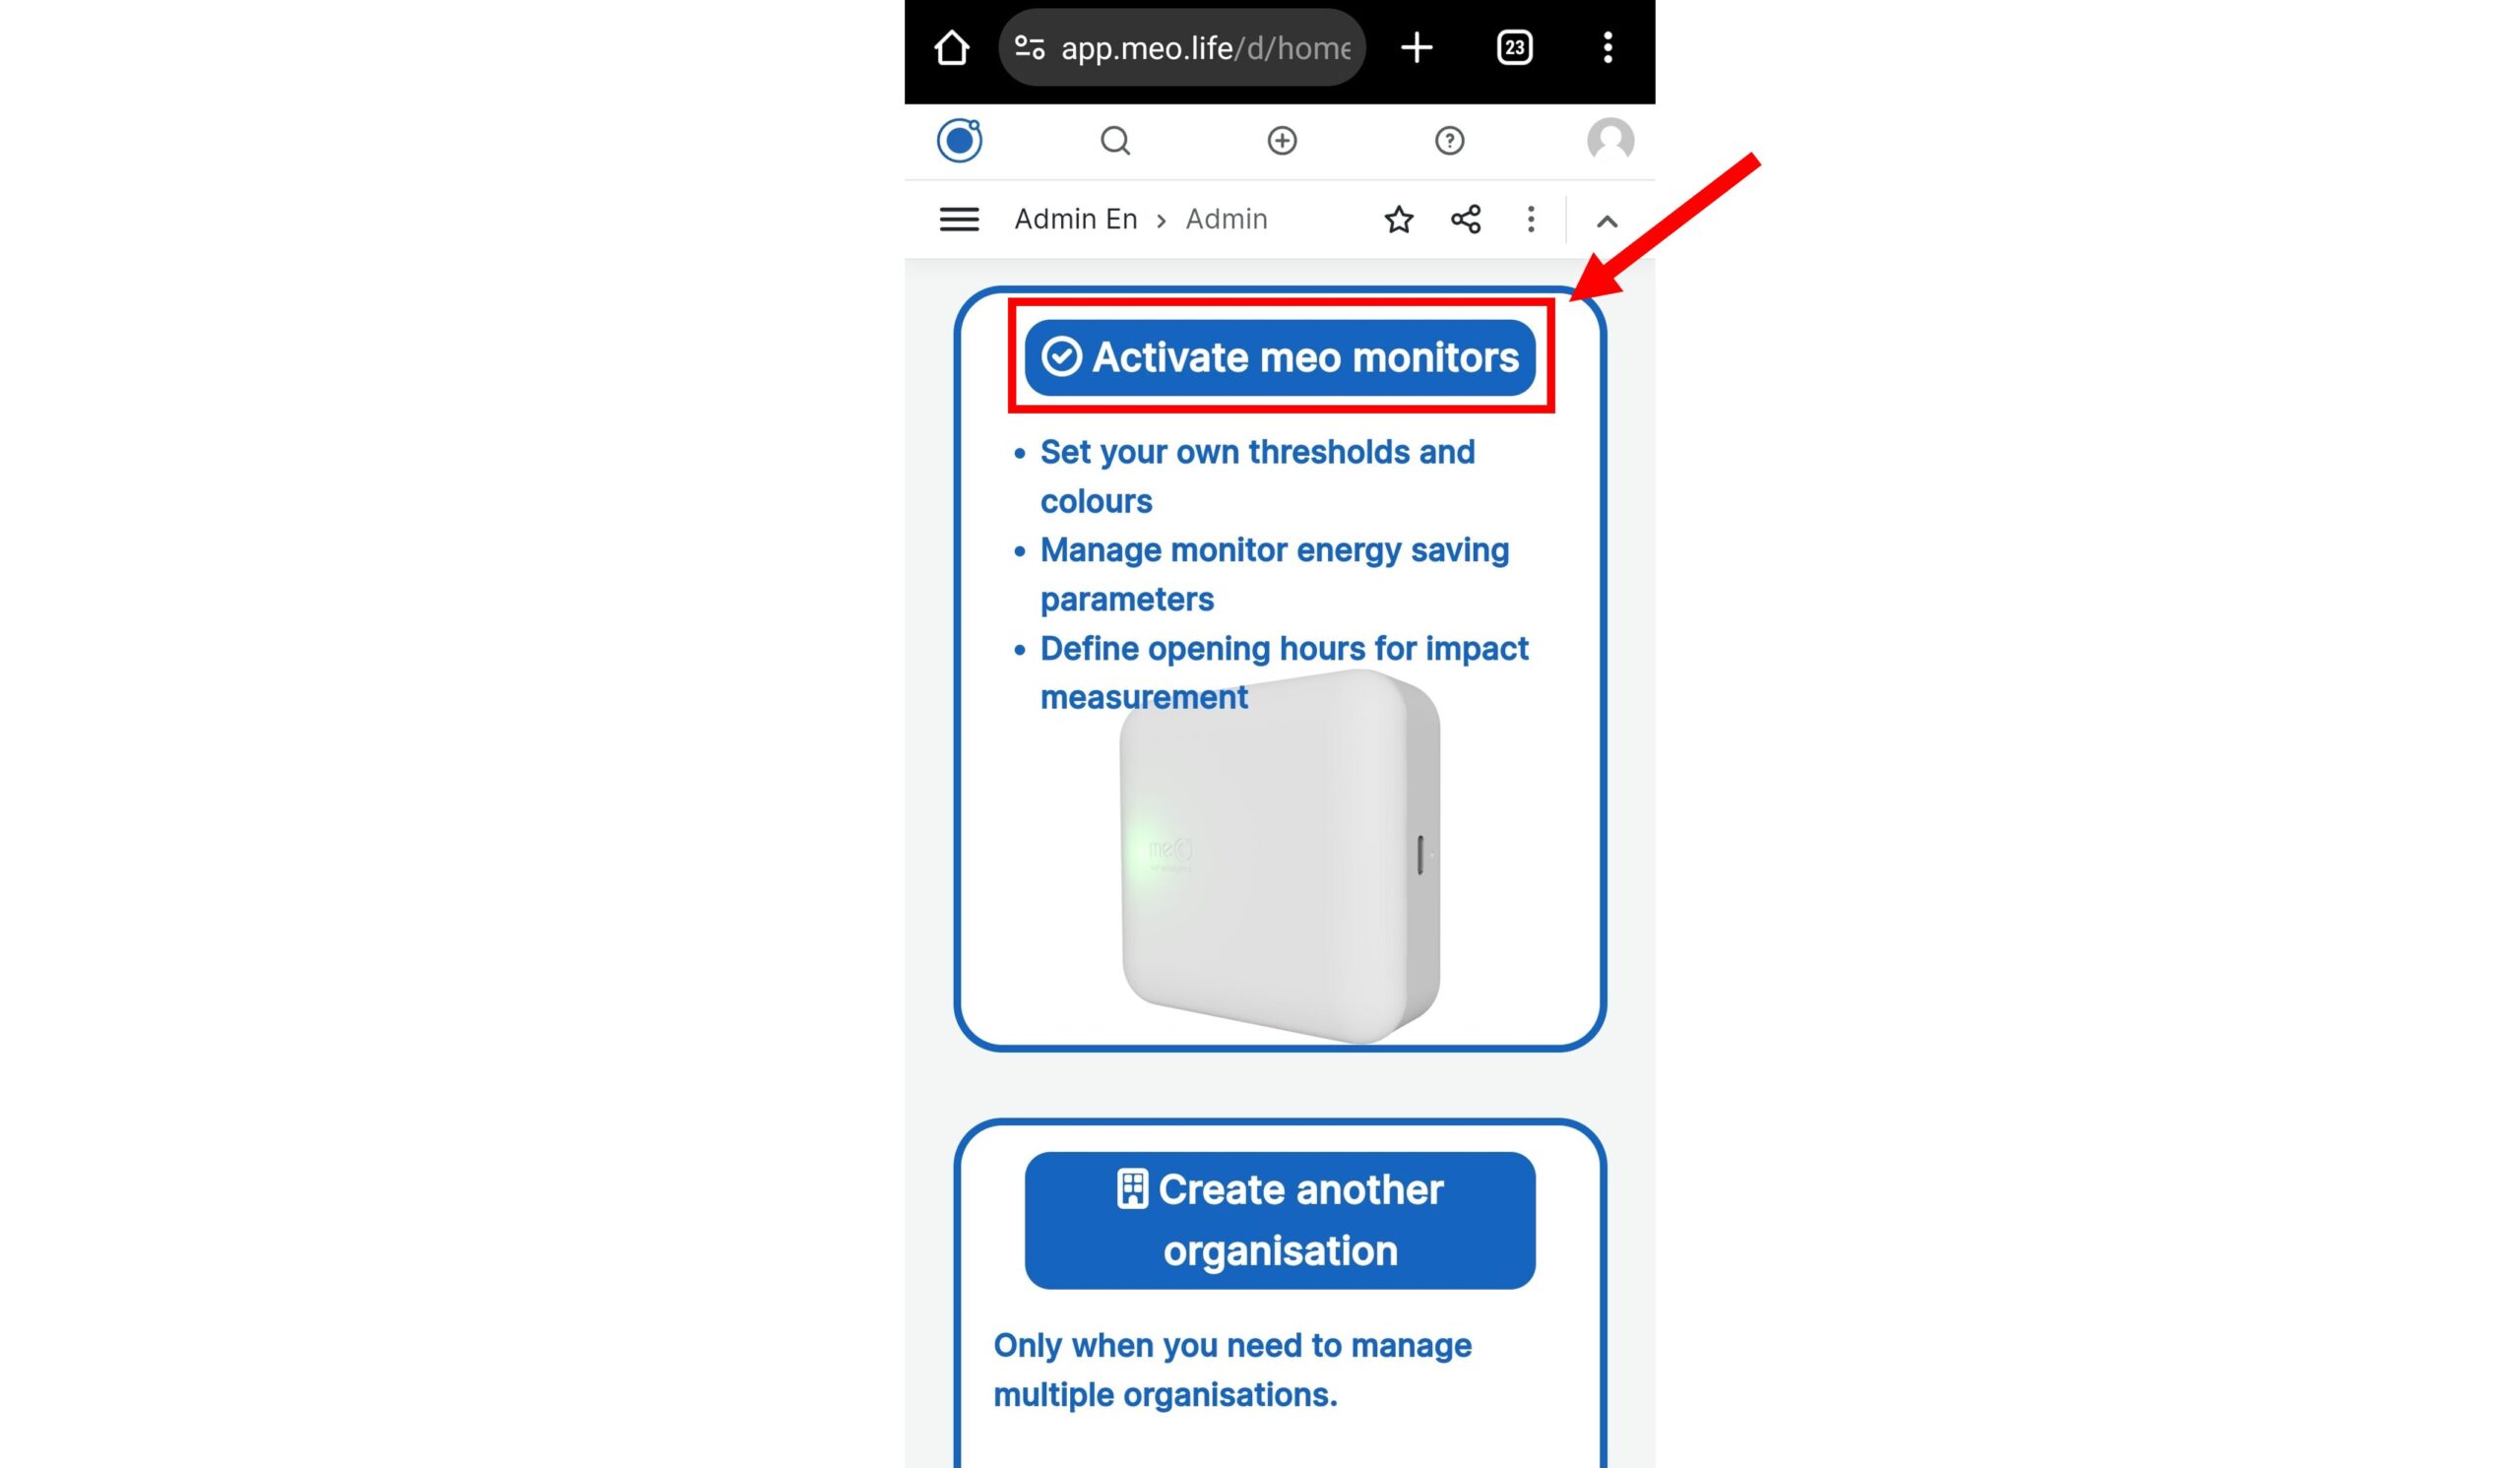
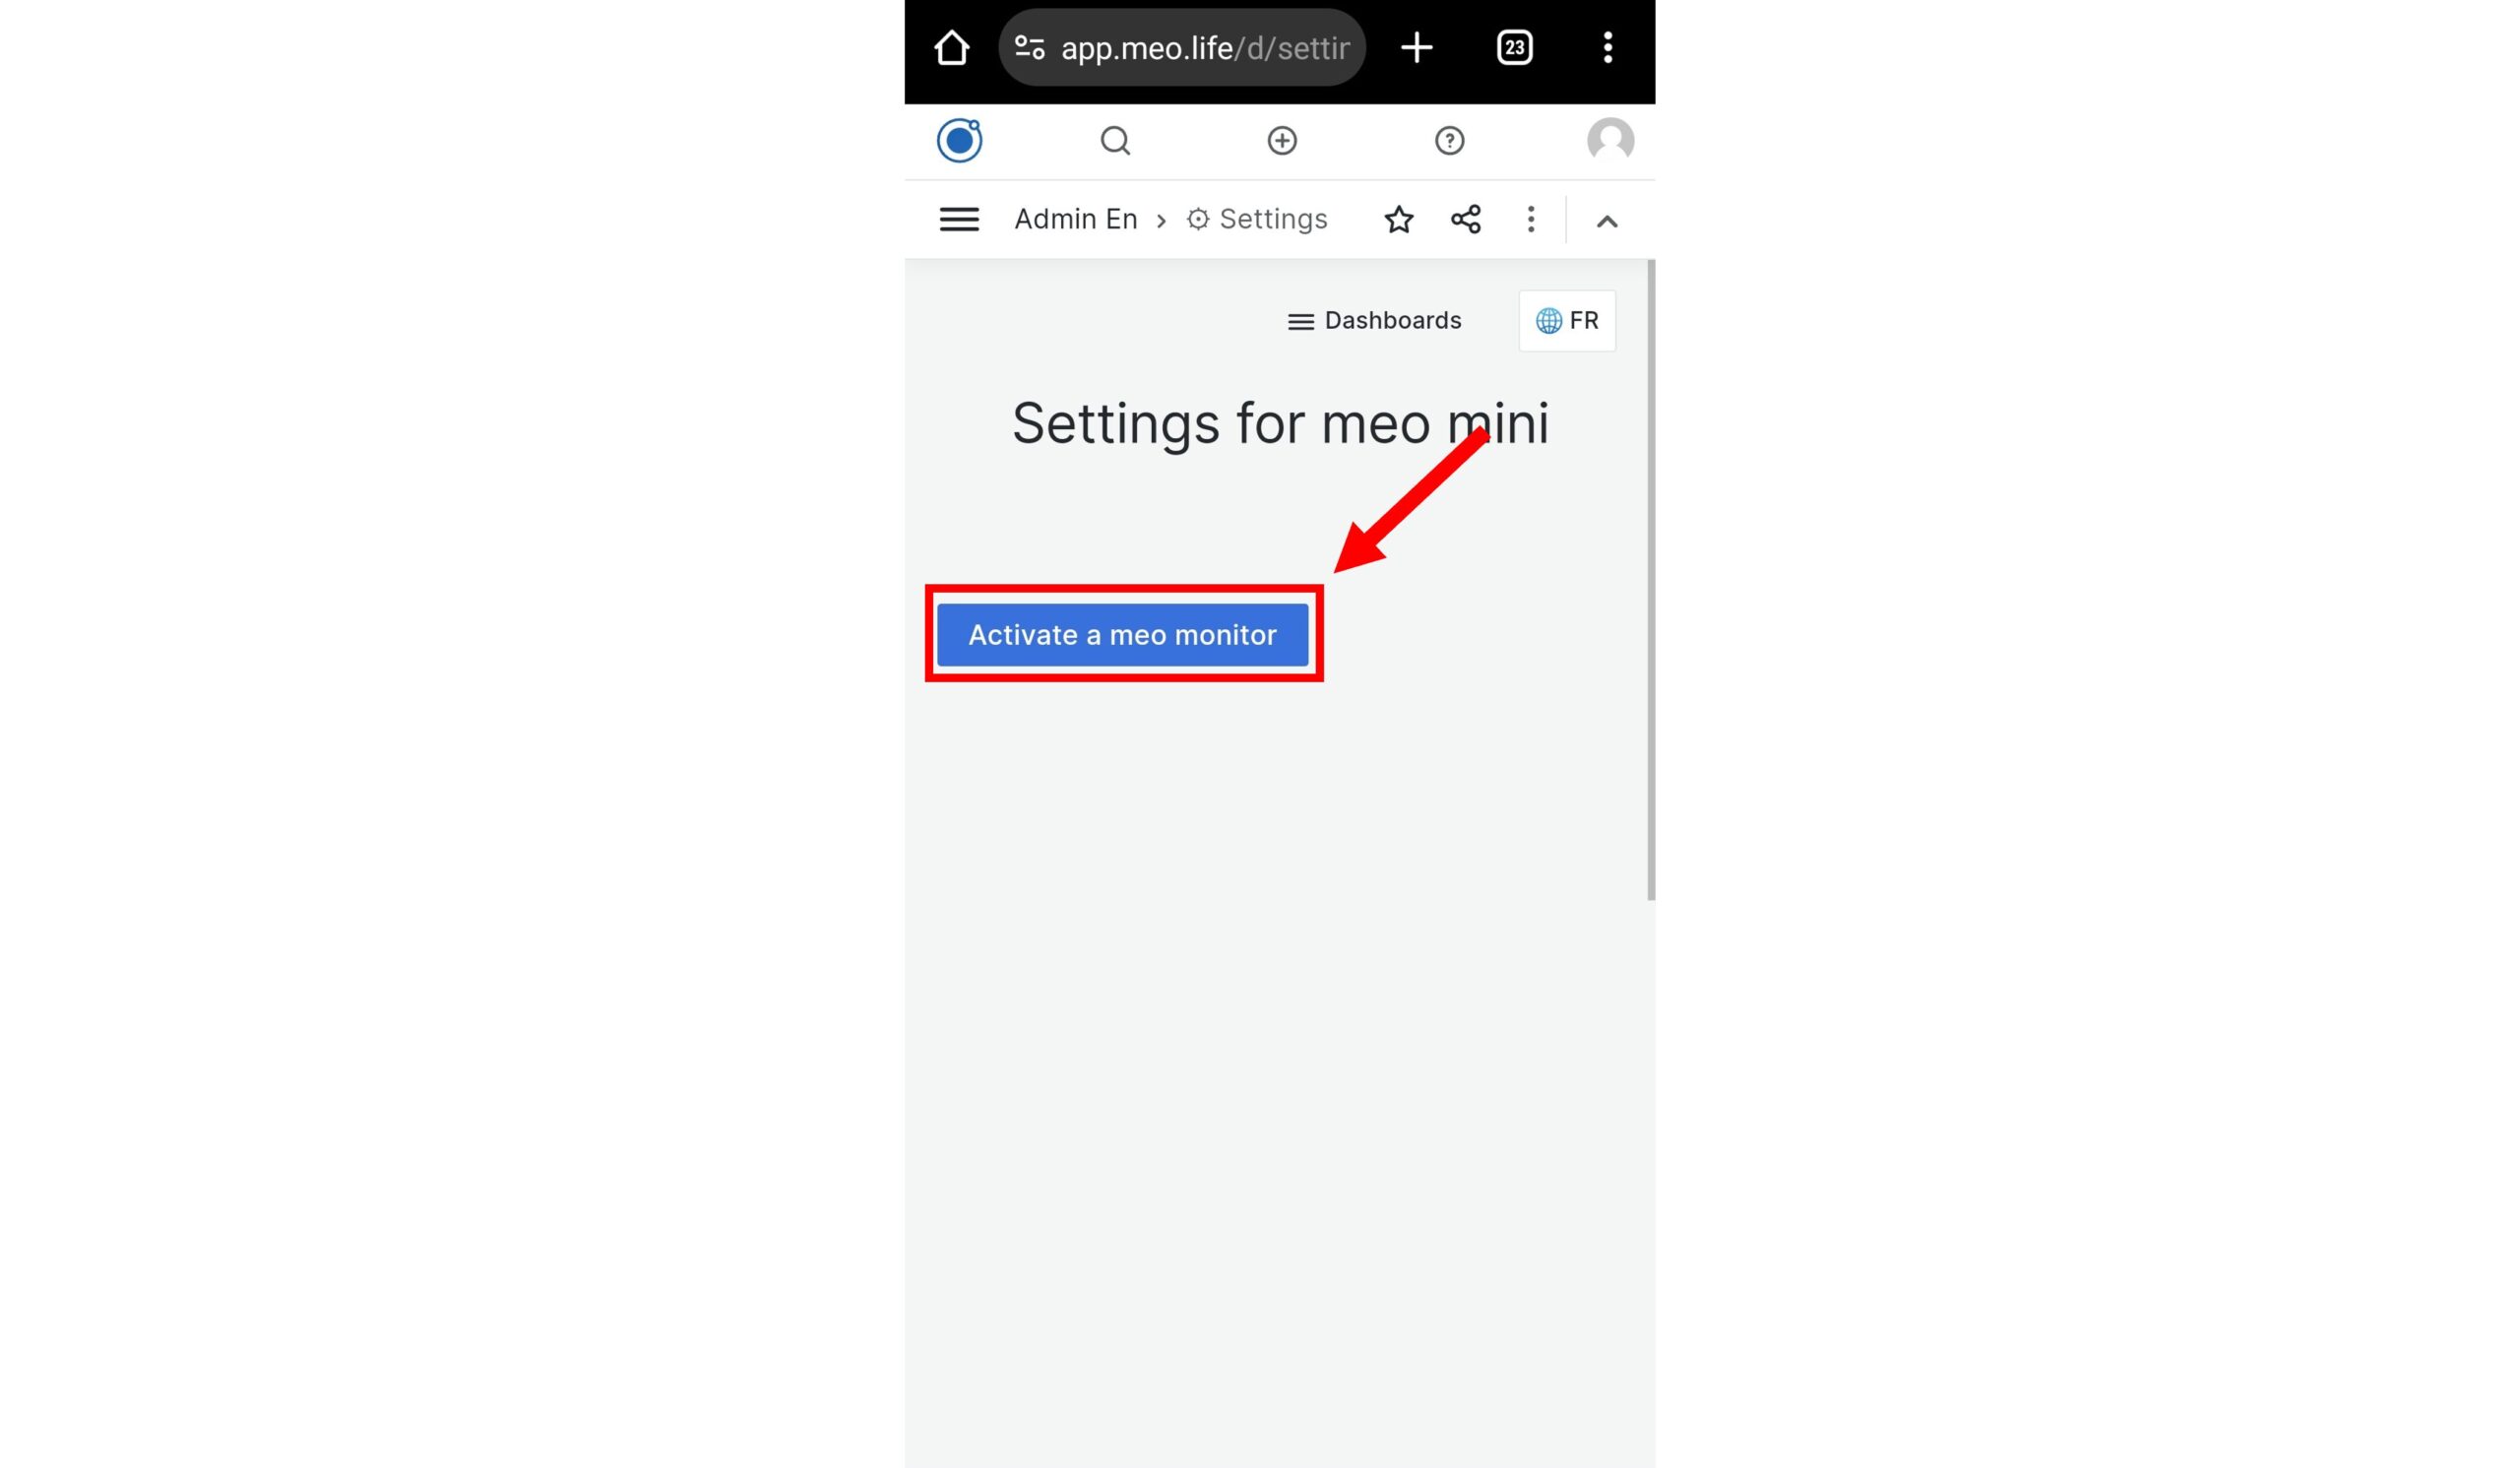
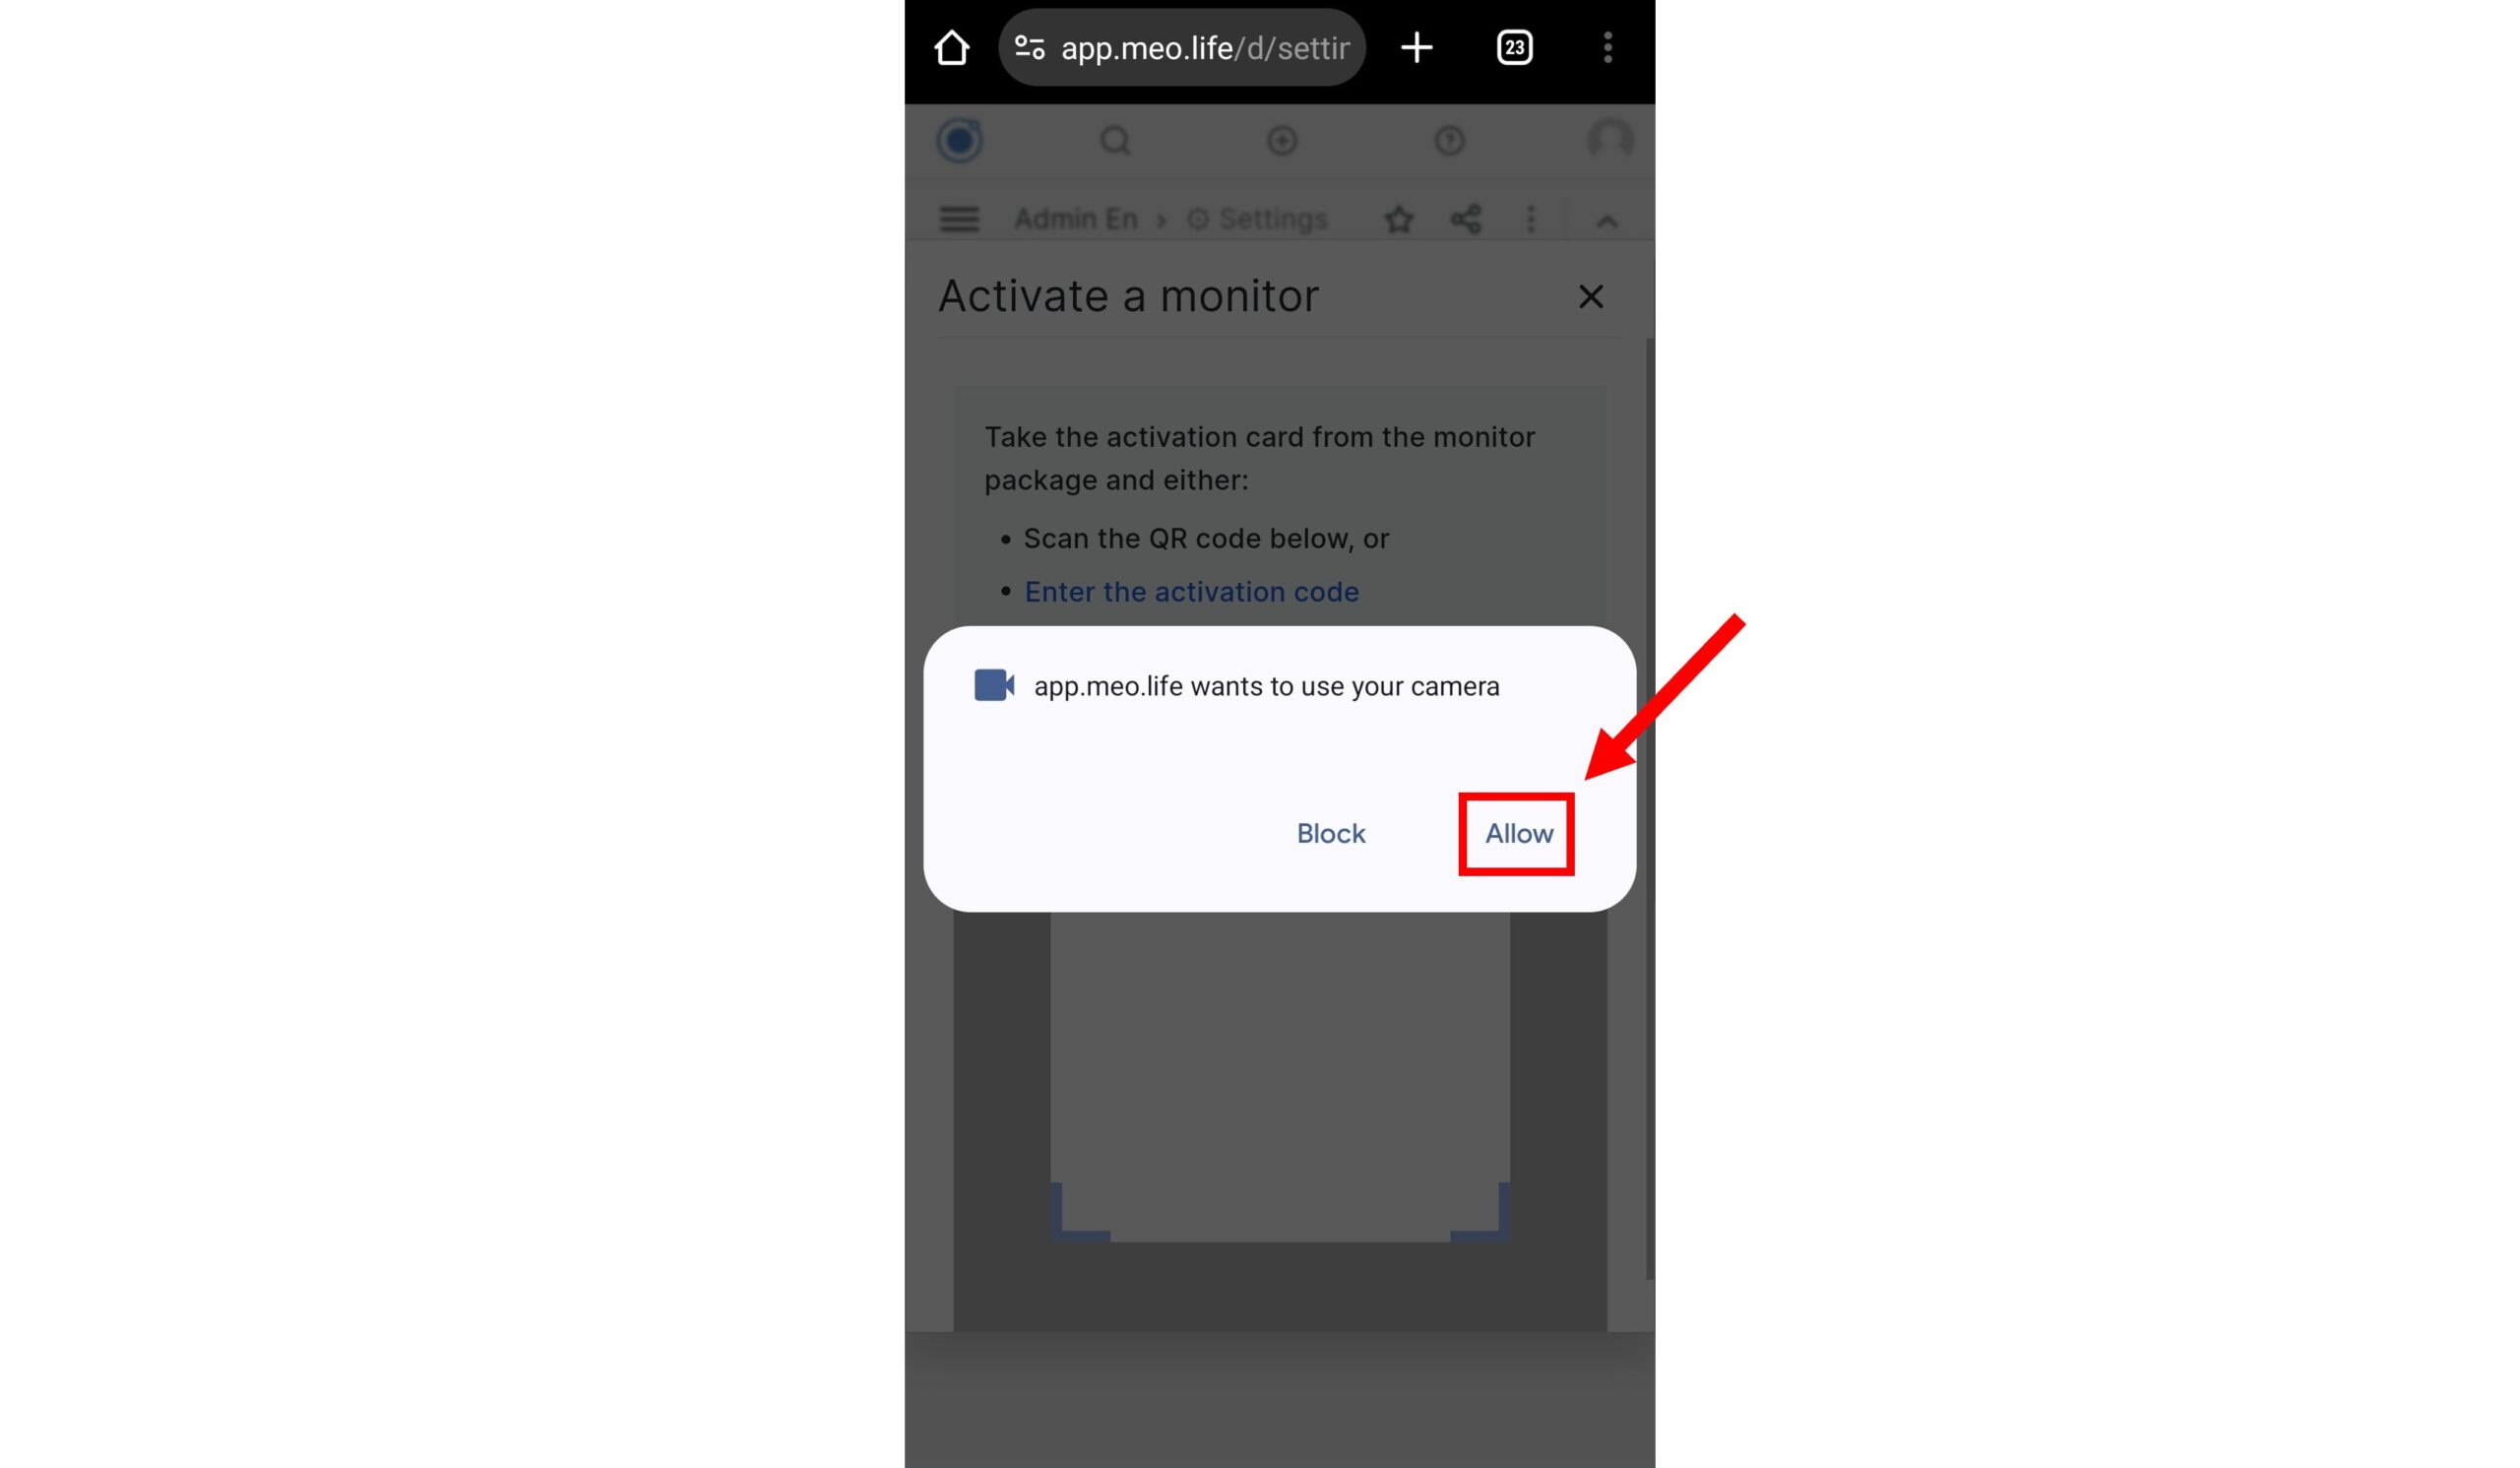
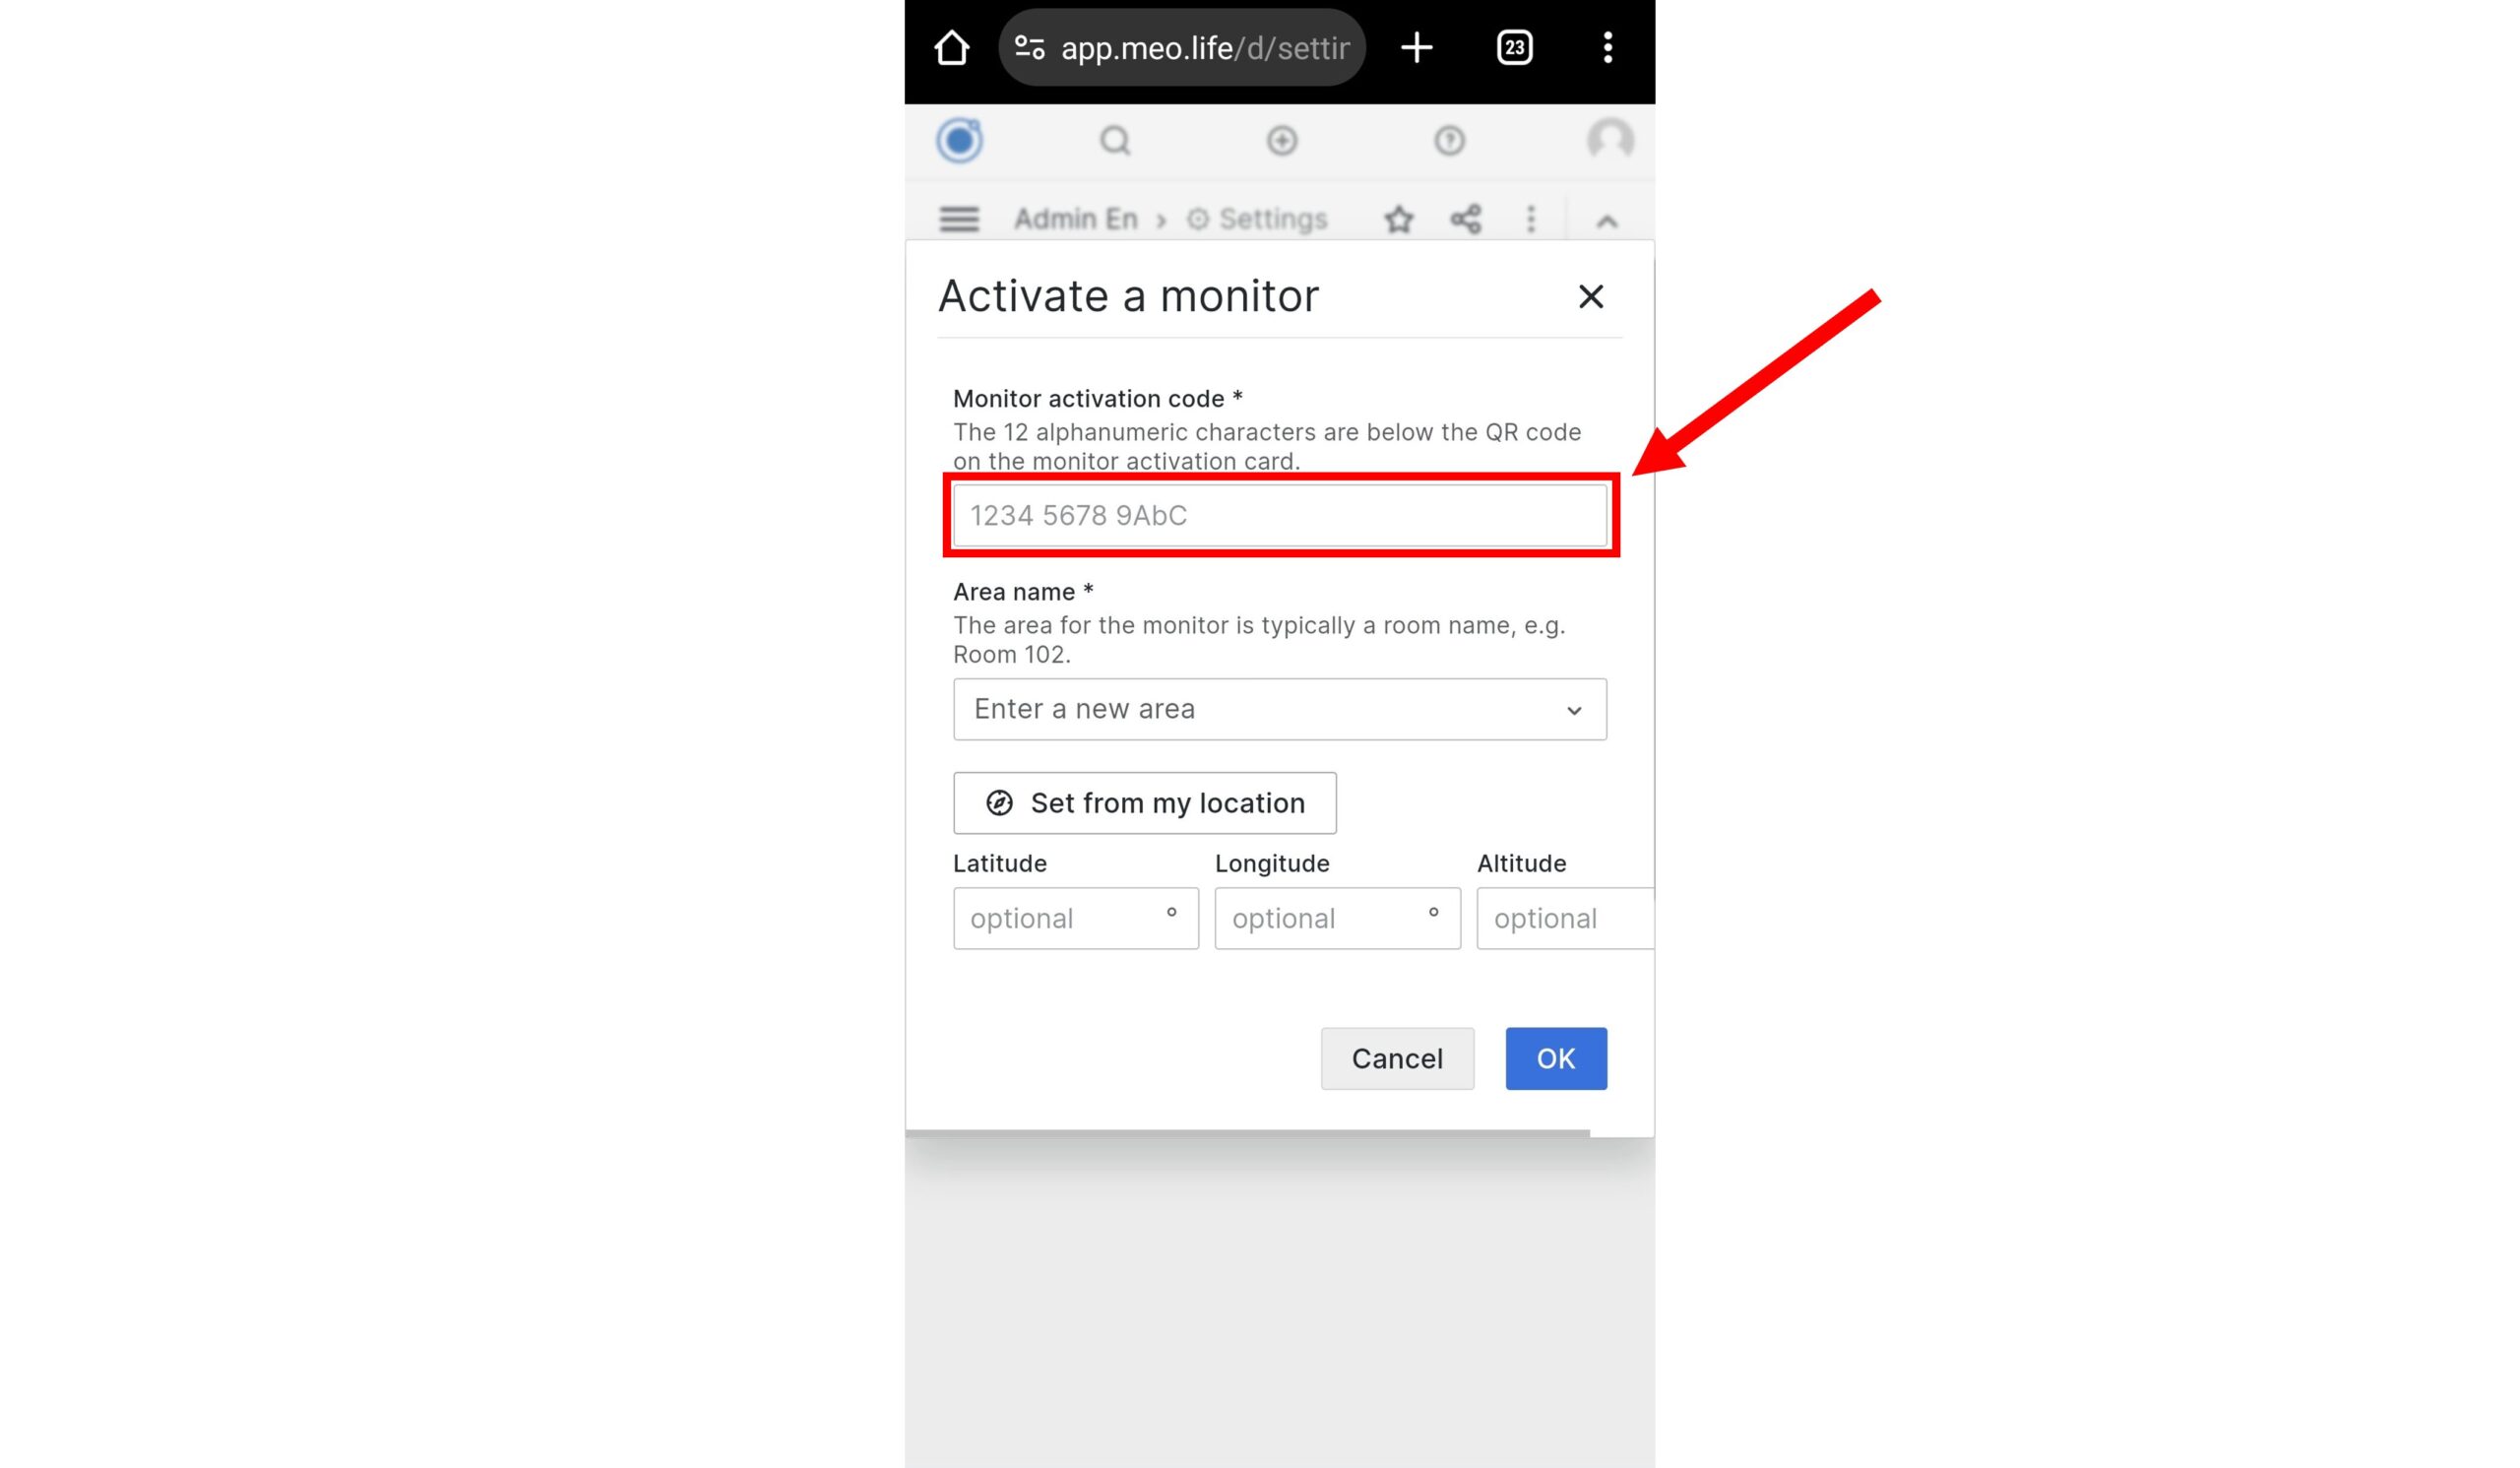
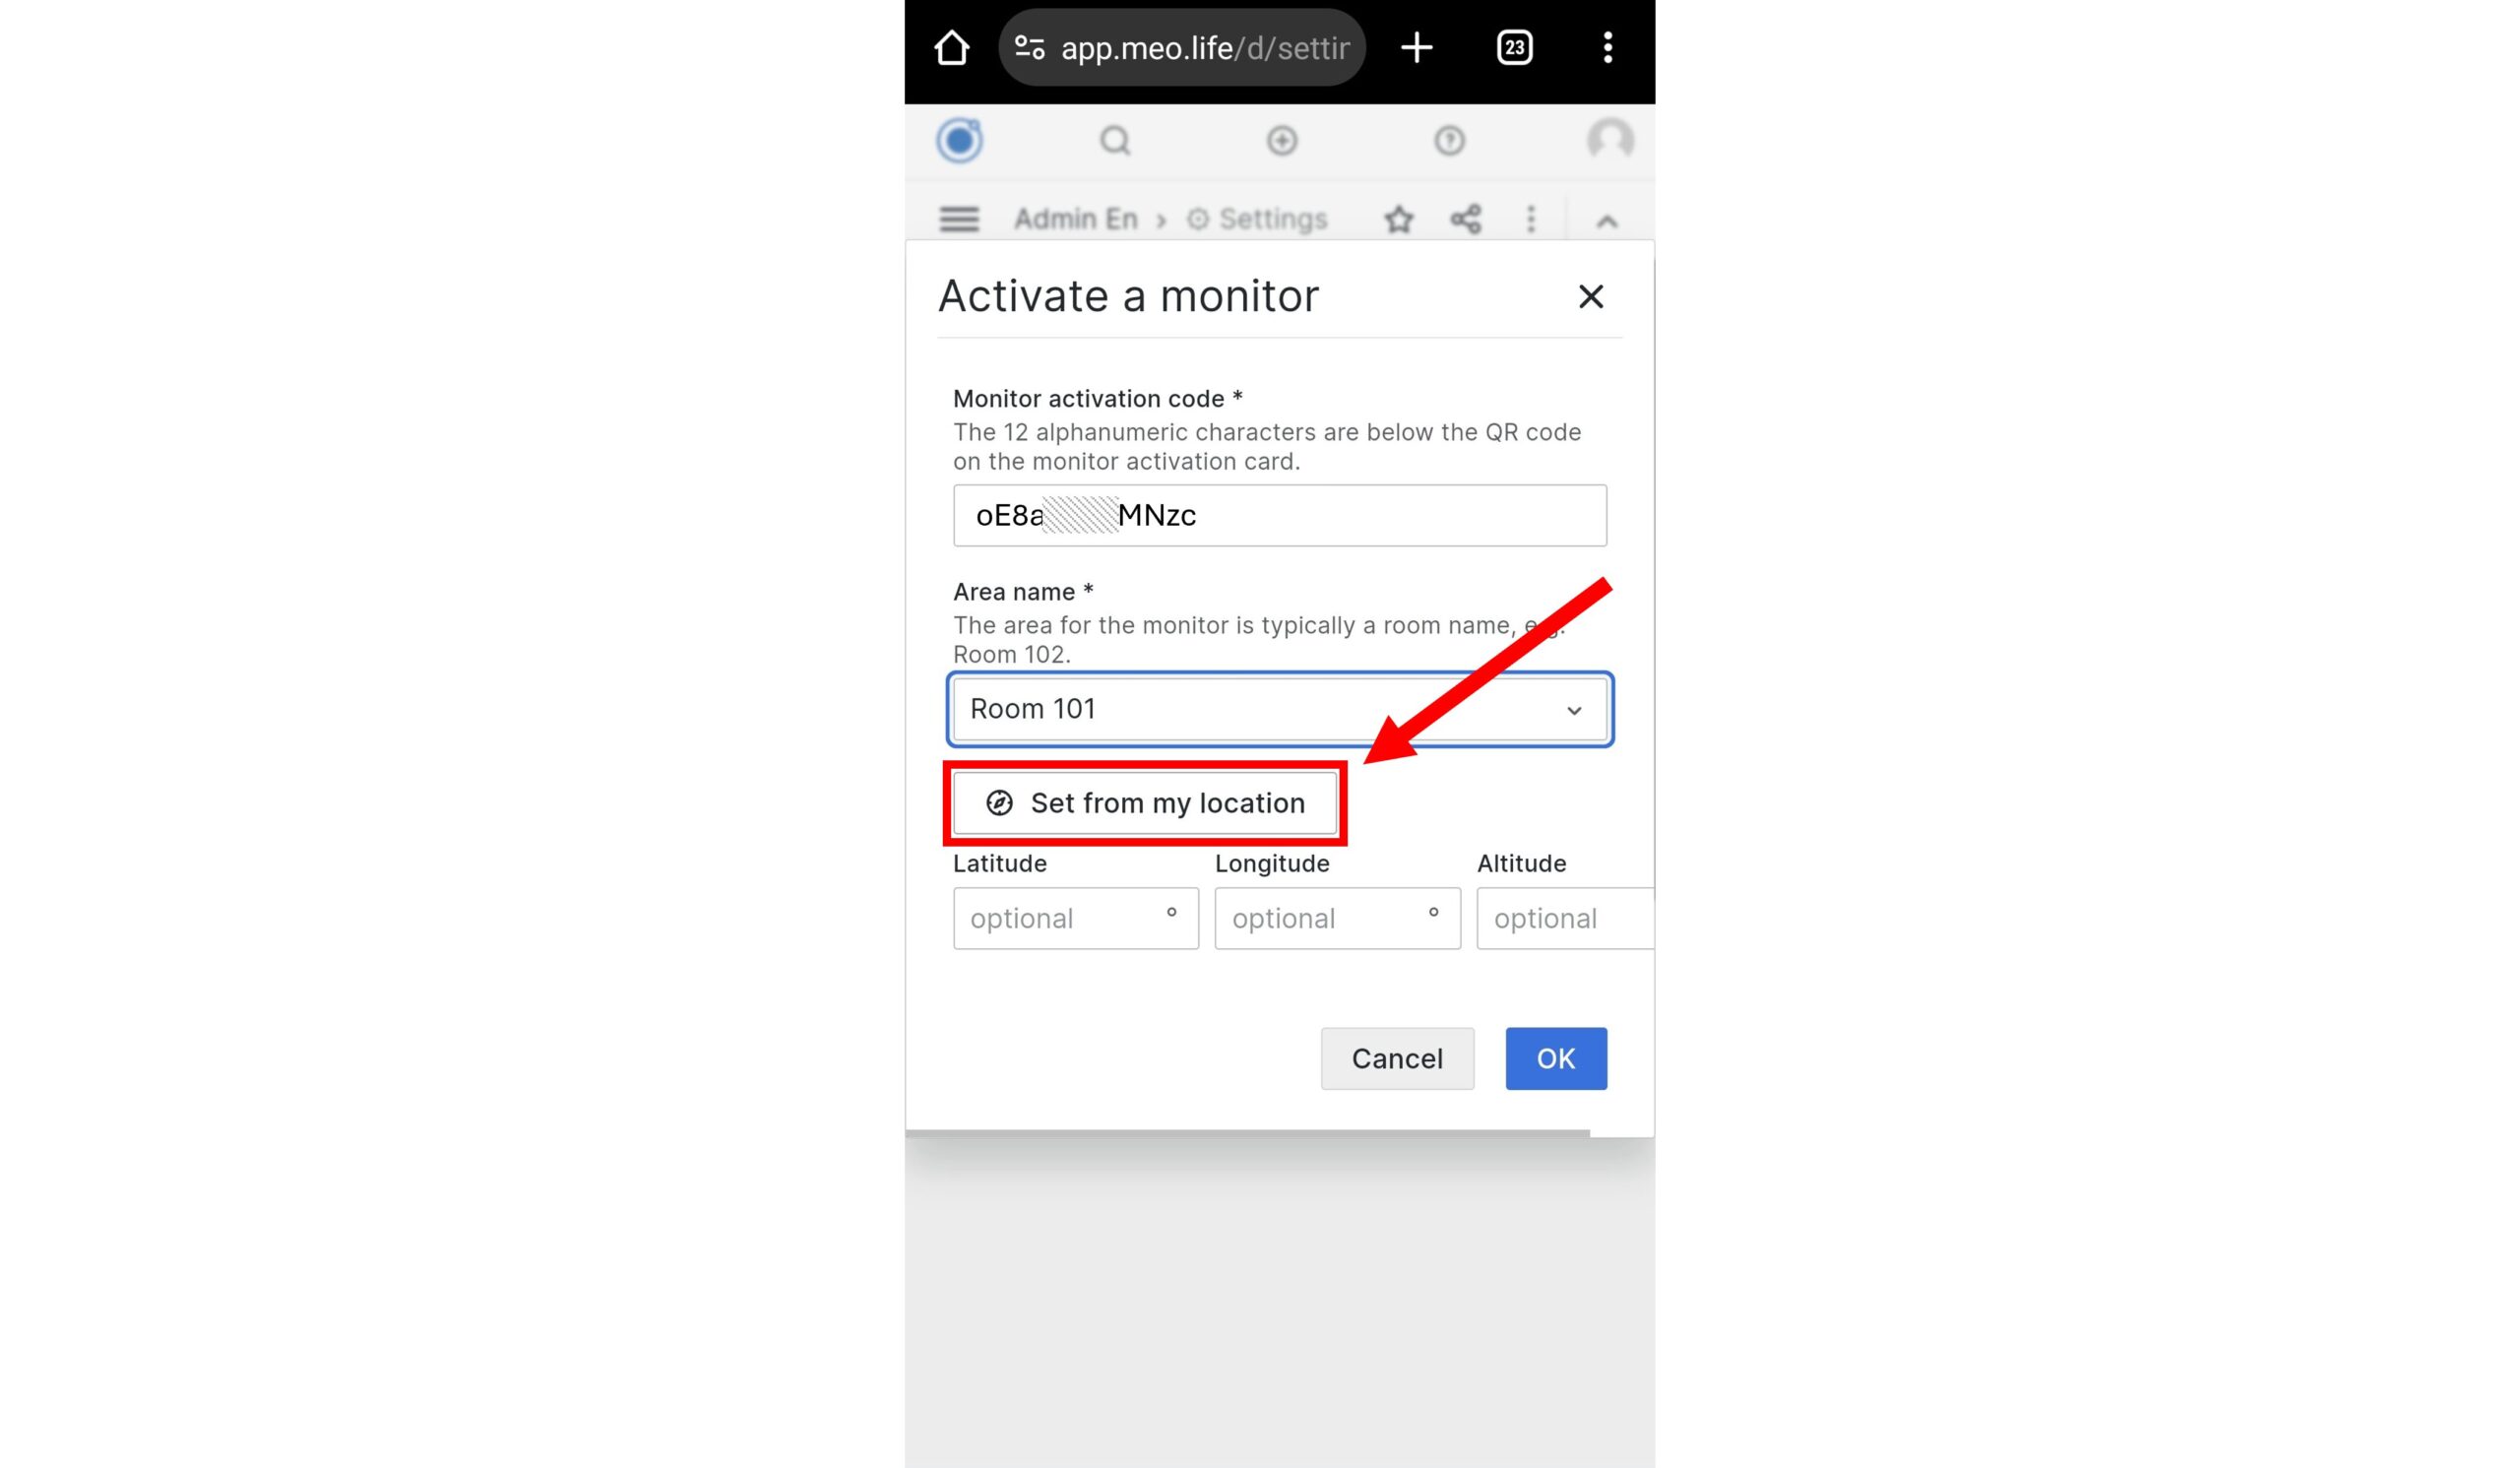
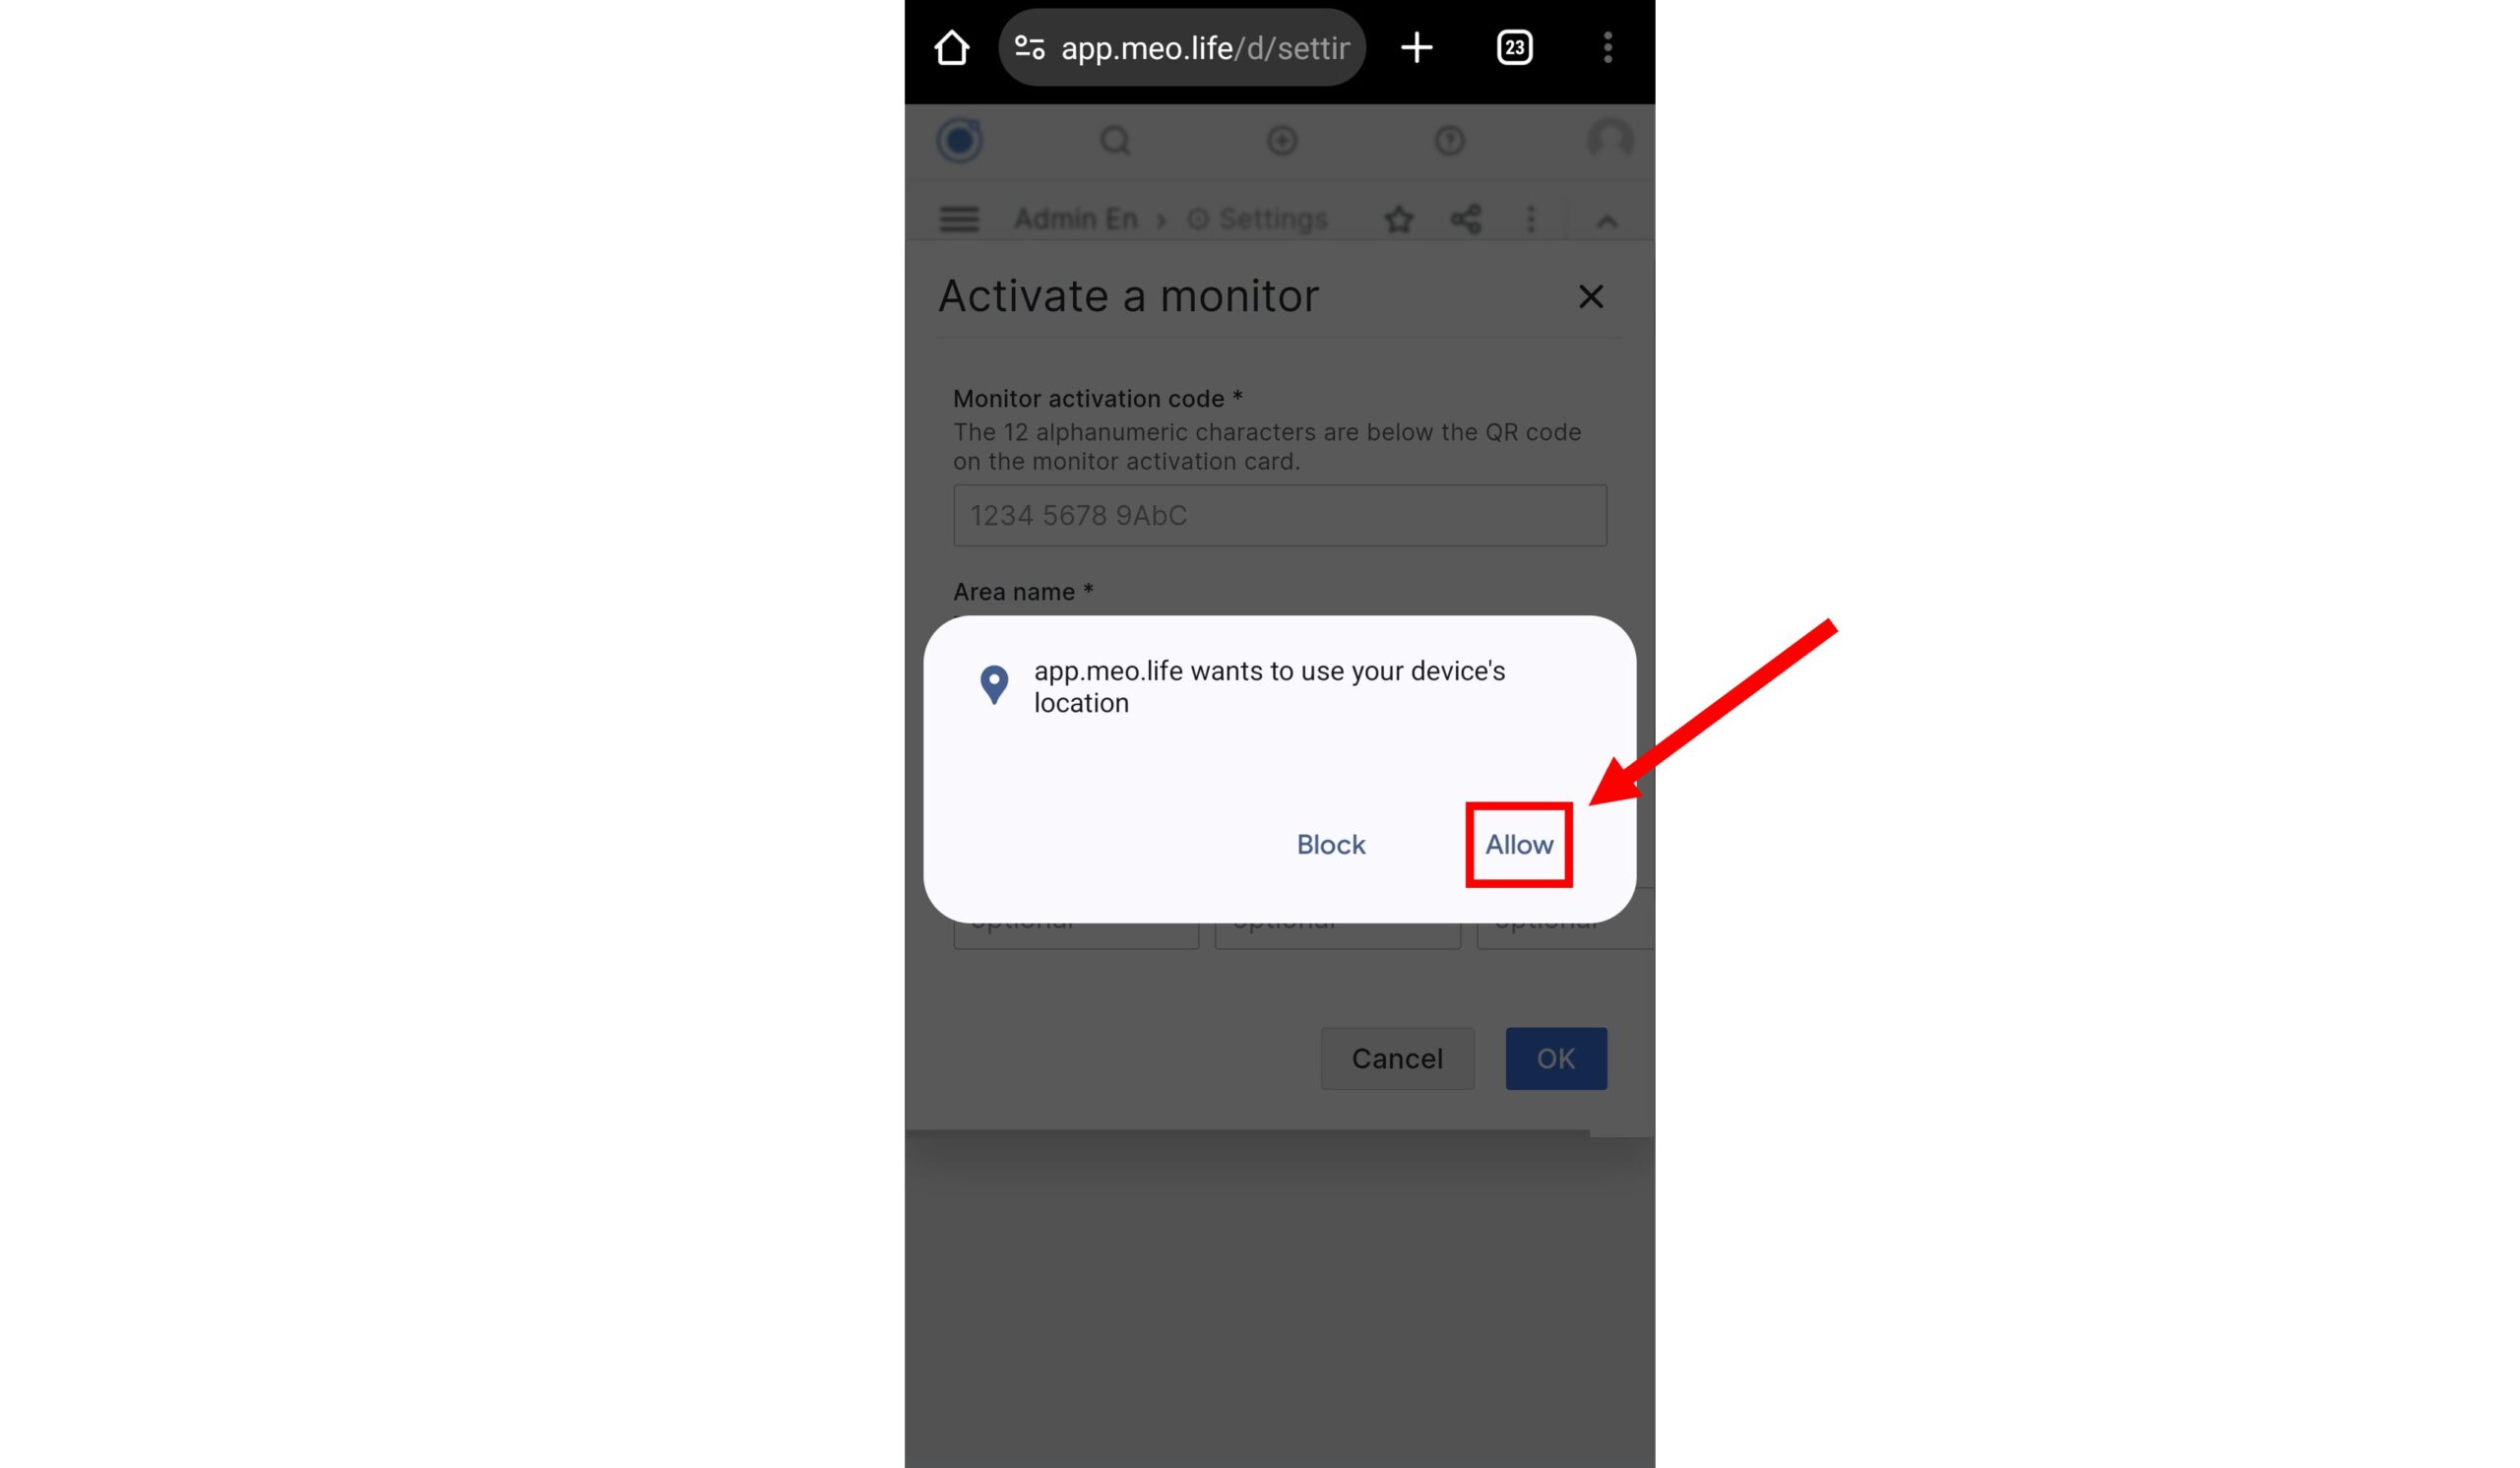
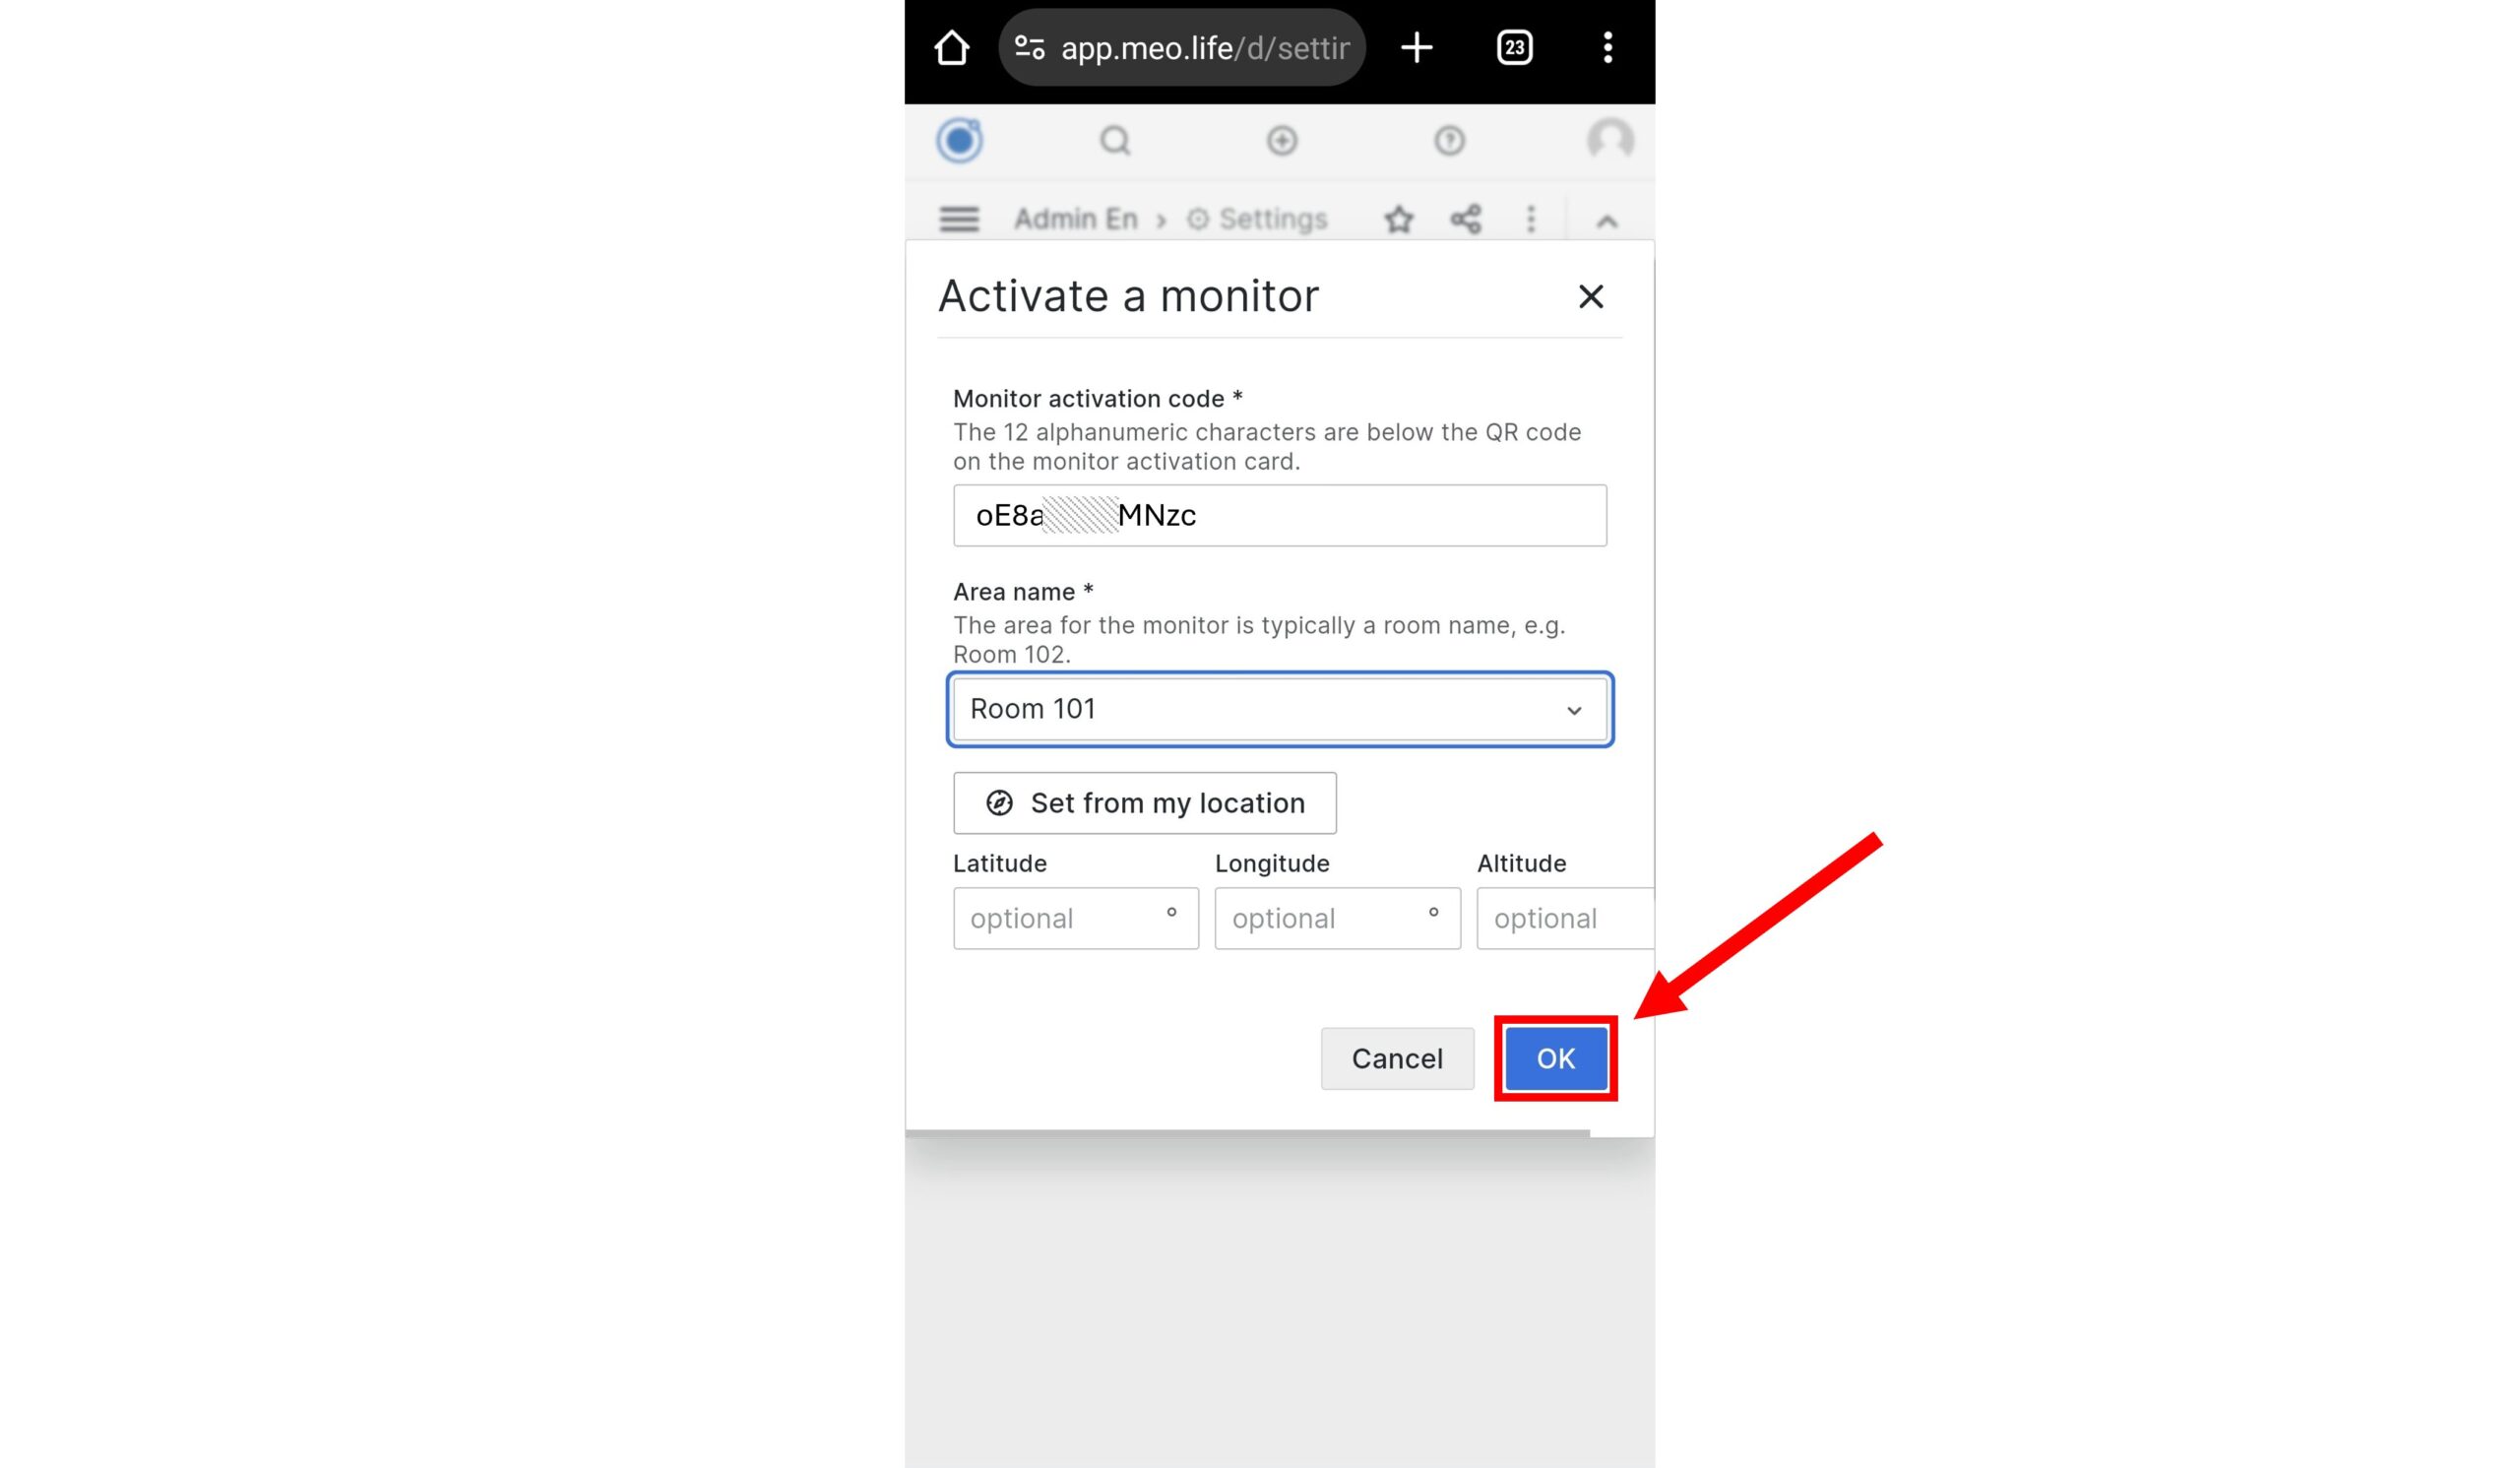
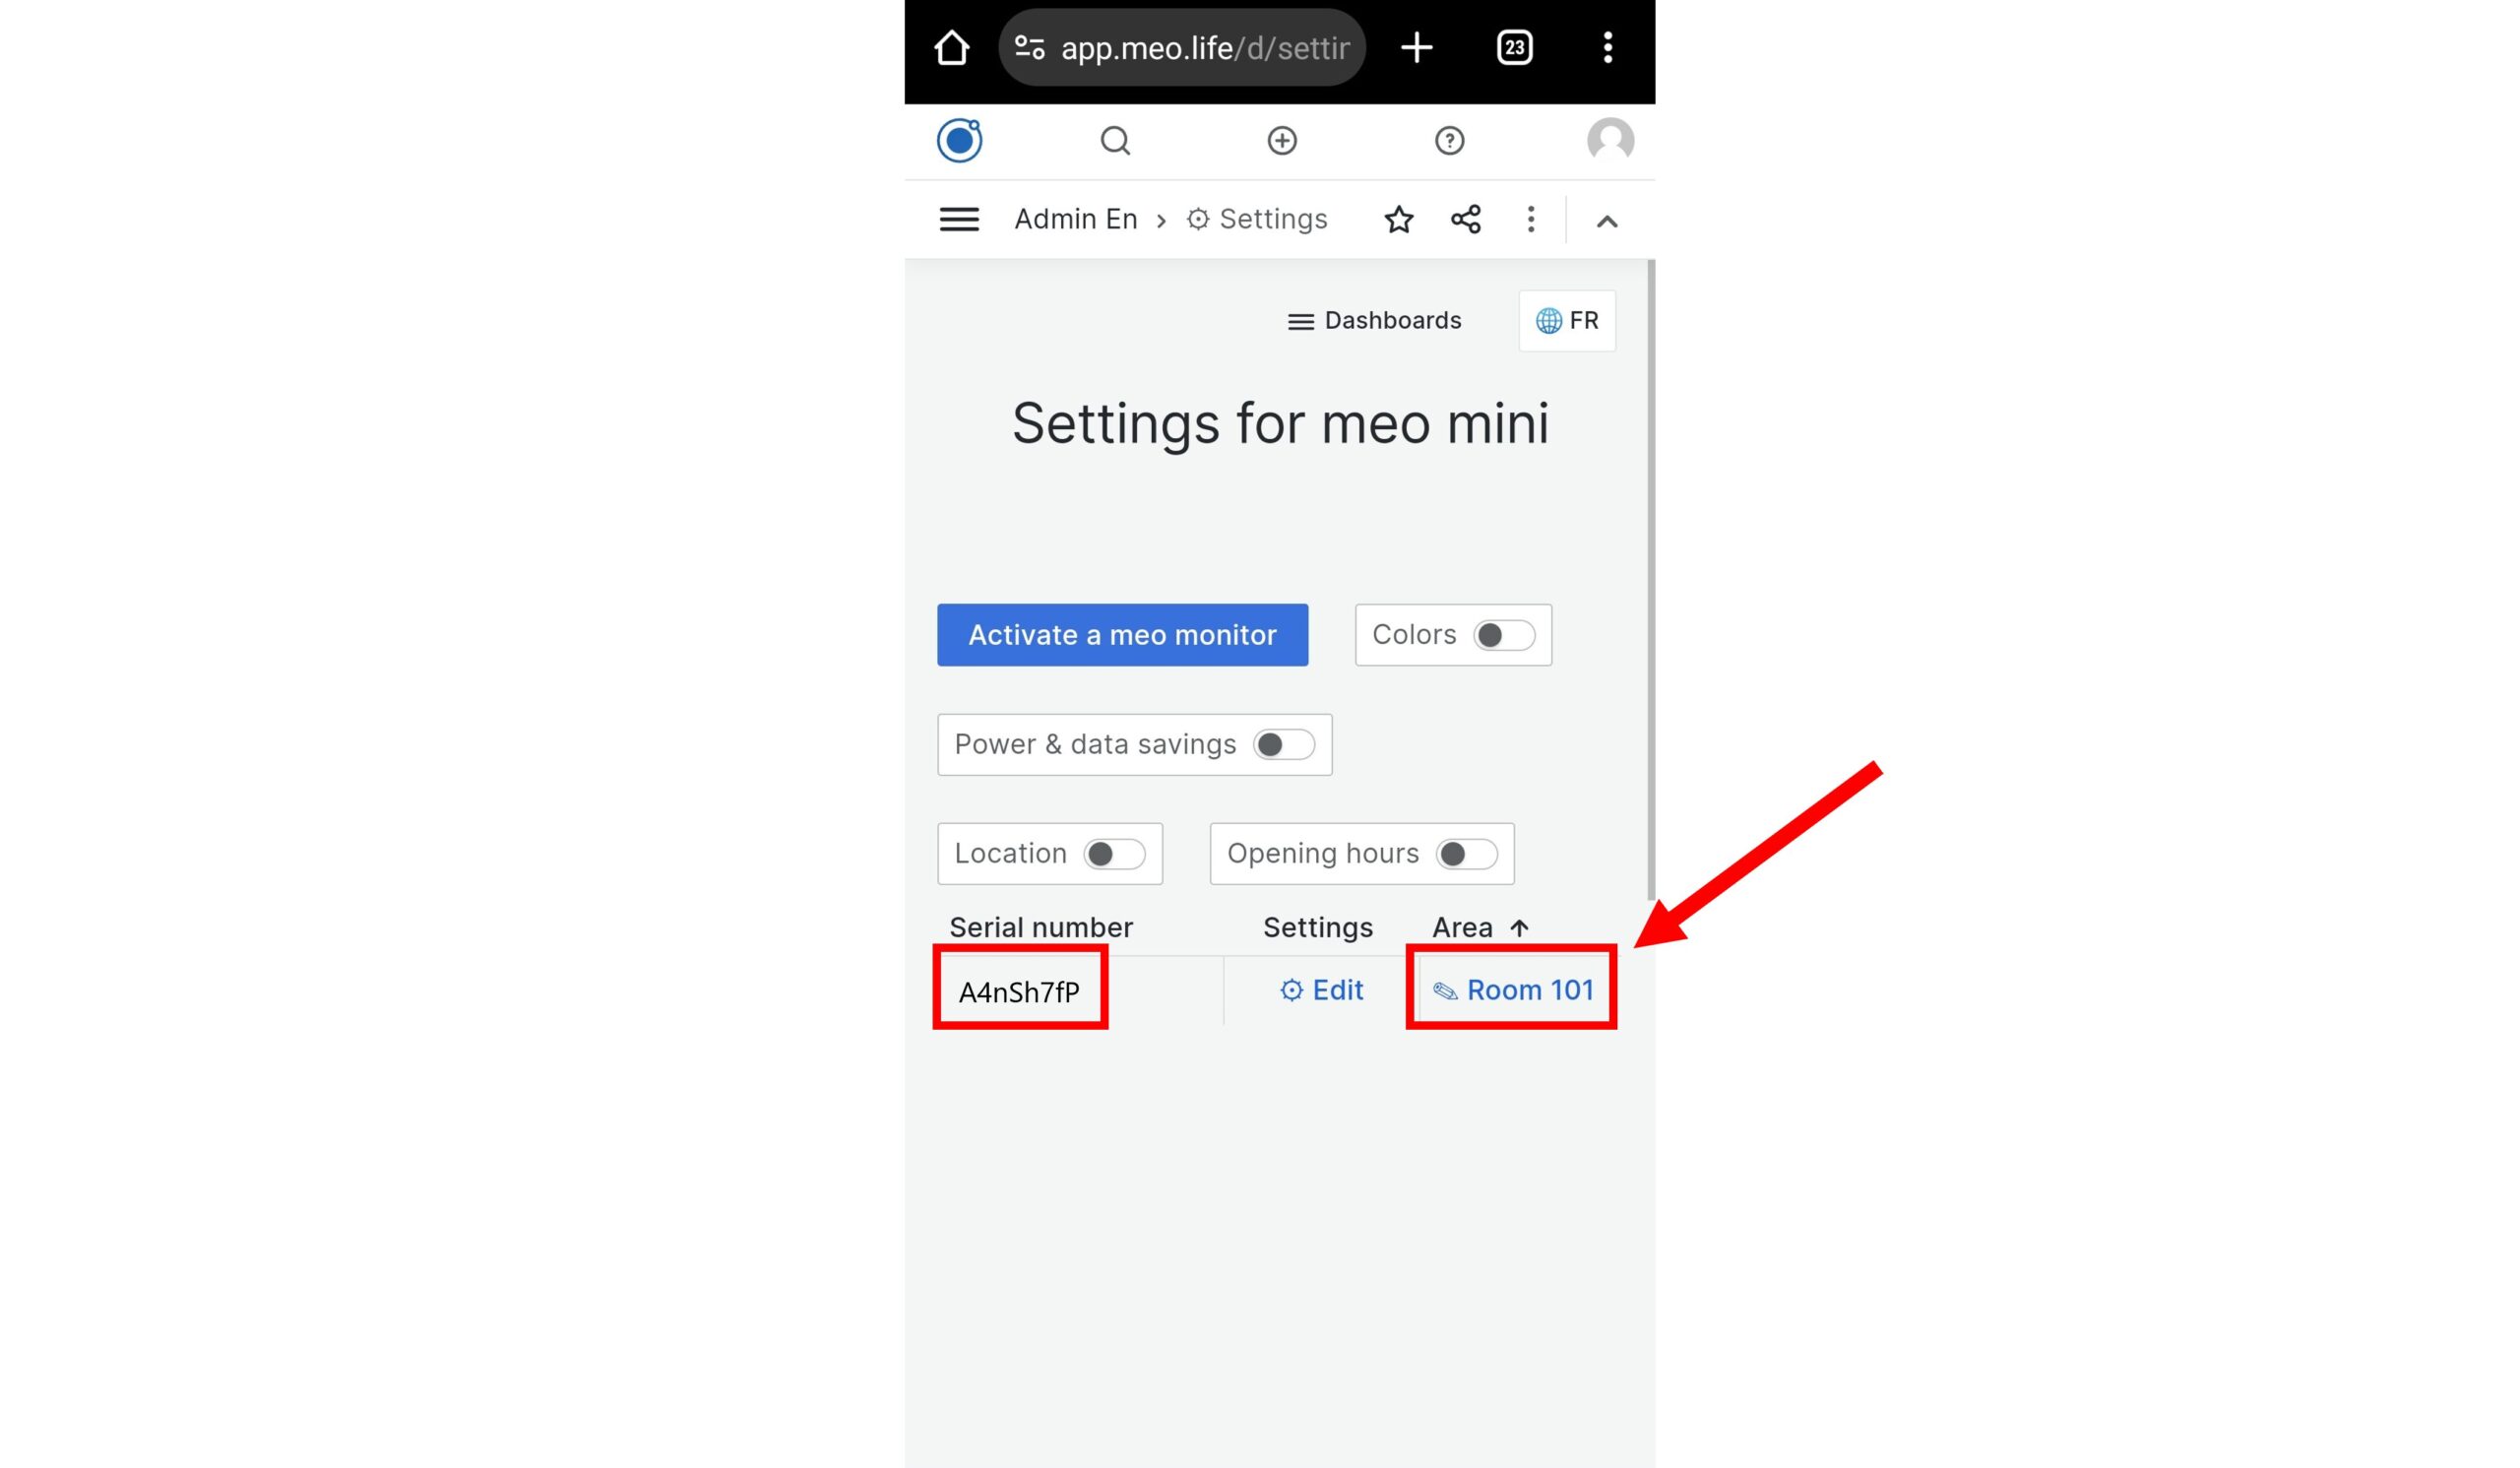
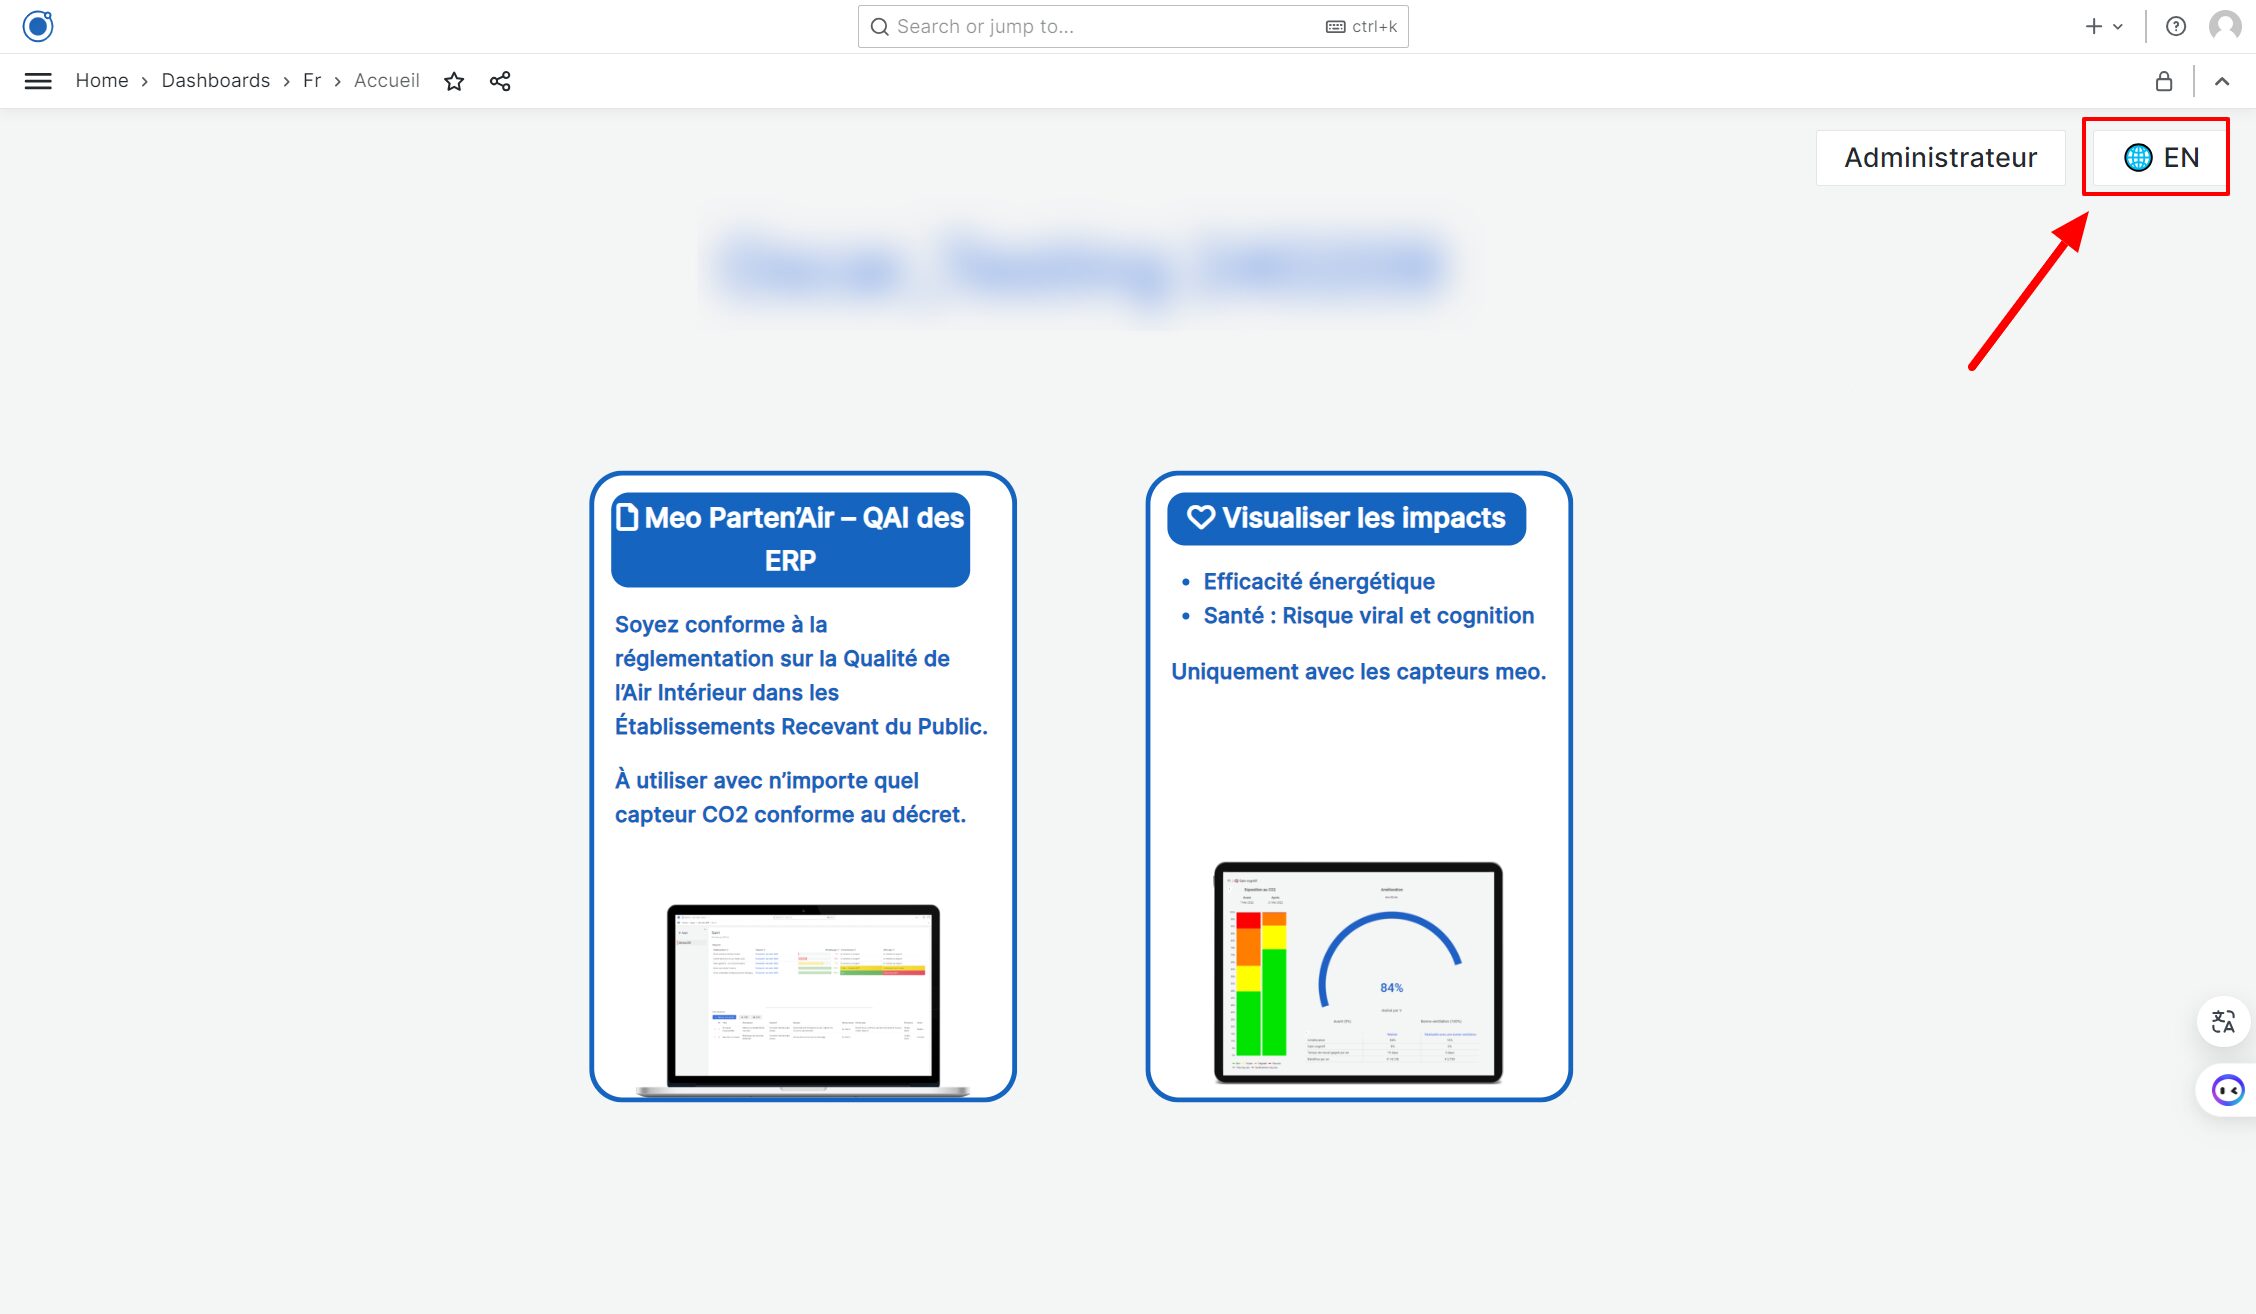
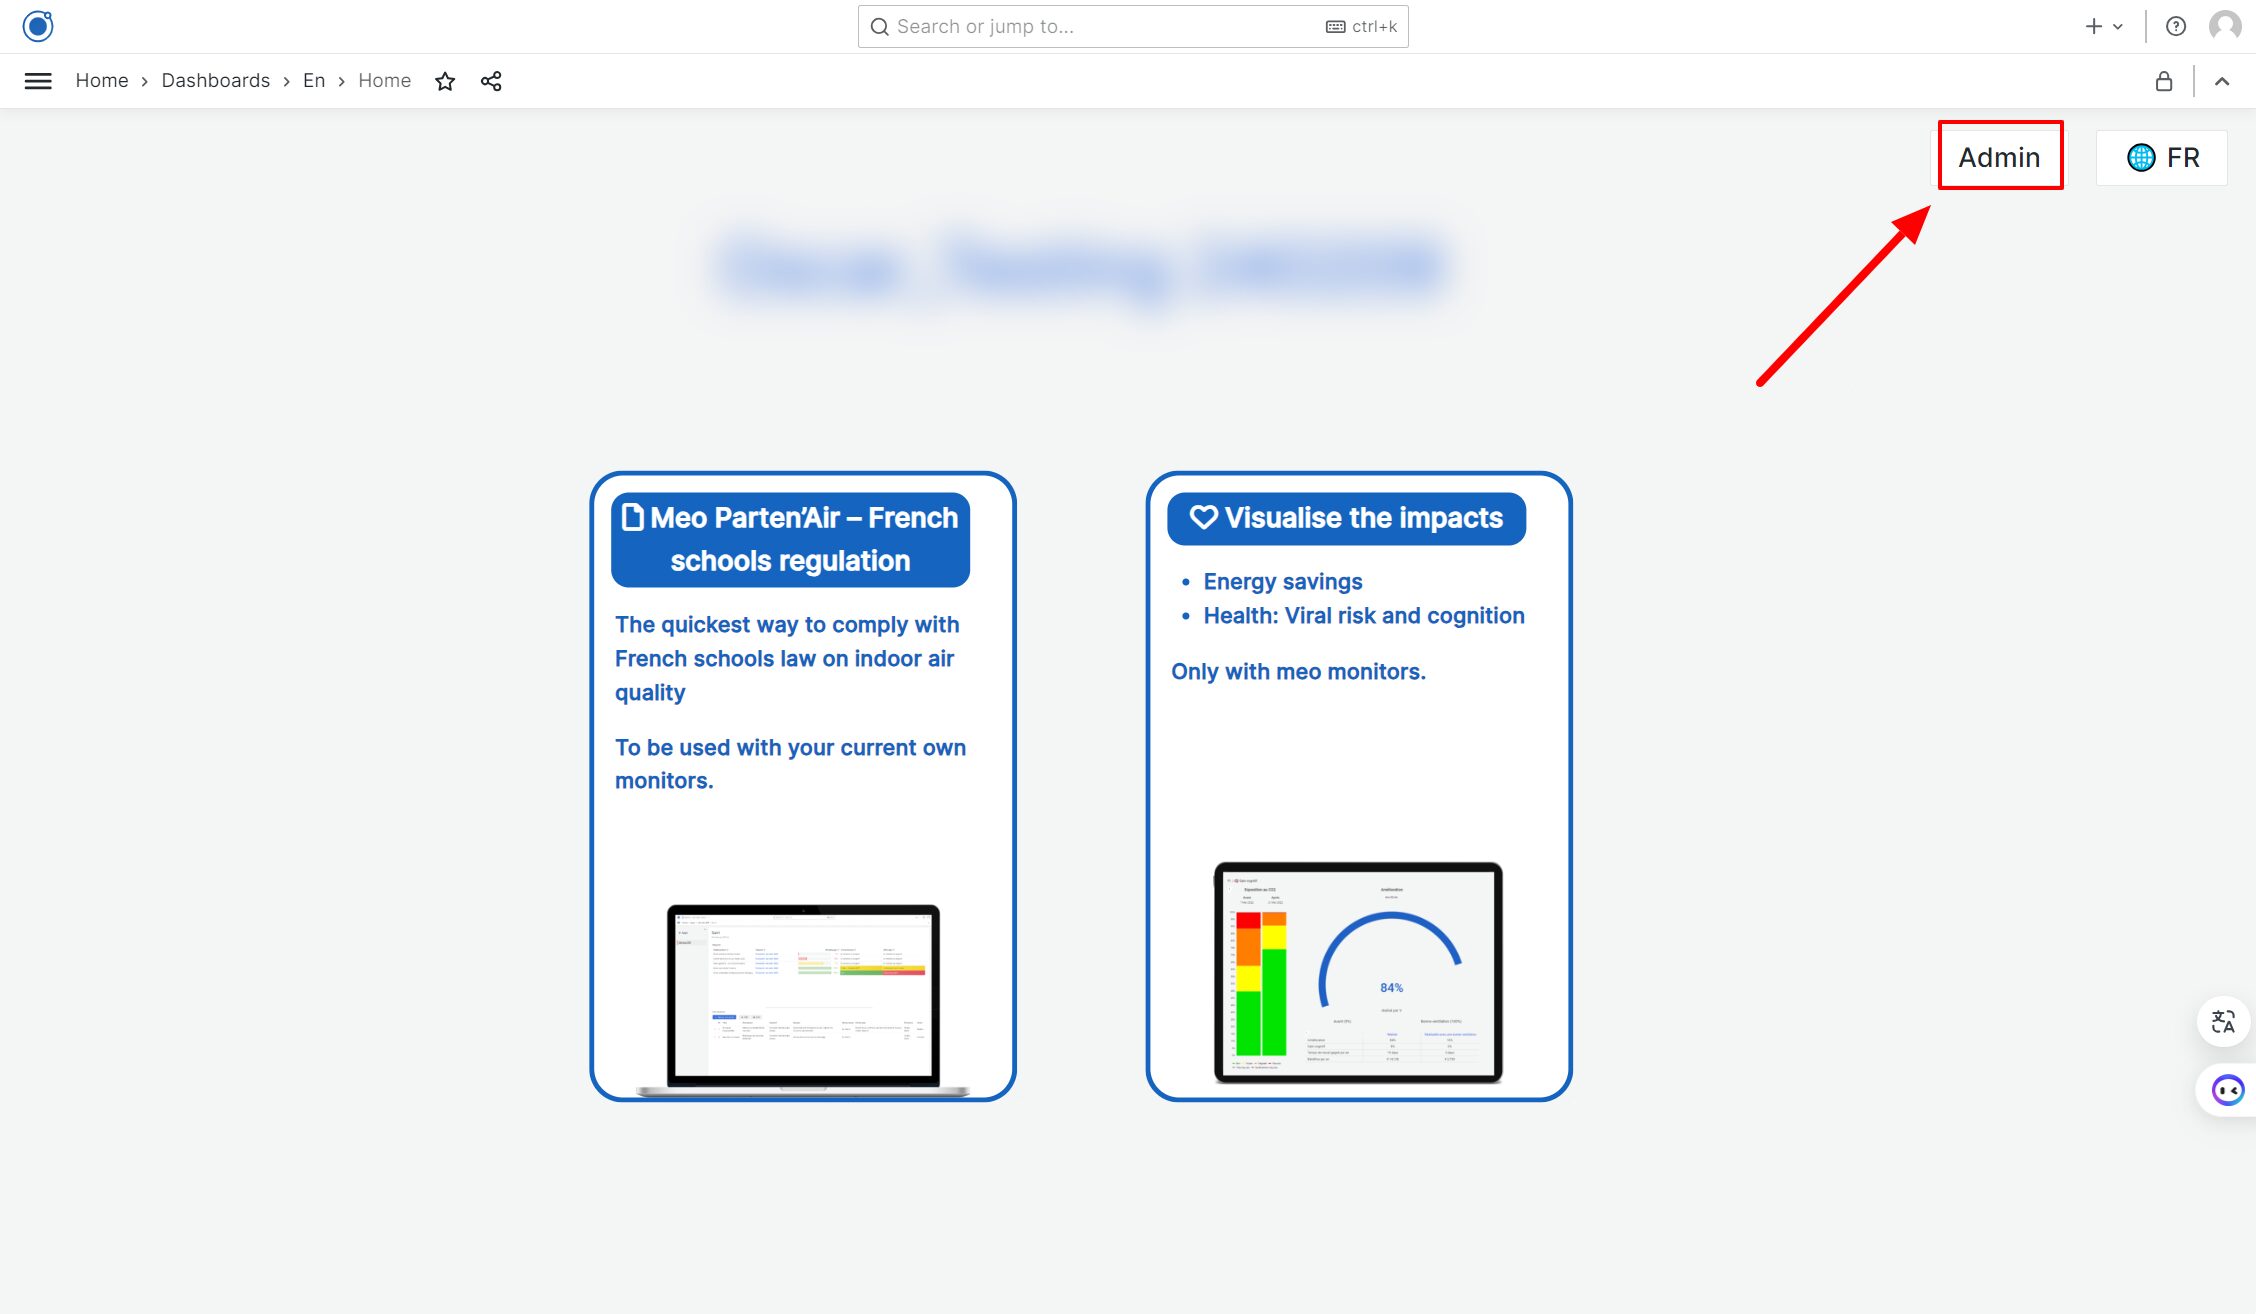
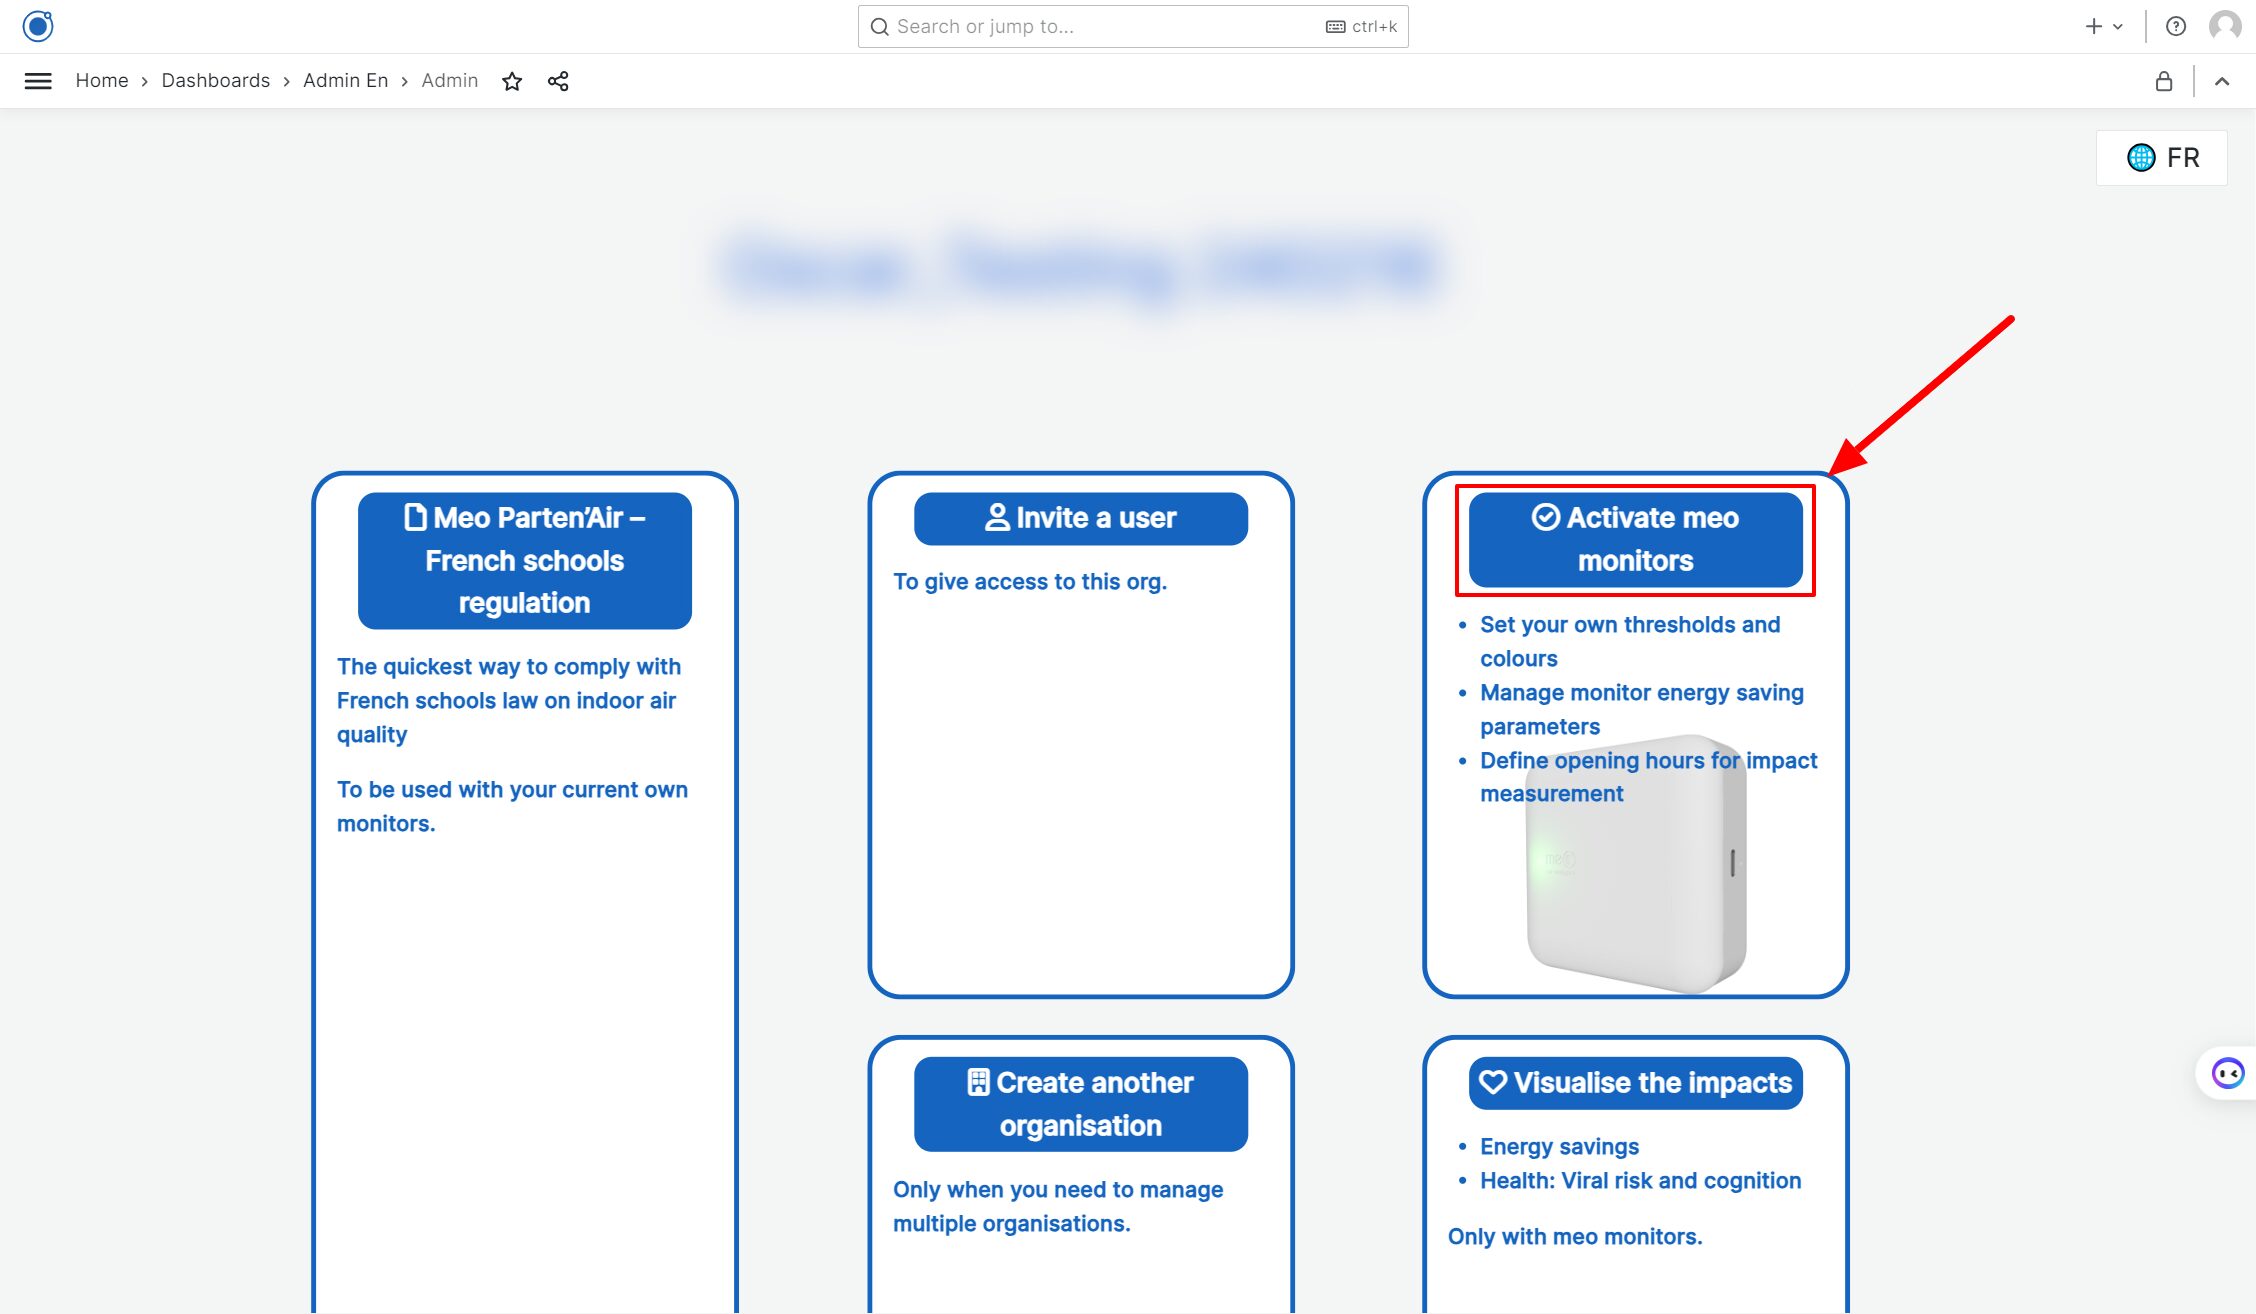
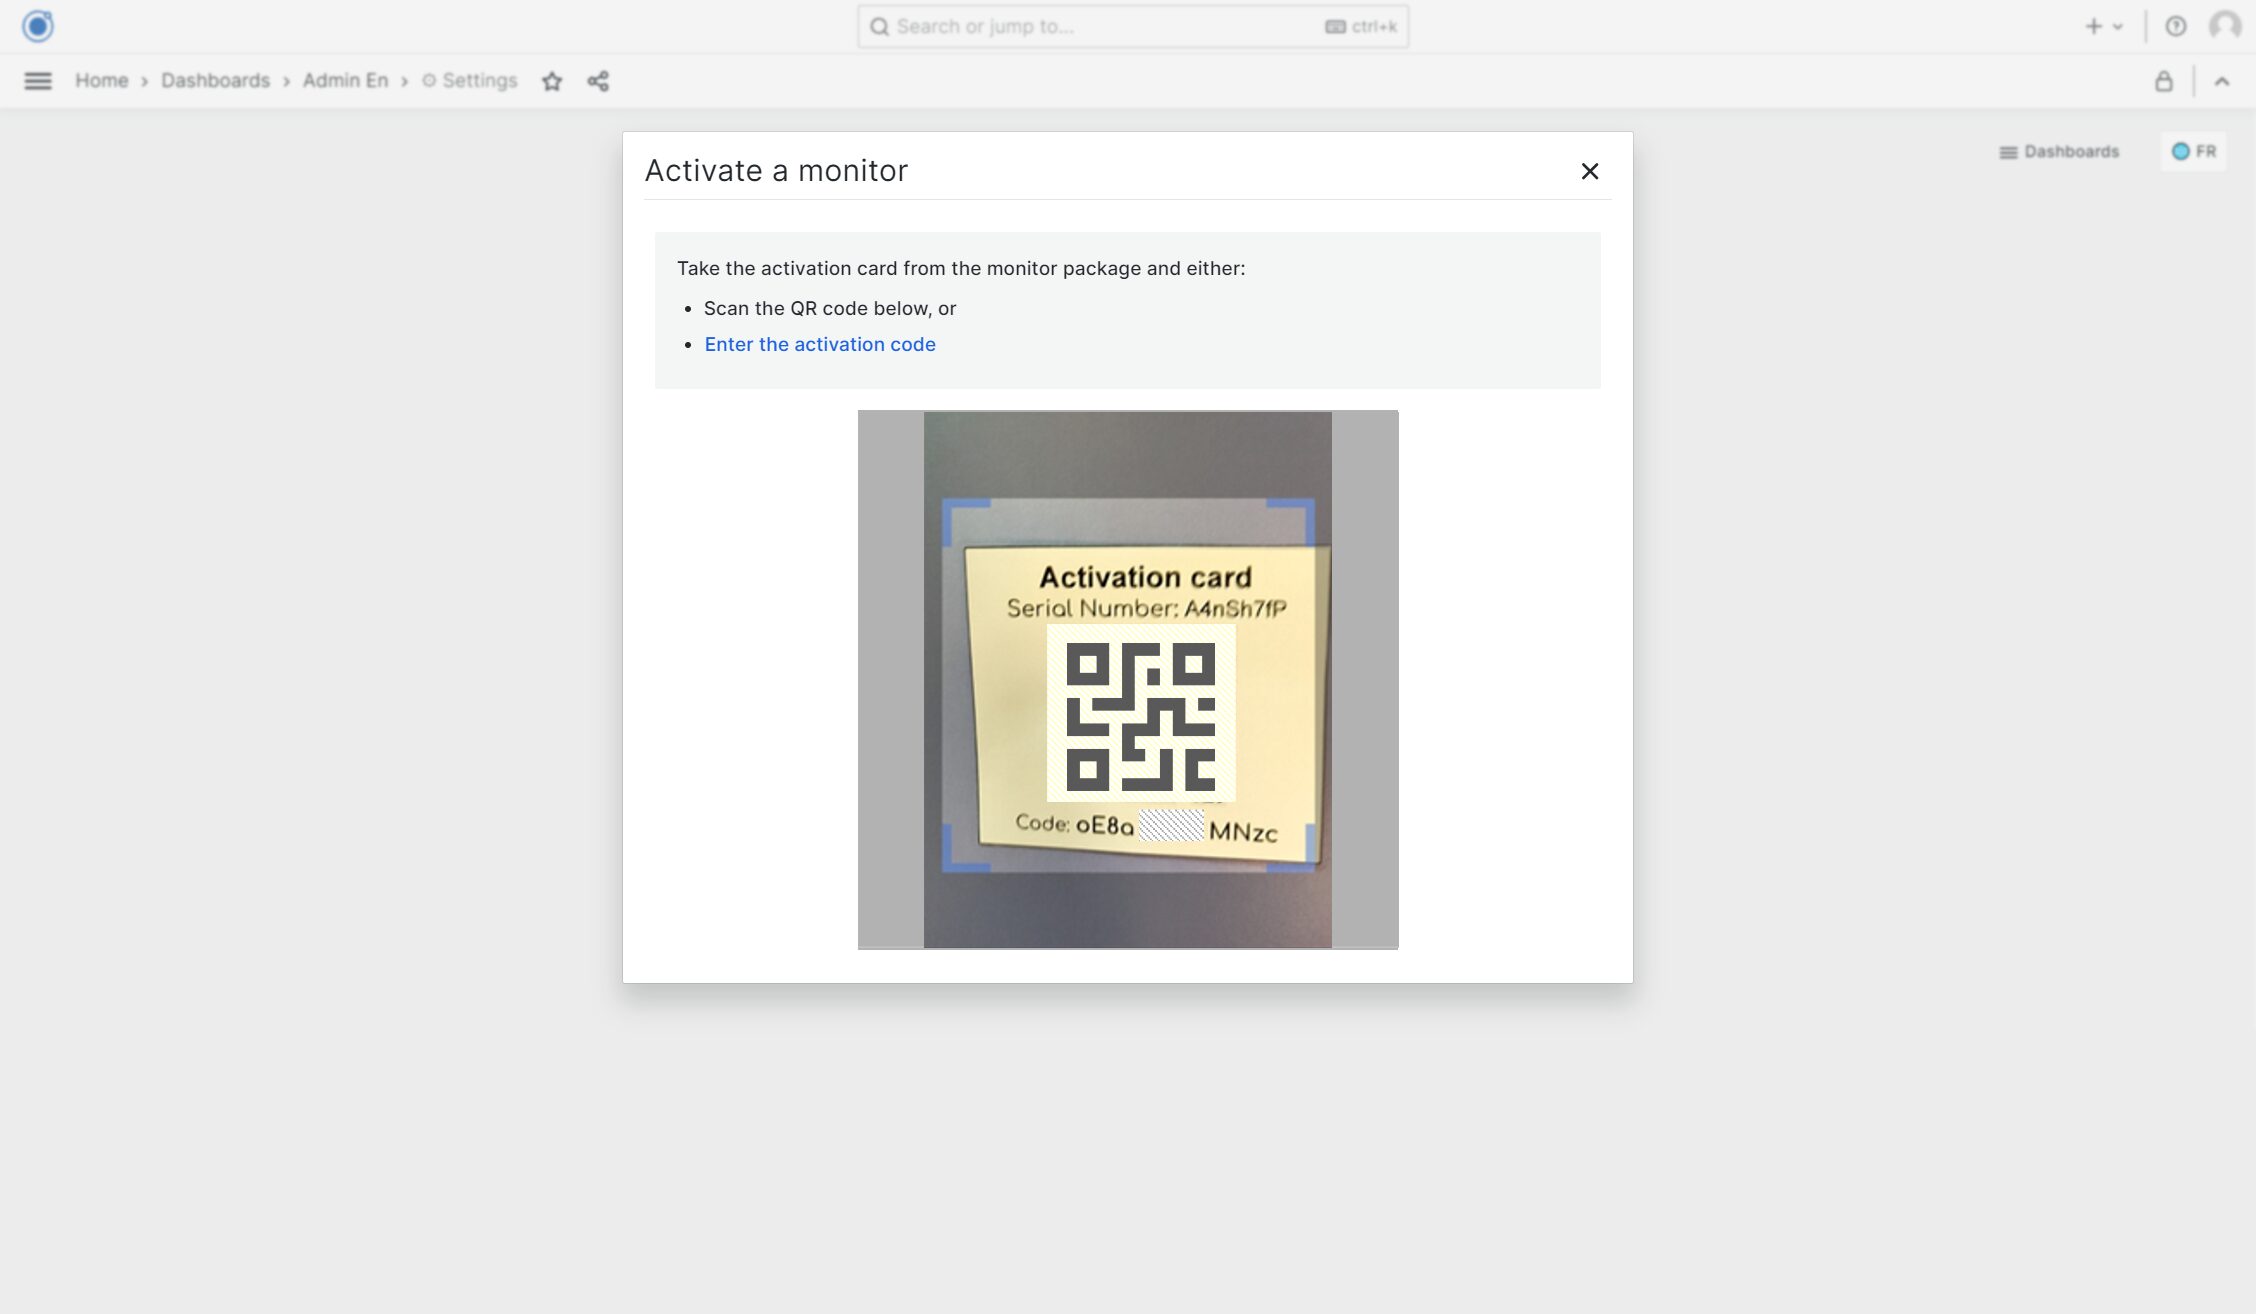
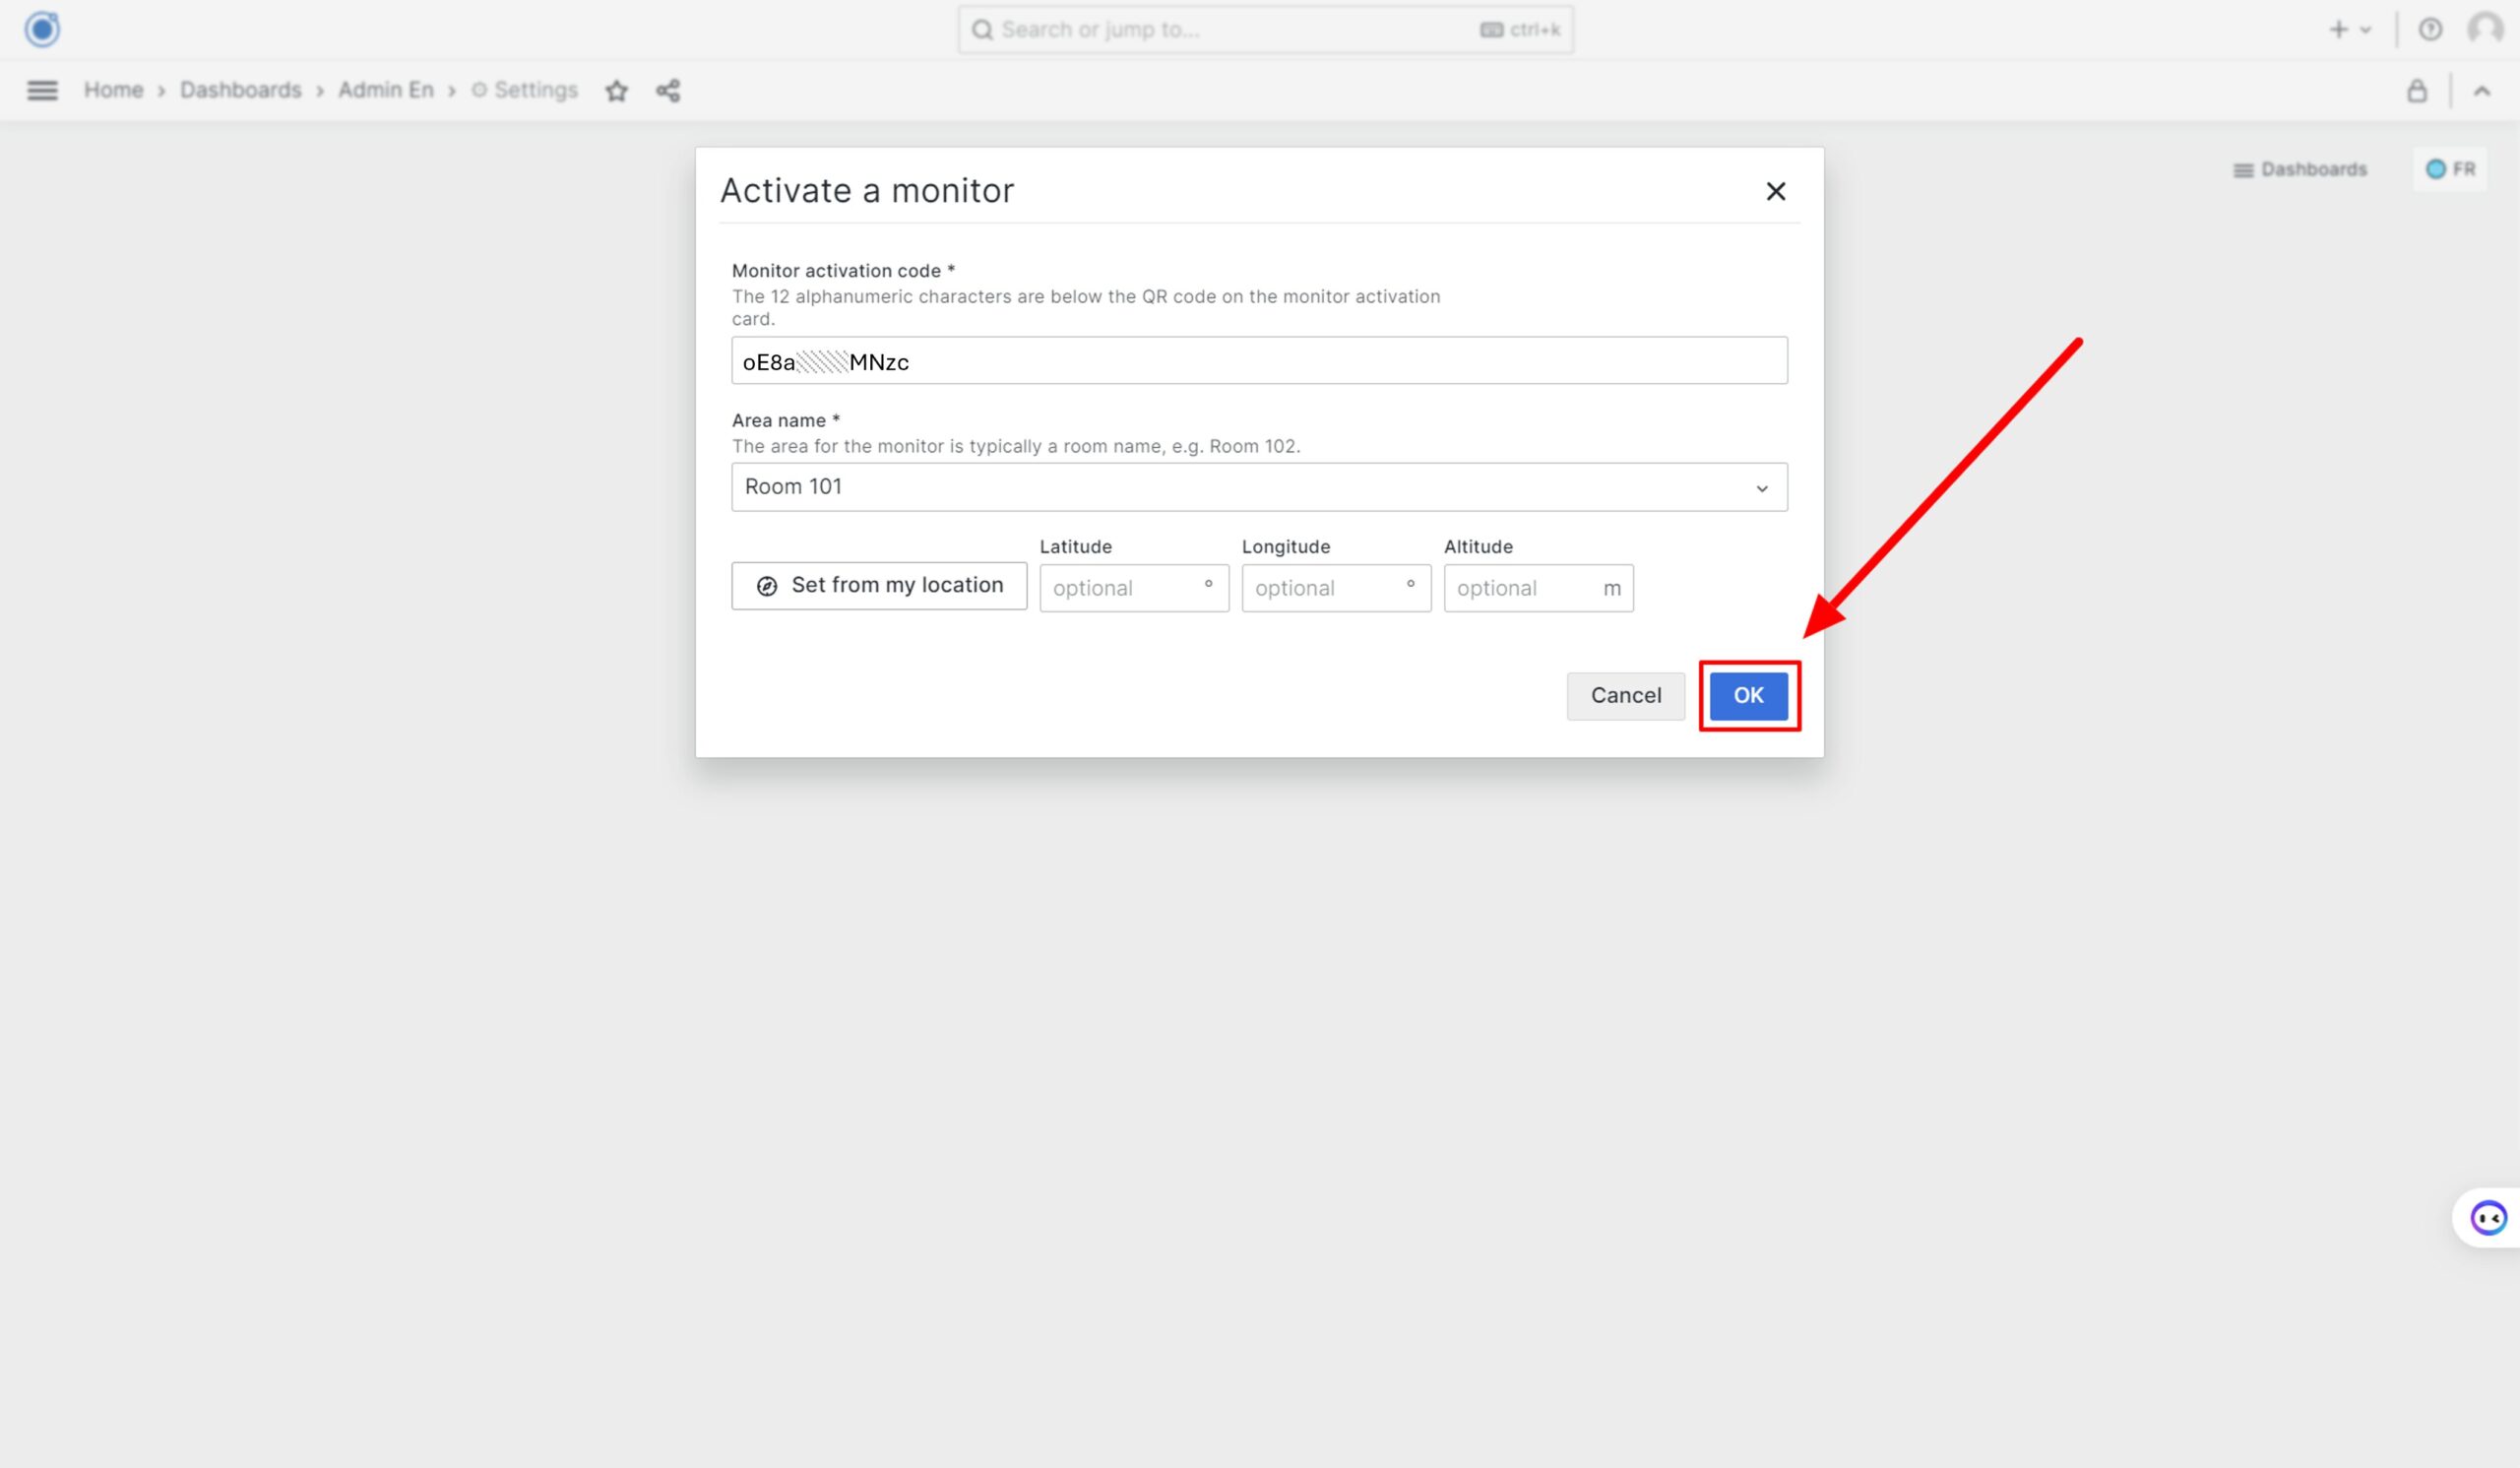
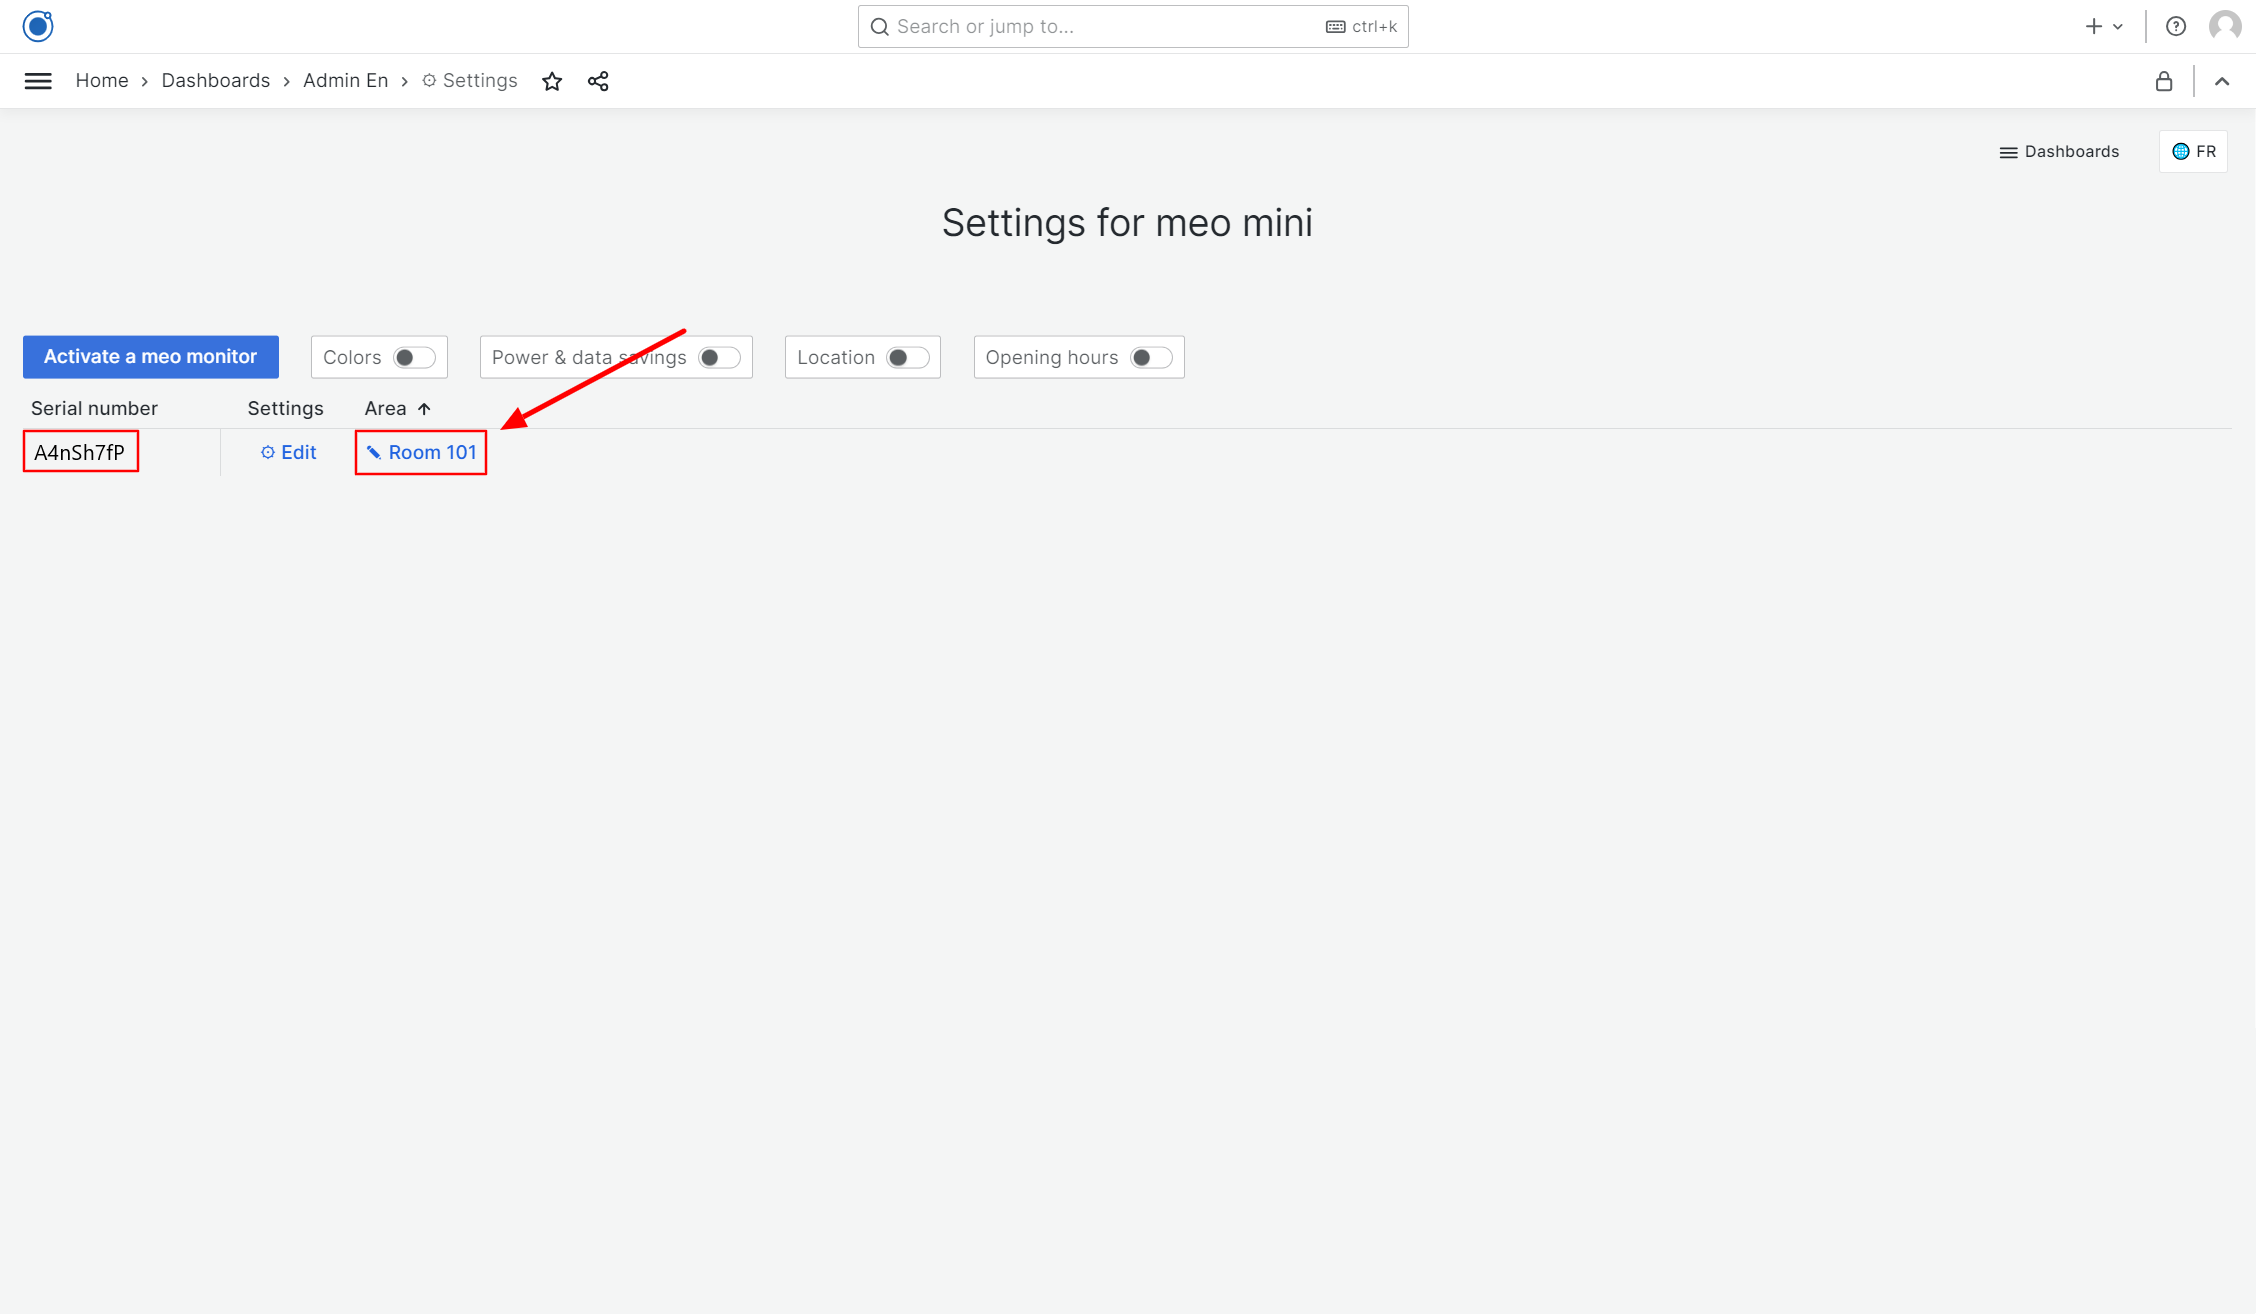
Activate new meo monitors

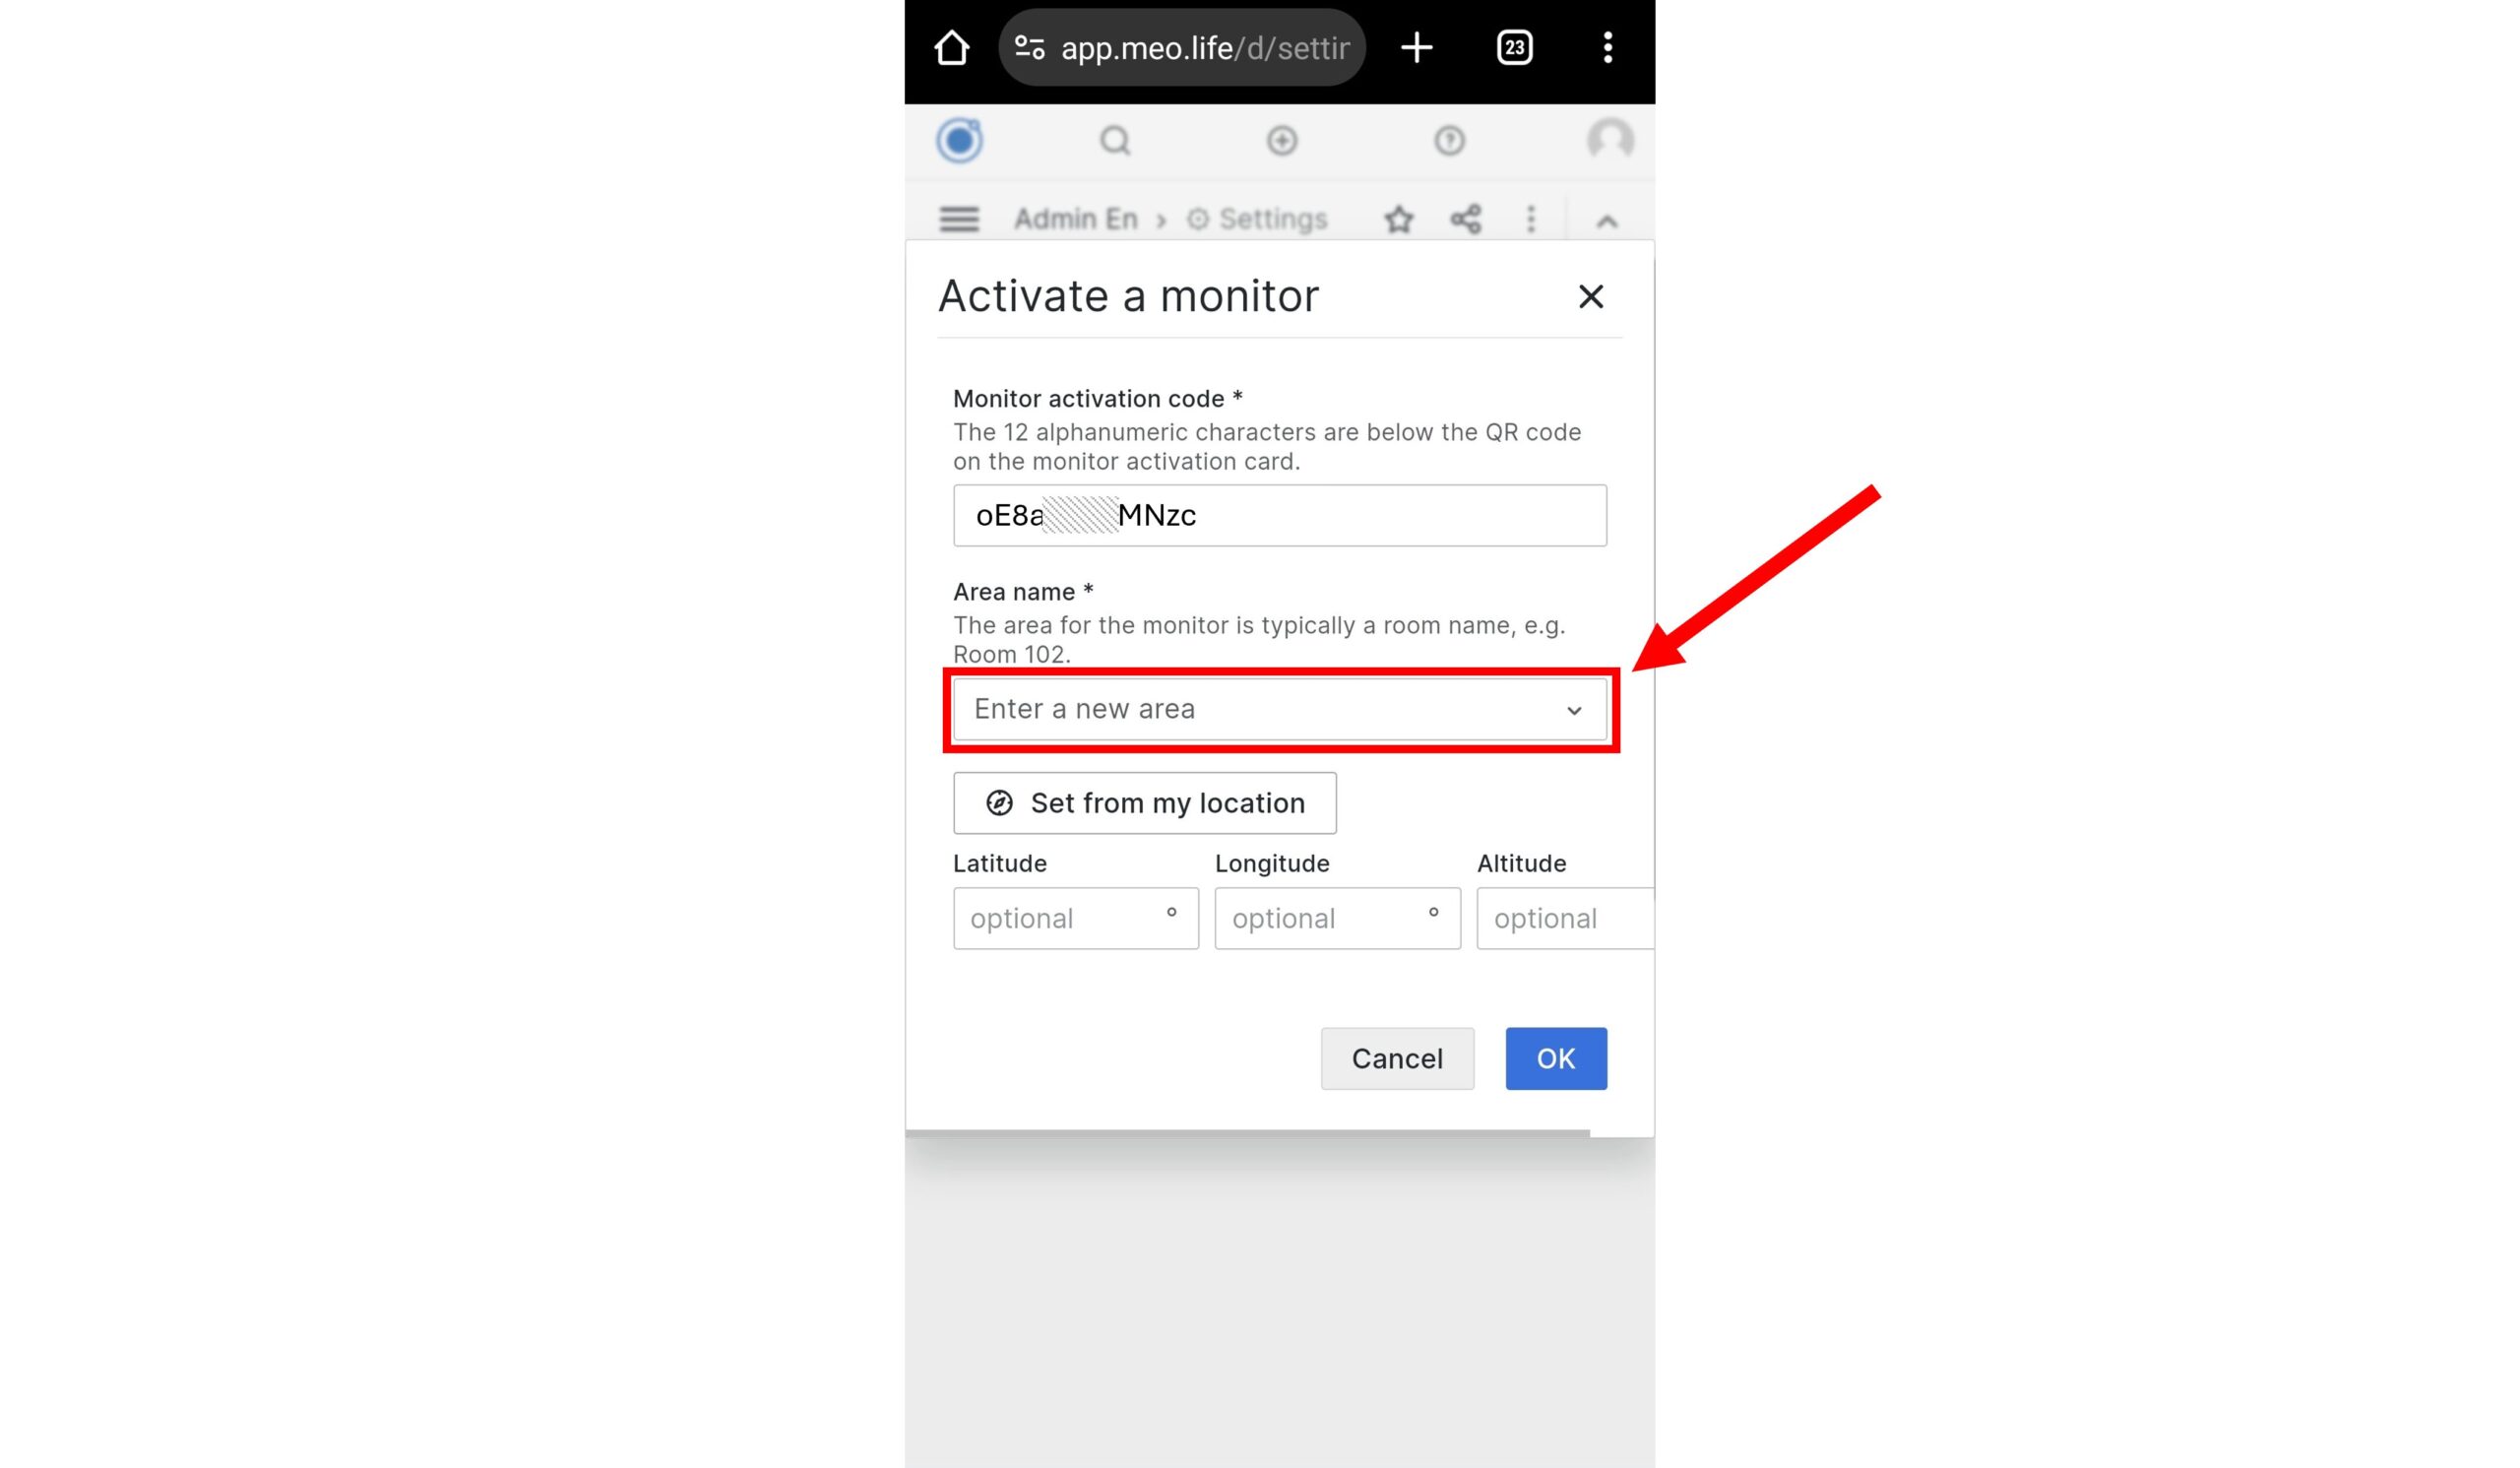
![9. Click on “Create: [area name]”](https://www.meo.life/wp-content/uploads/2024/02/9_And_then_click_on_Create_area_name_entered_mobile_EN-scaled.jpg)
Remarks:
- Repeat “Activate new meo monitors” steps for each new monitor to register
- Power the meo mini/maxi up at the respective areas to start recording data
with your computer
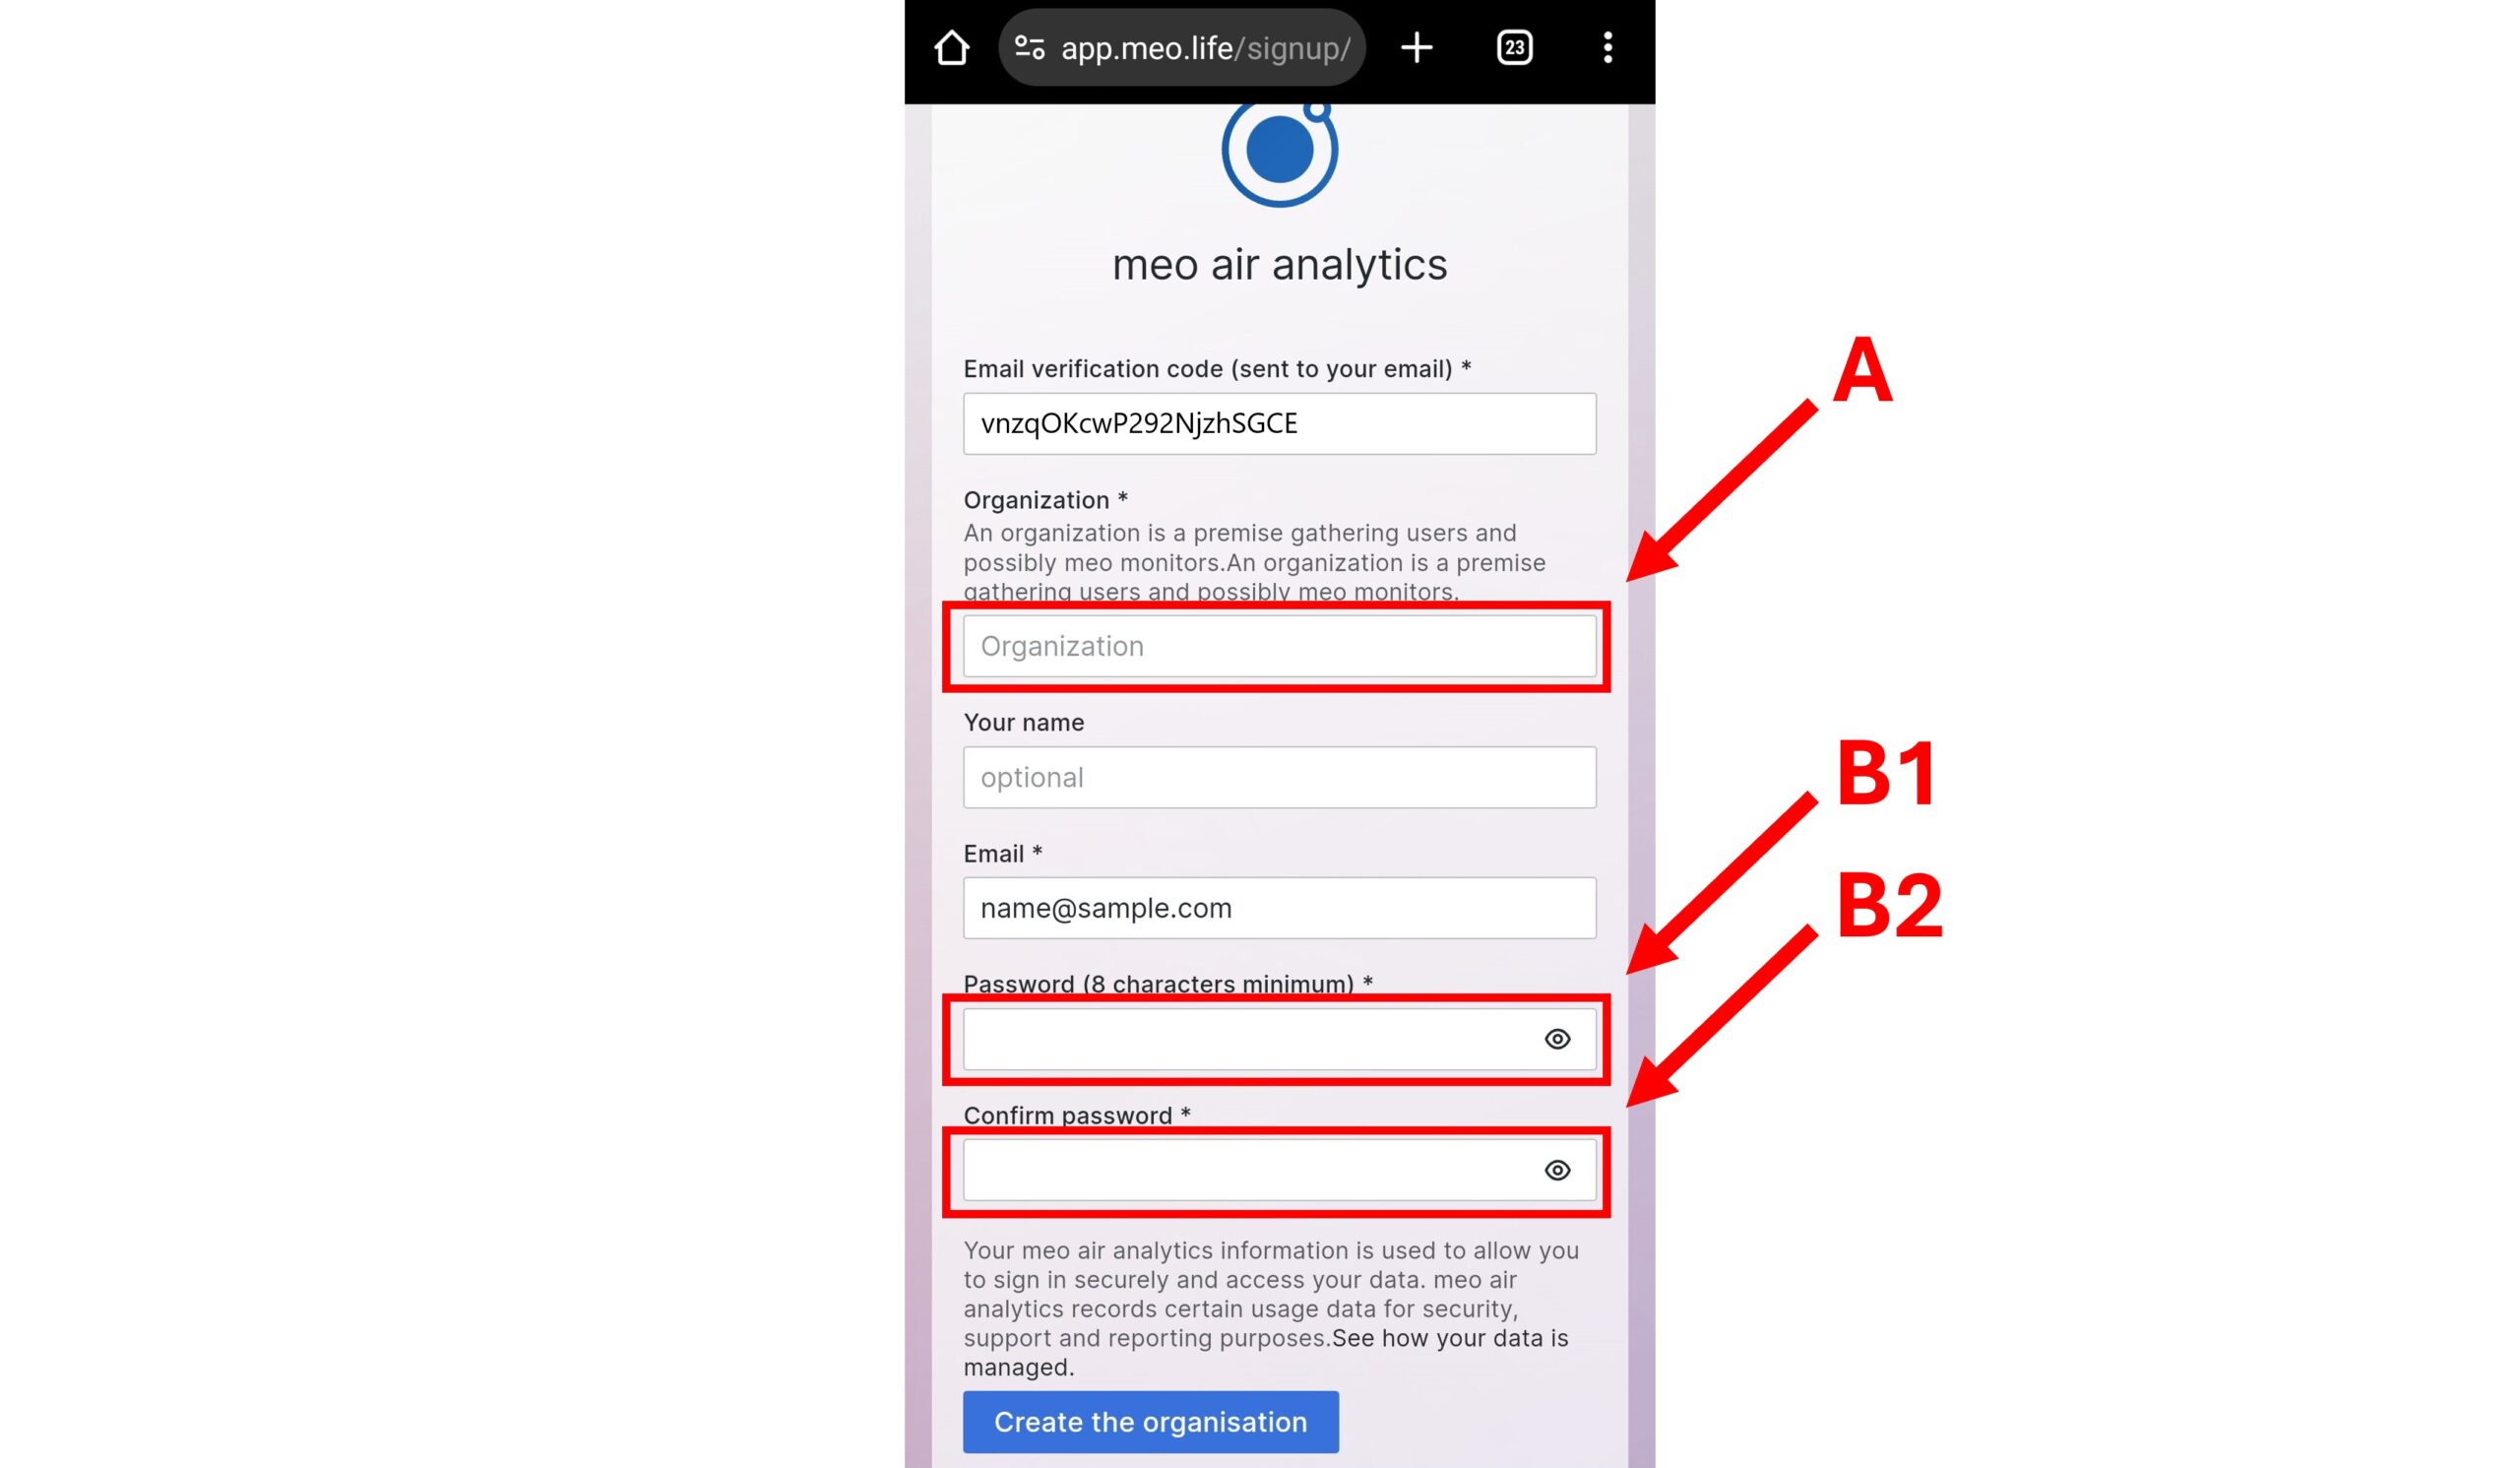
Create an organisation (aka SignUp)
- Open a browser on app.meo.life
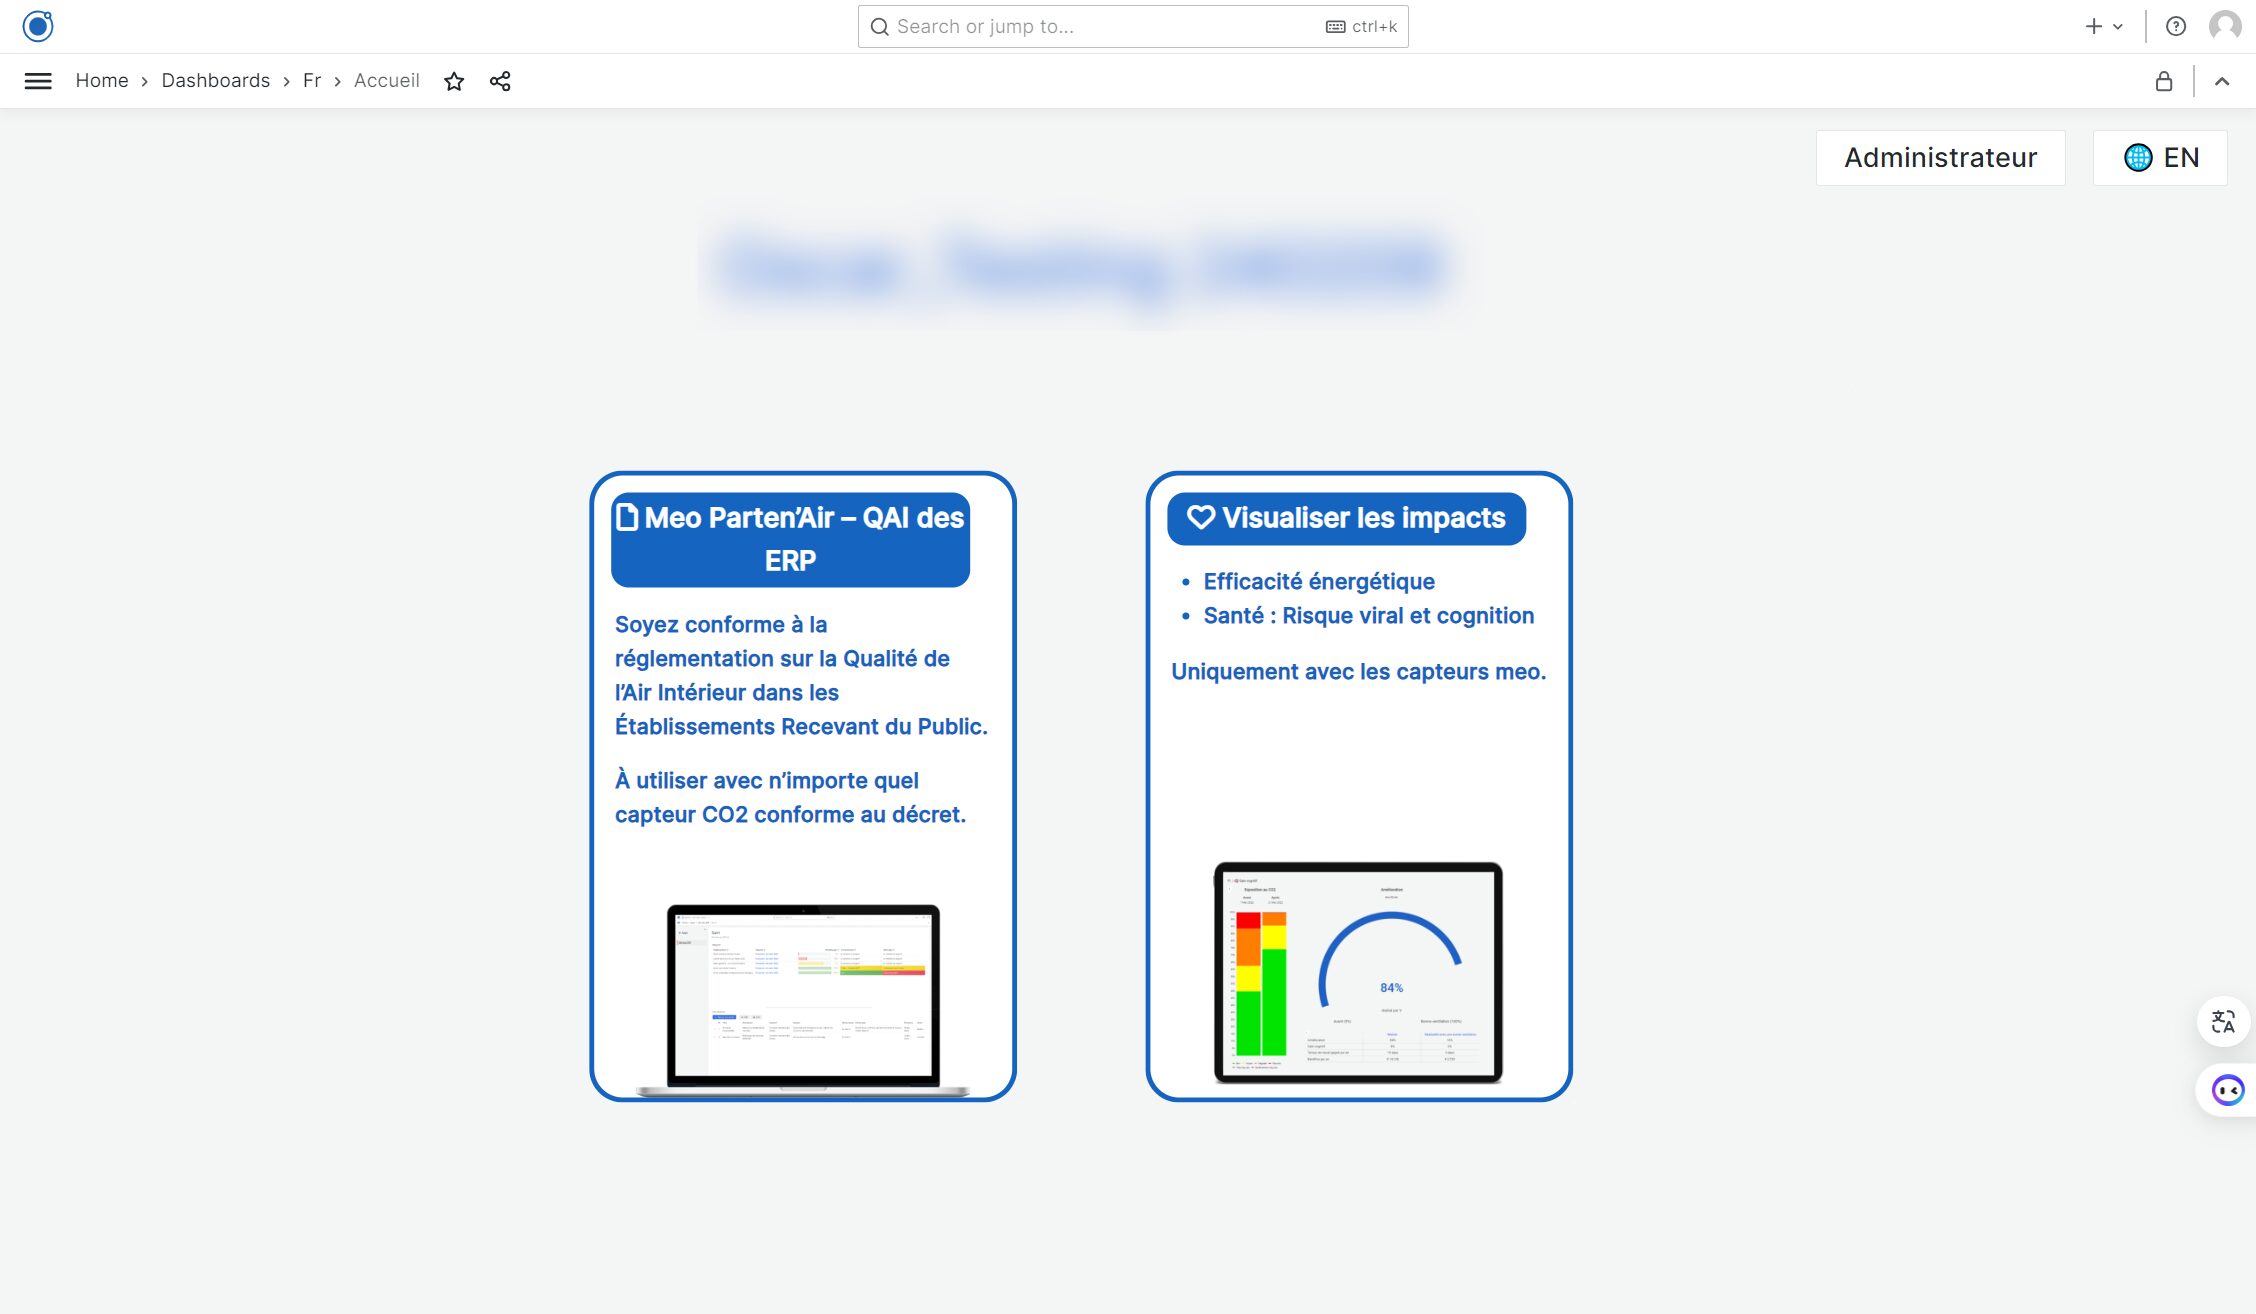
Activate new meo monitors


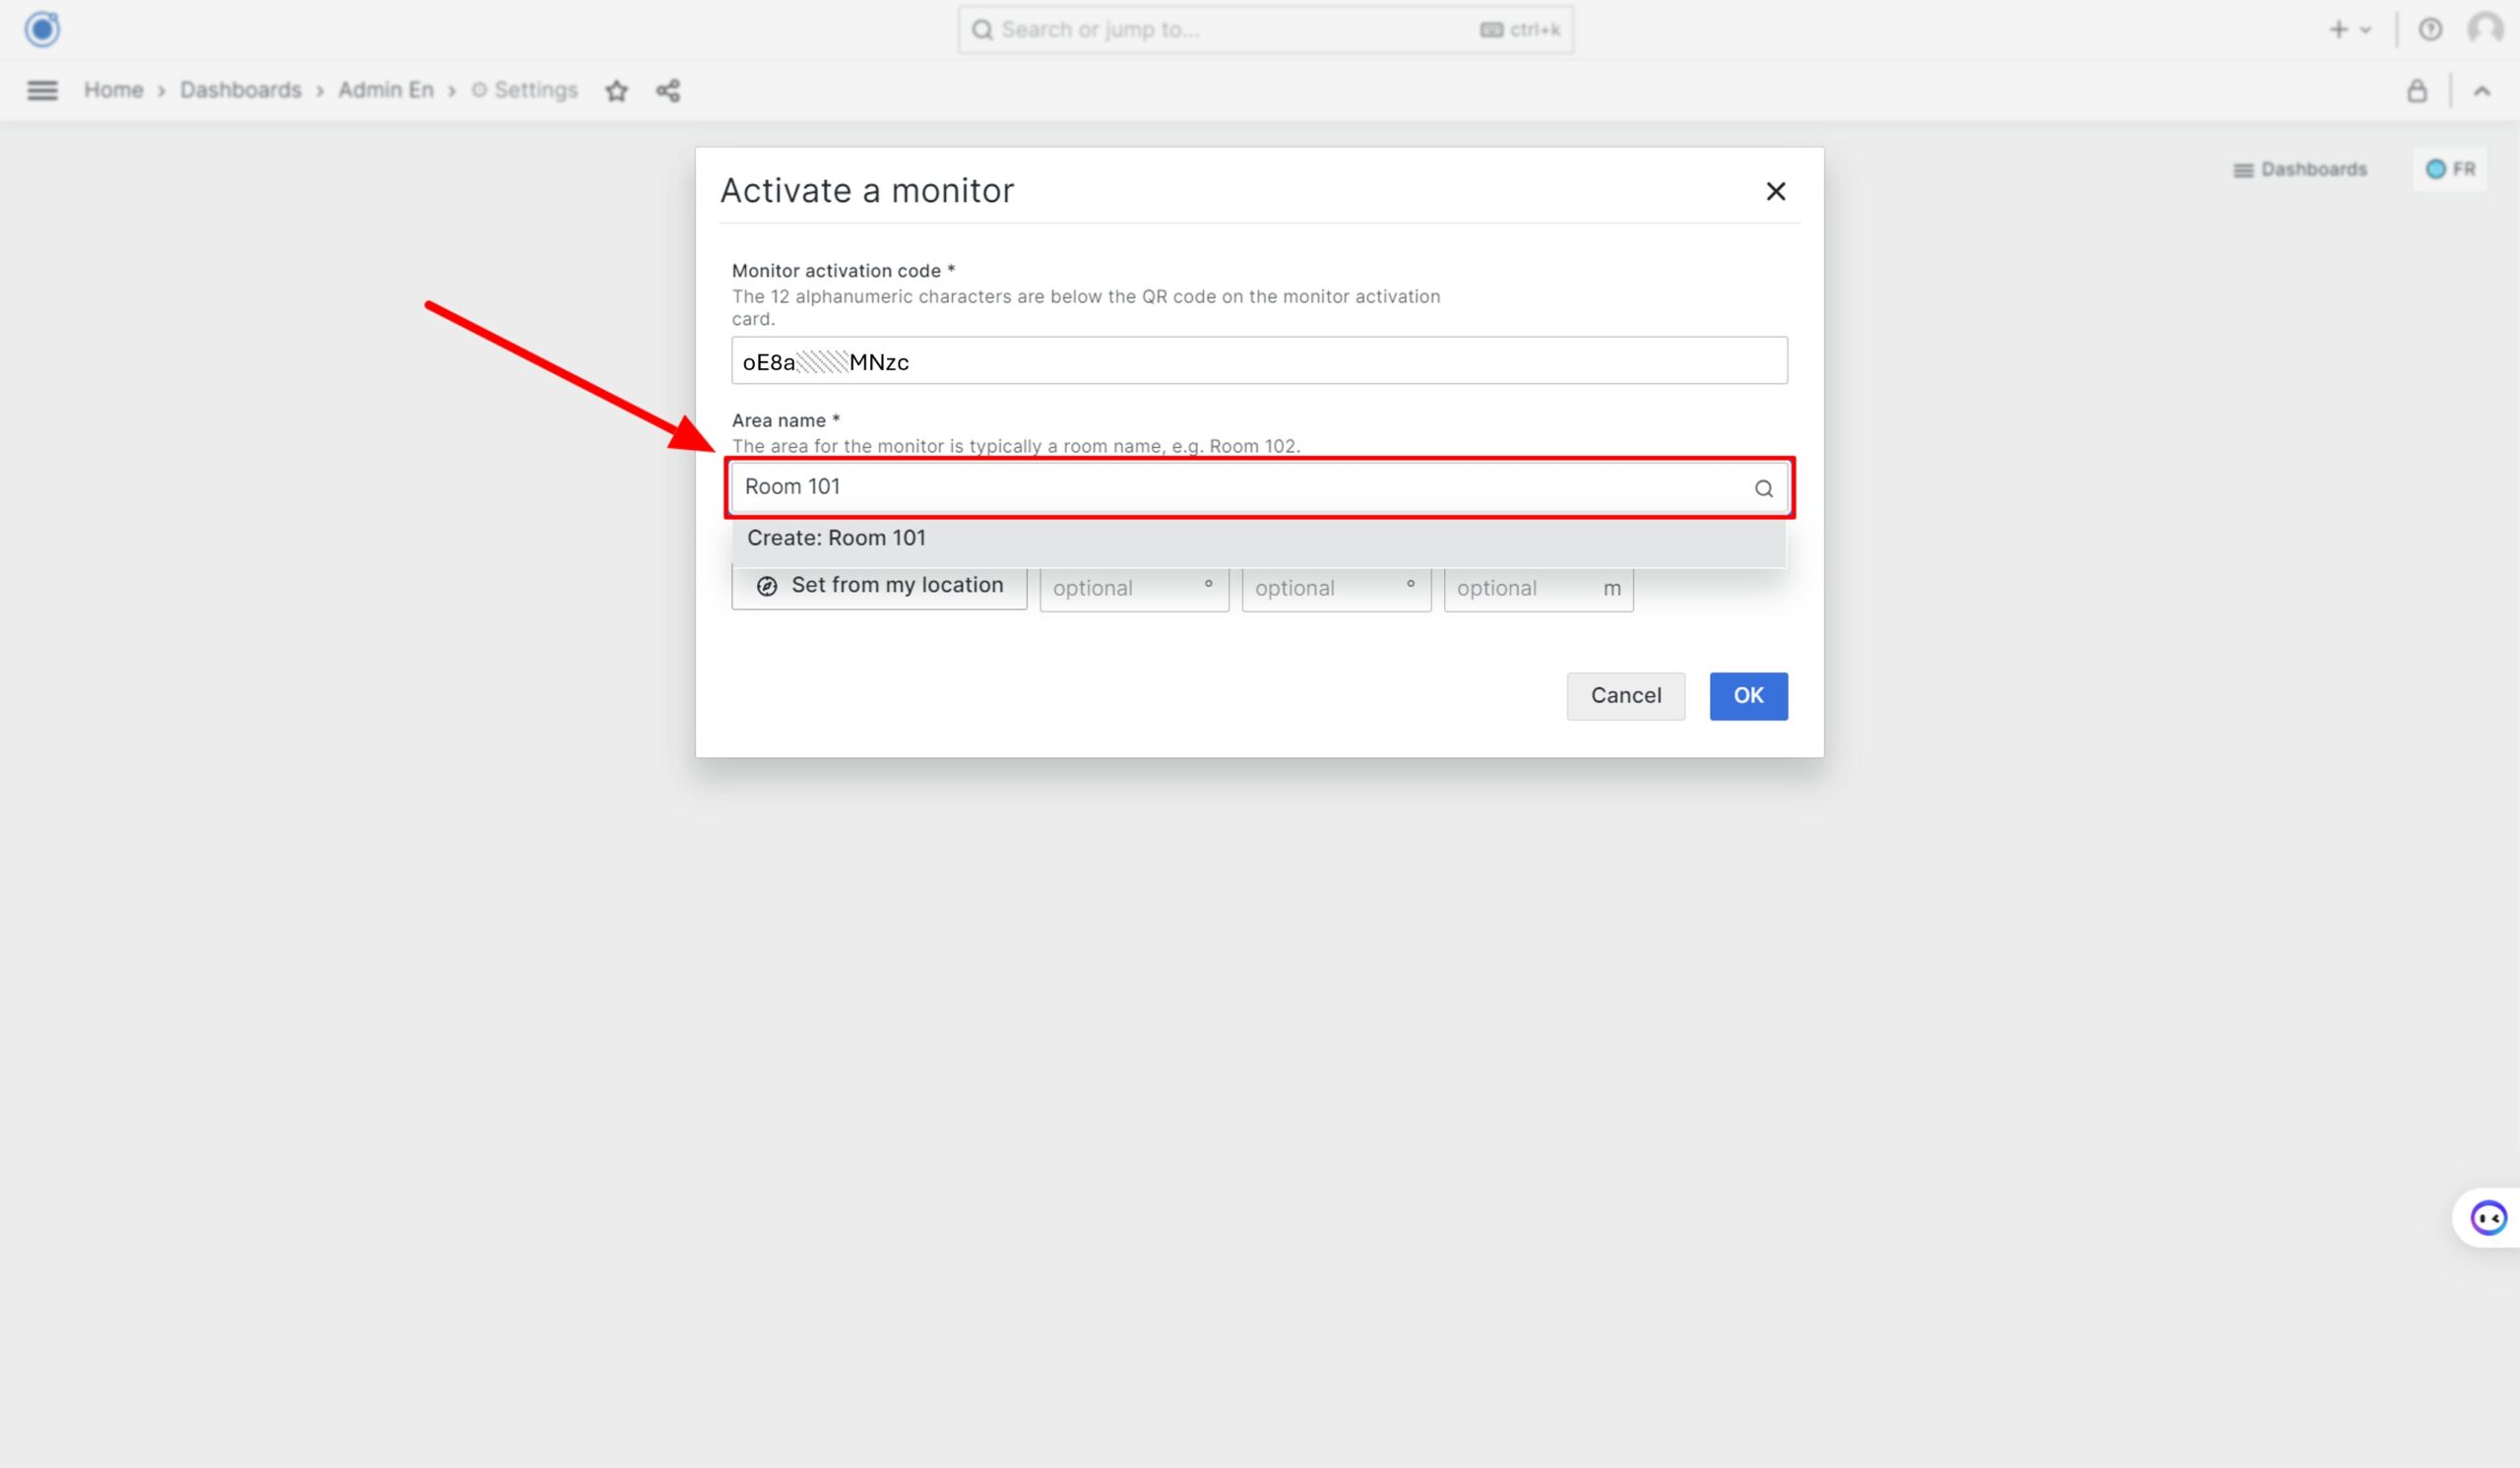
![9. Click on “Create: [area name entered]”](https://www.meo.life/wp-content/uploads/2024/02/9_And_then_click_on_Create_area_name_entered_computer_EN-scaled.jpg)
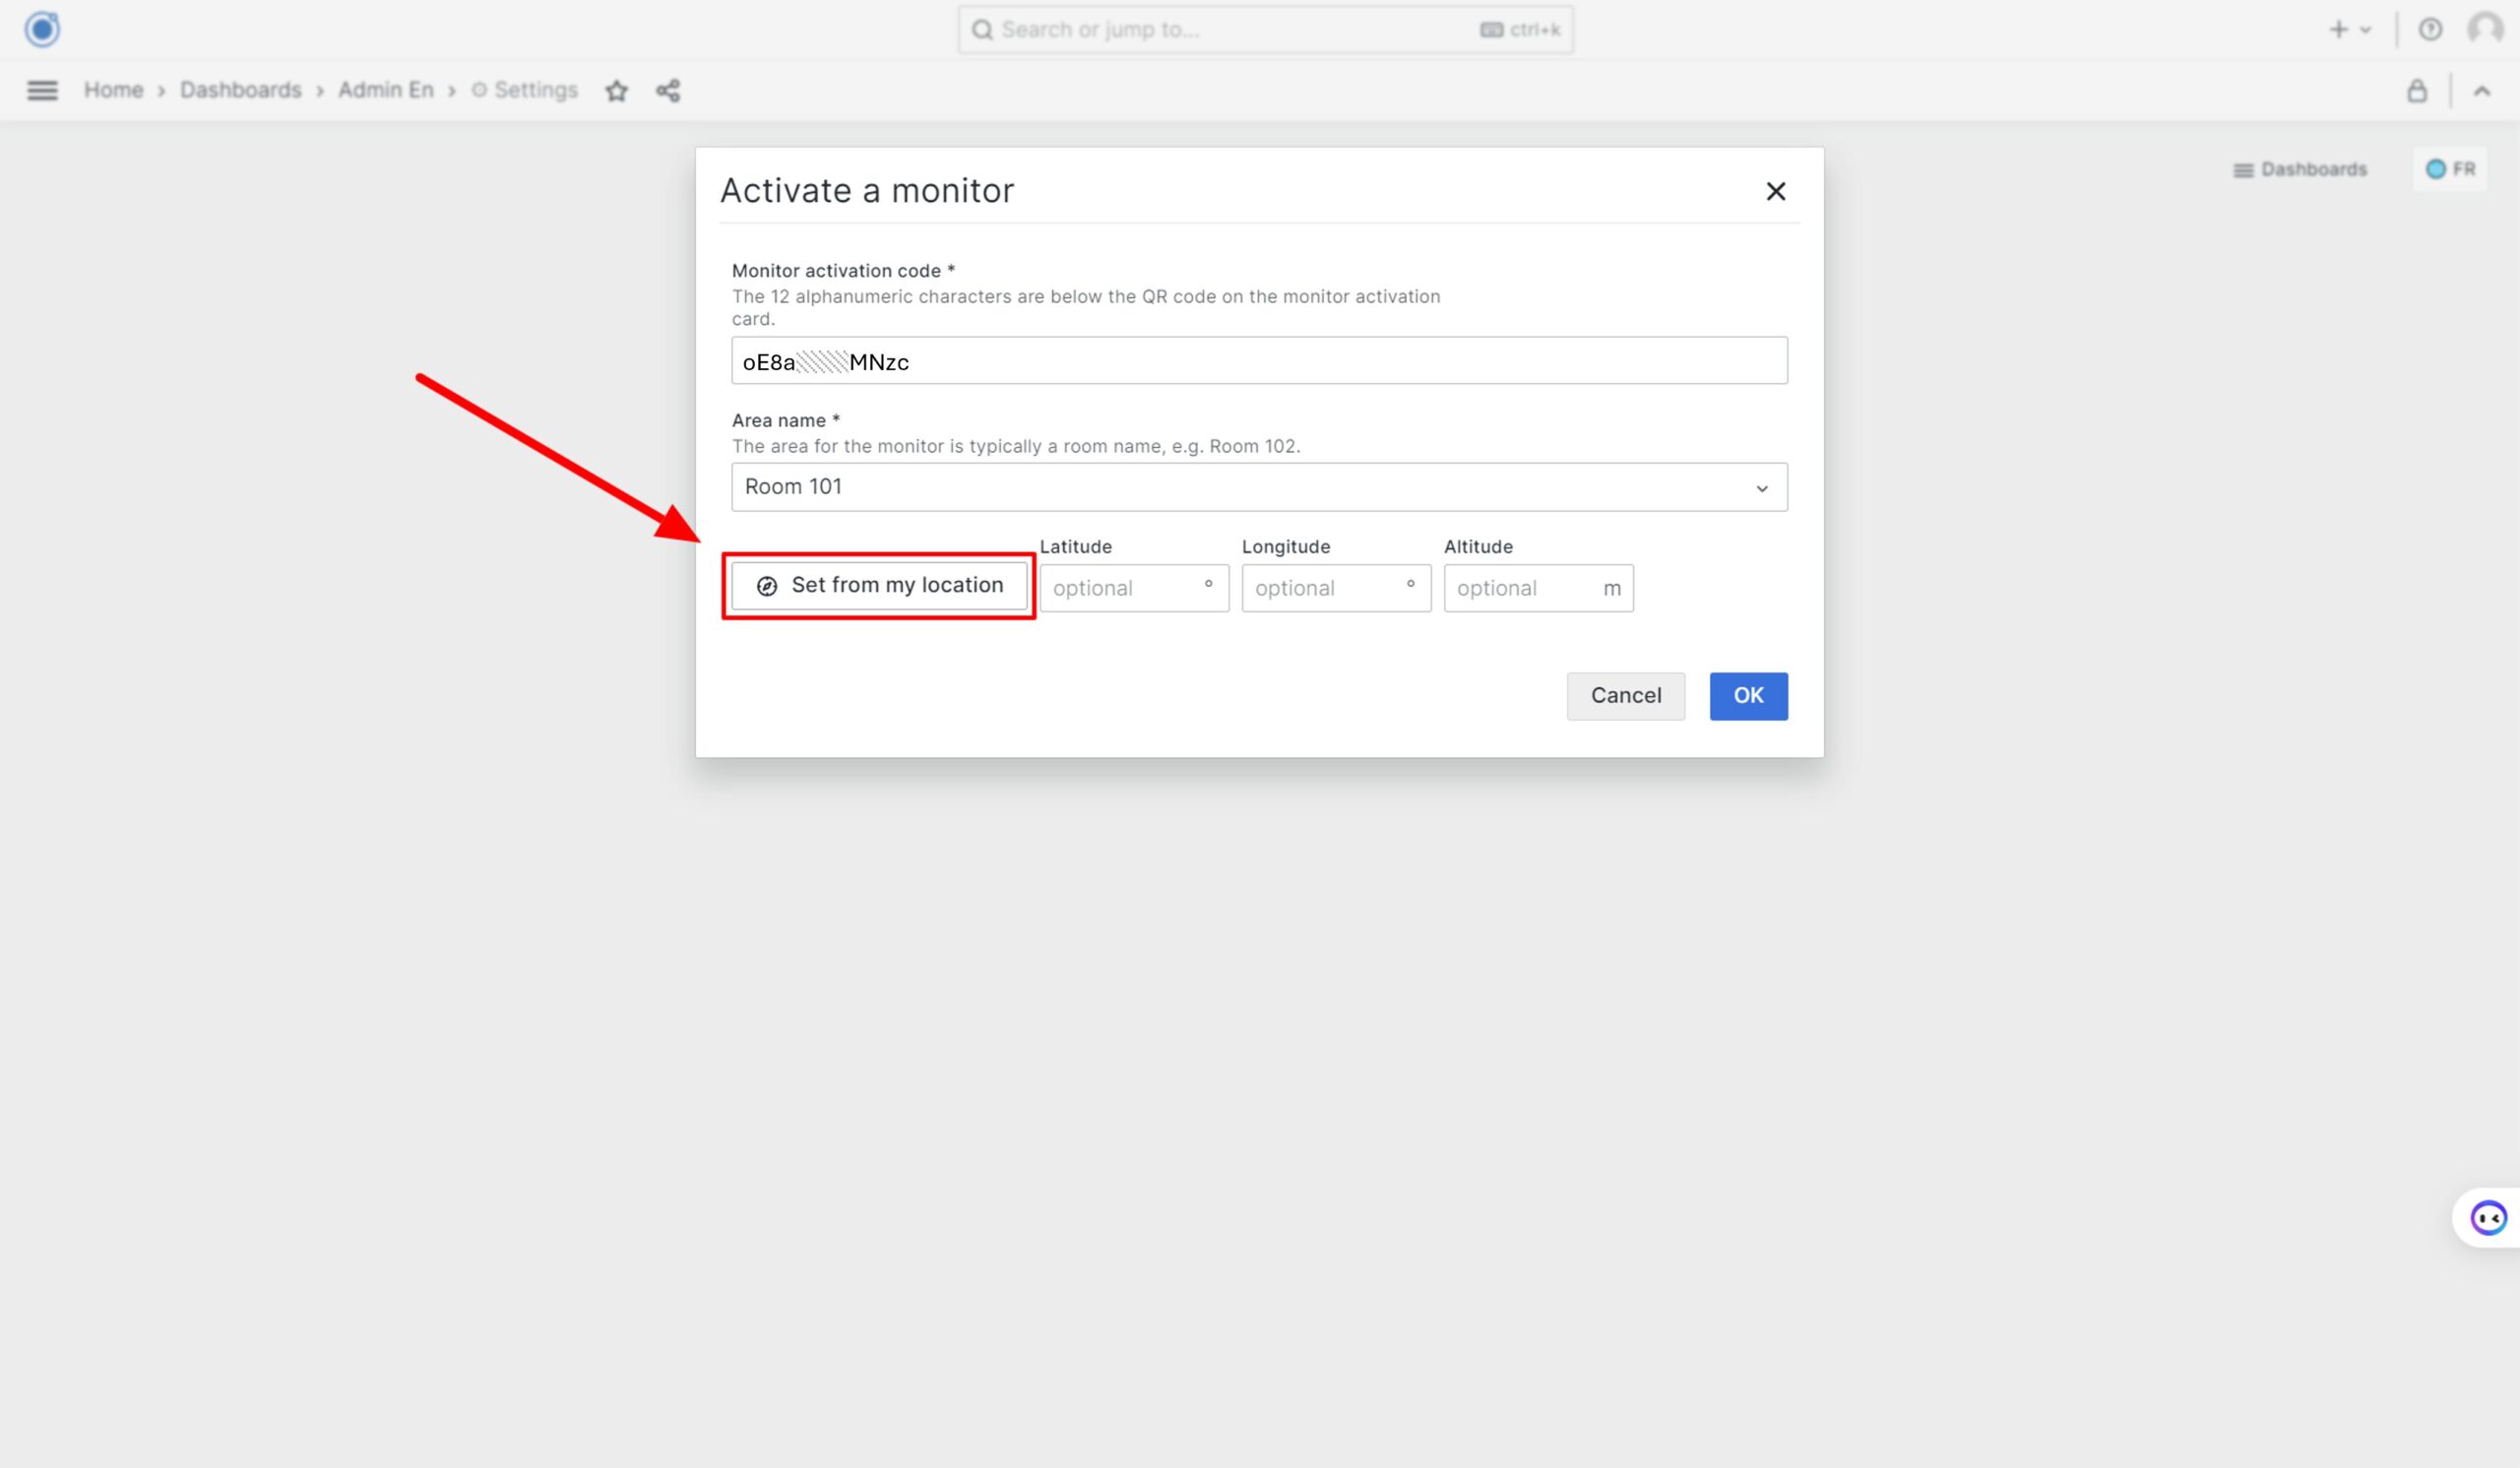
Remarks:
- Repeat “Activate new meo monitors” steps for each new monitor to register
- Power the meo mini/maxi up at the respective areas to start recording data
Placed at 1 to 2 meters height, on either
● on a desk or shelf, with meo brand looking upward
● on a wall, with its provided wall mount kit

Parts
meo mini monitor
Wall mount
Tools (not included)
Pencil
Driller
Wall plug
Wall screw
Cross screwdriver
Video Demonstration:
- Unscrew the screw holding the monitor back plate
- Slide the wall mount as shown
- Screw back the wall mount to the monitor
- Bring the monitor with wall mount to the drilled wall location
- Screw the monitor to the wall with a suitable screw for the wall type
You are all set!
Advice:
●DO NOT cover the monitor
●DO NOT place it near any heat sources
●Avoid placing near air supply, e.g air-conditioner’s inlet

- Only the Admin can share access with other users
- Click on “Administration” > “Users”
- Click on “Invite”
- Enter the email of the user you want to invite, and
- Select the role for that user: Viewer or Admin
| Rights | Viewer | Admin |
| View dashboards | ✔ | ✔ |
| Modify monitors settings | ✔ | |
| Manage alerts settings | ✔ | |
| Share access | ✔ |
- Make sure the “Send invite email” is turned ON
- Click on “Submit”
Congratulations! An invitation email has been sent to the user. They have 1 day to enroll.
Press the button with a paperclip or a sim extraction tool
| Function | Action required | System status light |
| Reboot | Press for less than 5 seconds, and release | Solid white when pressed and then startup lights |
| Manual calibration (3 to 30 minutes) | 1. Place the monitor outside (recommended), or inside next to a well opened window. 2. Press and hold for more than 5 seconds until the status light gets yellow, then release. | In progress: Green. Success: No light. Error: Yellow. Please reboot and retry Manual calibration after placing the monitor outside. |
| Flash reset (with data erase) | Press and hold for more than 15 seconds until the status light gets white, then release | Blinking white for 5 seconds and then startup lights |
To achieve customization and energy saving on settings, Advanced Settings feature is introduced for users to customize some other settings for their meo mini.
Note: Advanced settings are only available to admin only
Colors (applies to monitor only)
Define 4 different colors for the Air Quality LED at 3 different CO2 ppm level
Energy savings
- Measurement Interval
→ how frequent environment is measured
Example: If 10 minutes is selected, meo mini monitor will measure every 10 minutes.
Also see “Sending interval”
- Sending interval
→ how frequent the measured data is sent to meo cloud, in absence of CO2 event. This impacts dashboard visualisation (in absence of CO2 event)
Example: If 6 hours is selected, without any CO2 events within that period, meo mini will send the stored measurements at the end of the 6 hours.
- CO2 event threshold
→ the minimum CO2 concentration that forces sending, ignoring the Sending interval.
Example: If 800 ppm is selected, as soon as CO2 level gets above 800 ppm, all previously stored data are sent to meo cloud. While CO2 is above 800 ppm, the Sending interval will be ignored, and only Measurement interval will prevail. - Settings update interval
→ how frequent the setting changes are updated on meo mini monitor.
Example: If 12 hours is selected, any changes of the advanced settings are updated within the next 12 hours. - Reboot interval
→ how frequent the meo mini monitor reboots
Example: If 1 day is selected, the monitor will reboot every day.
Auto settings are the default settings for all meo mini at the factory. Based on the power mode you are using, meo mini has different advanced settings. The purpose is to extend the operating time when the monitor is battery-powered.
| Advanced Settings | Auto | |
| USB-powered | Battery-powered if available | |
| Measurement interval | 3 mins | 10 mins |
| Sending interval | 1 hour | 6 hours |
| CO2 event threshold | 800 ppm | 1500 ppm |
| Settings update interval | 1 hour | 24 hours |
| Reboot interval | 1 day | 7 days |
Opening hours
- Opening hours
→ Opening hours of your organisation. This impacts dashboard visualisation (Viral Risk and exposure calculation). Only data within opening hours will be used for exposure calculation and the Viral Risk visualisation.
Example: If your organisation opens from 8:30am to 4:30pm, you can just fill in the first two timeboxes, deleting the third and the fourth, like below:
If your organisation opens from 8:30am to 6:00pm and has a mid-day break from 12:00pm to 2:00 pm, you can fill in all the four timeboxes, like below:
Note: Data between 12:00pm to 2:00 pm will not be shown in dashboards (Viral Risk and all exposure calculation). - Time zone
→ define the time zone where you place the meo mini - Holidays country
→ define the holiday of your meo mini. This impacts dashboard visualisation (Viral Risk and exposure calculation).


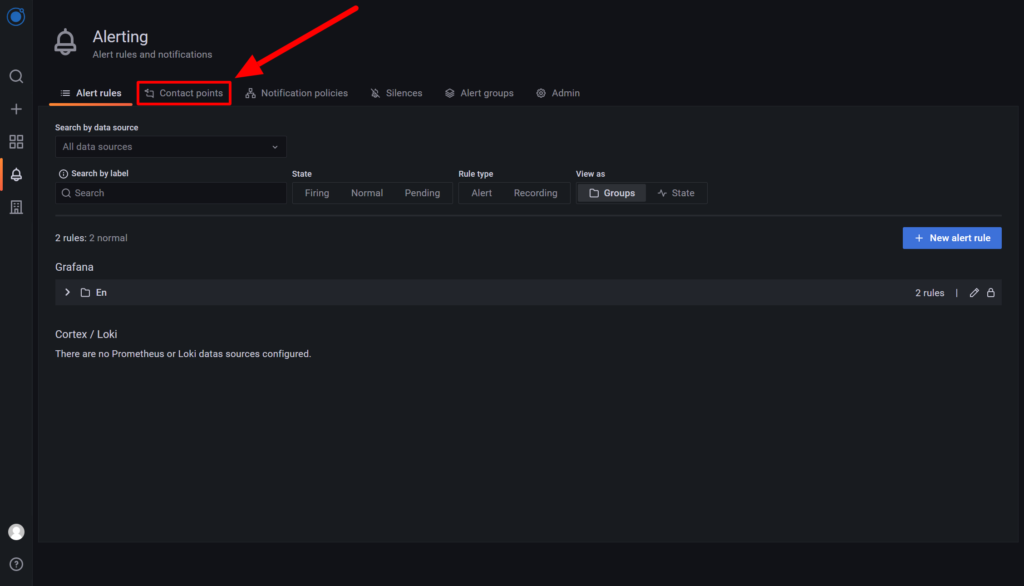
Alerting is designed to notify users based on the alert rules. meo has two default alert rules:
- CO2 is above 800 ppm
- monitor(s) cannot send data (i.e. disconnected or low network coverage).
The alerts will work only for the monitor(s) added to the organization and with the Mandatory Configuration completed. Furthermore, Additional Configuration is available: changing language to French, change CO2 threshold, change evaluation duration.
Note: If you haven’t added any monitors, please move to the “![]() Activation” tab.
Activation” tab.
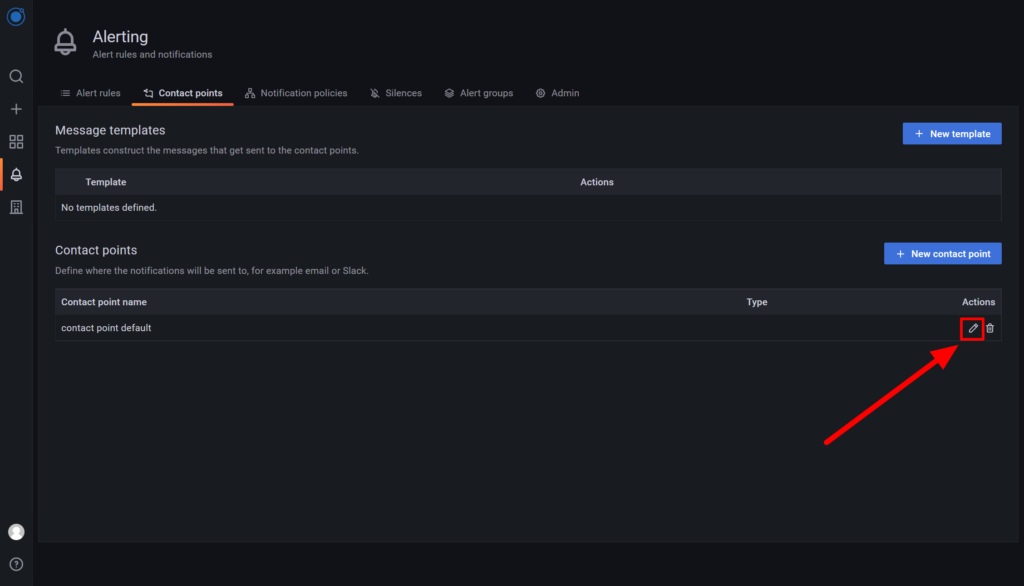
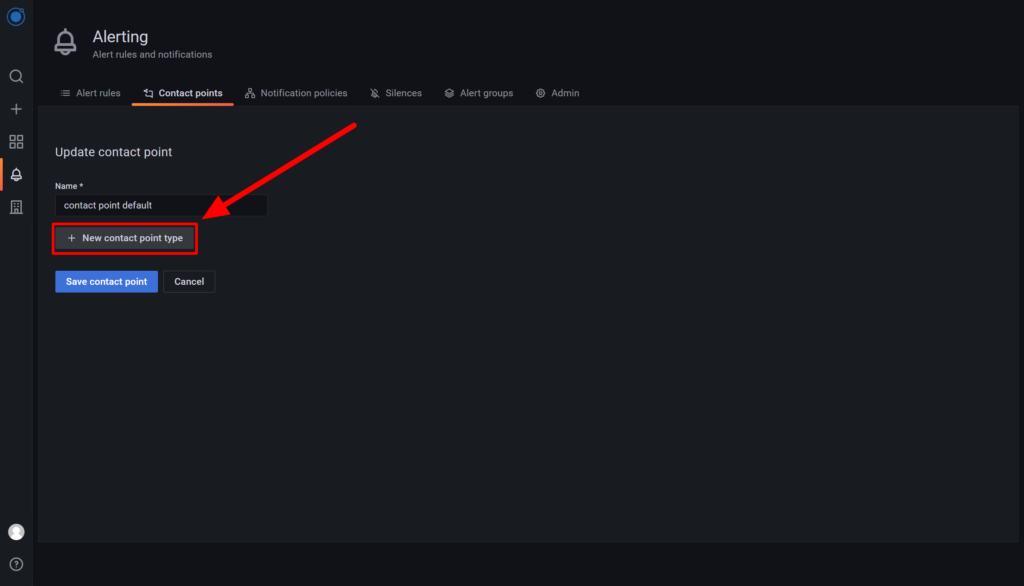
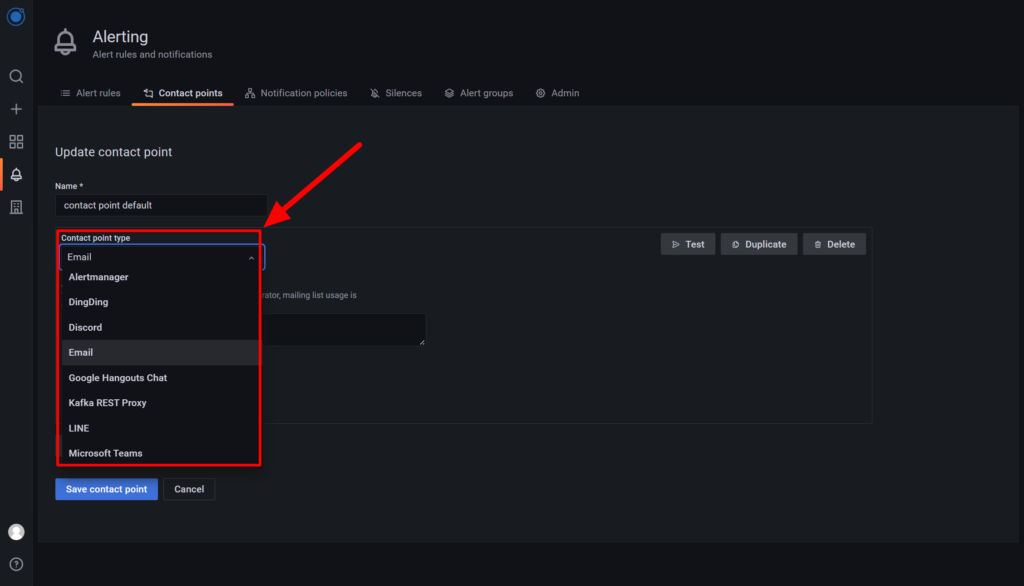
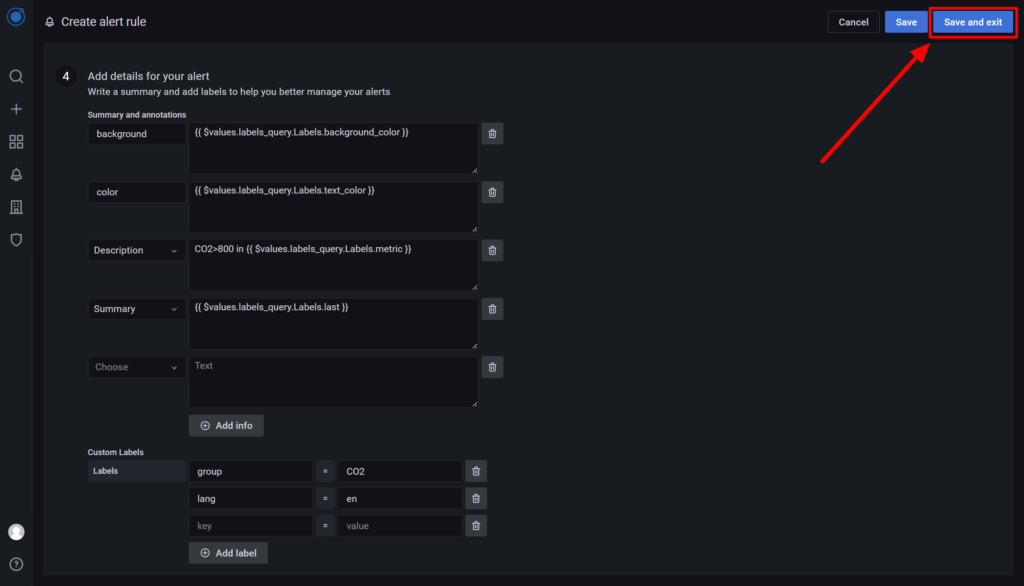
Mandatory Configuration:
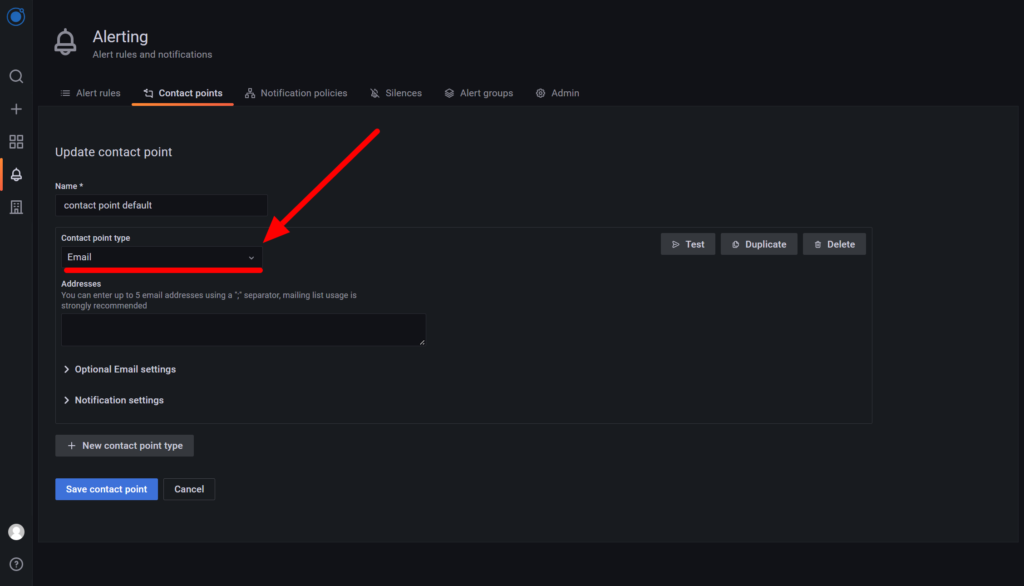
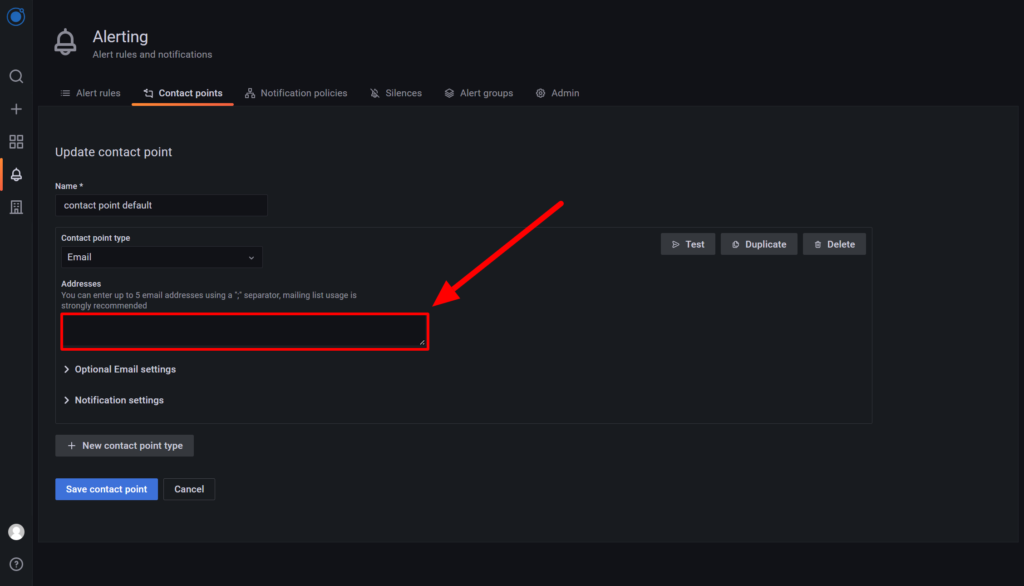
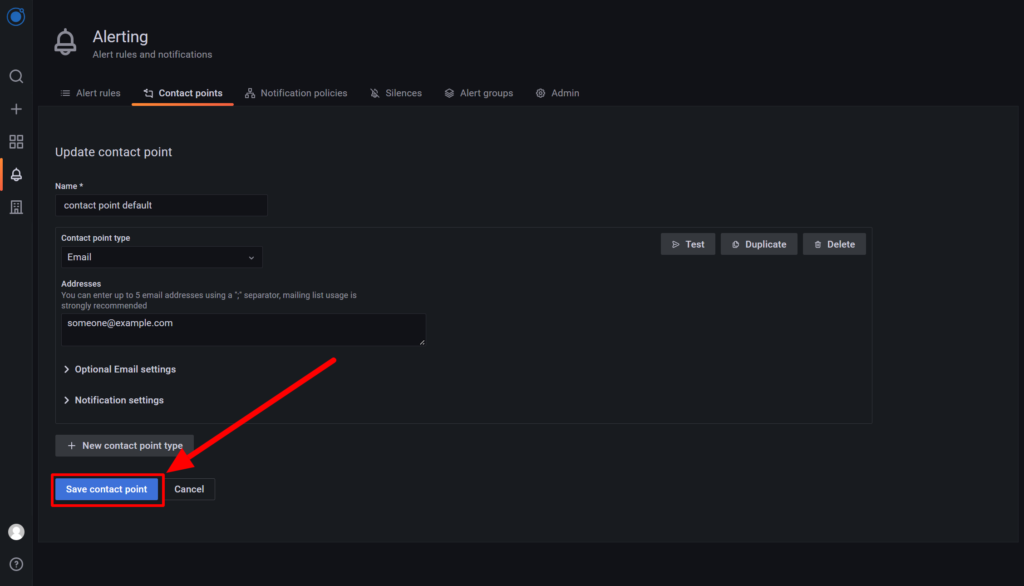
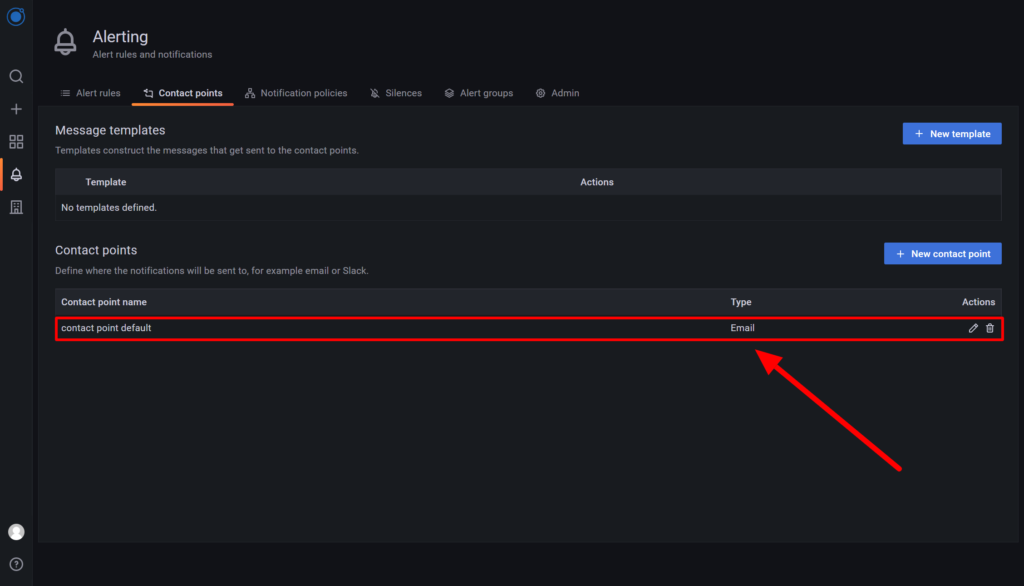
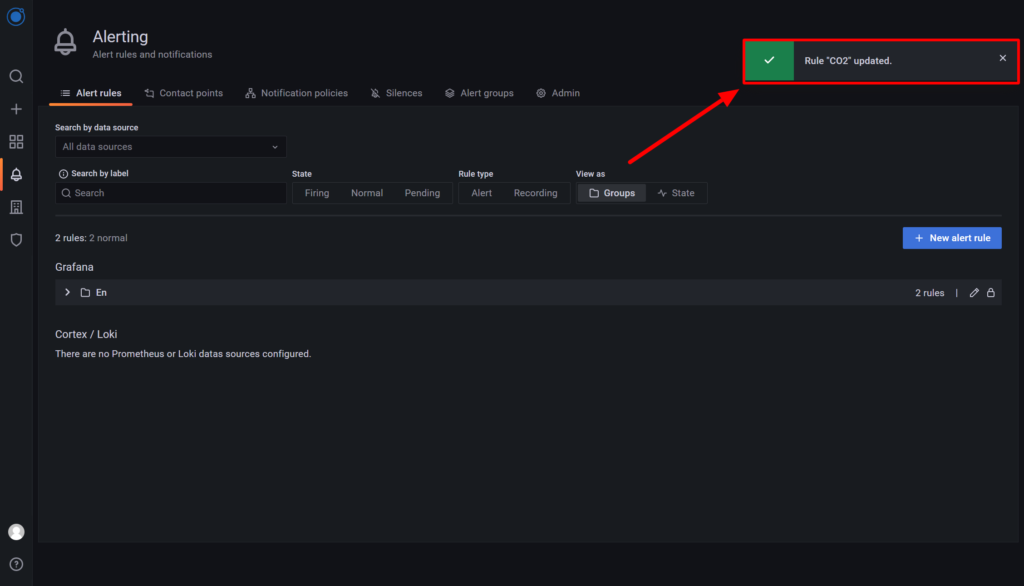
That’s it. The Alerting is now configured.
Additional configuration:
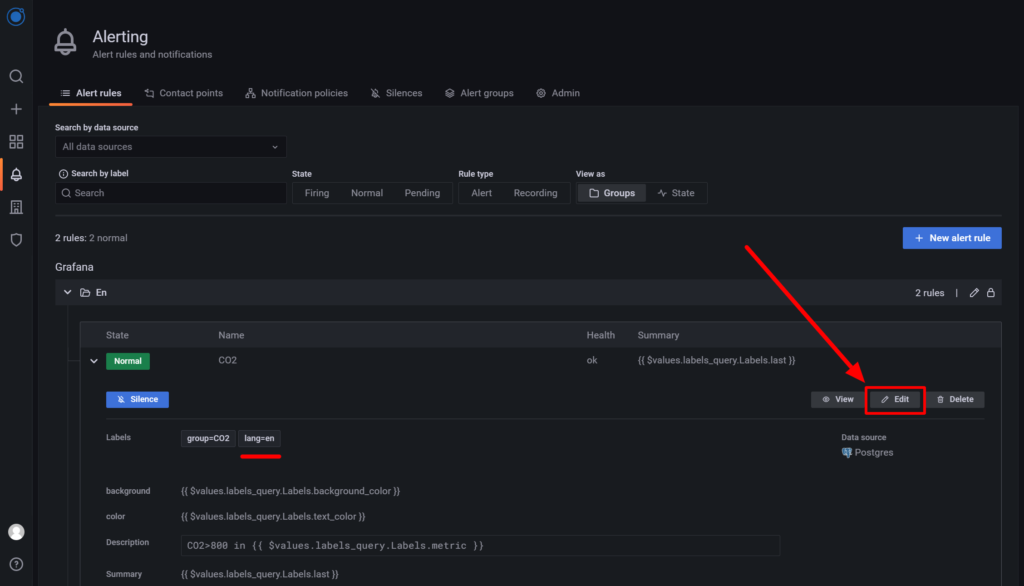
Changing language to French:

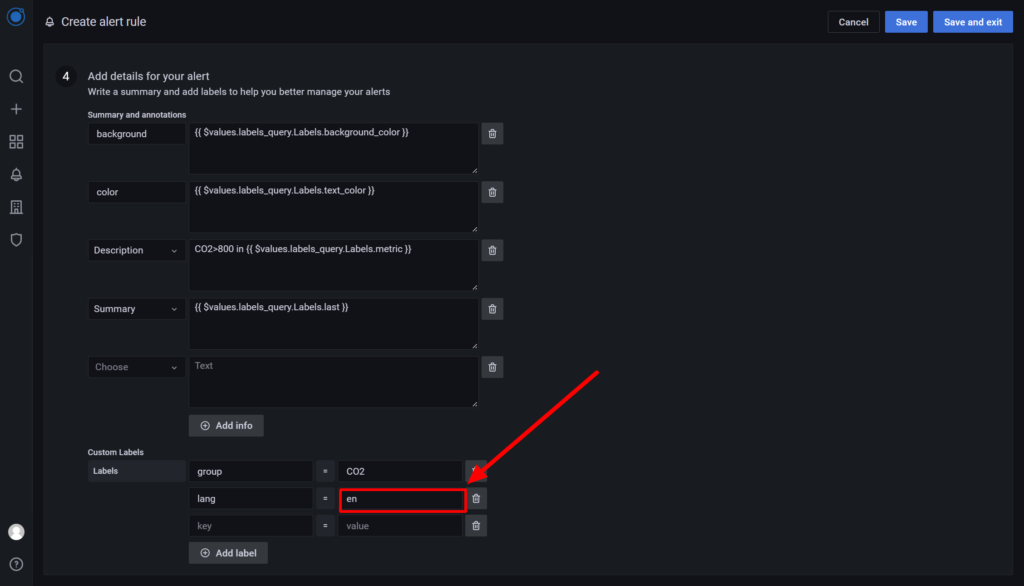

Repeat Step 1 to Step 8 (except 5) for the other alerts rules.
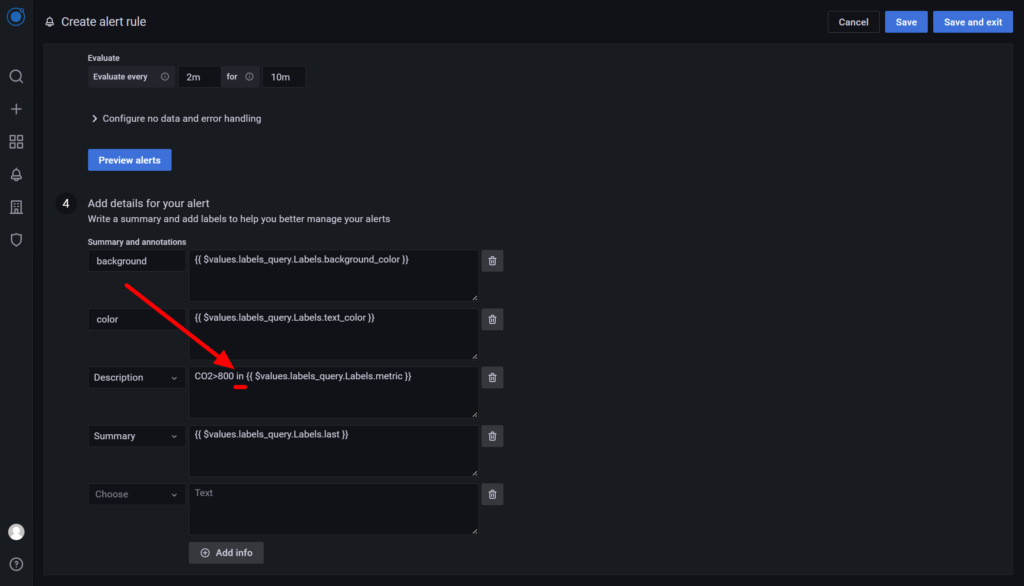
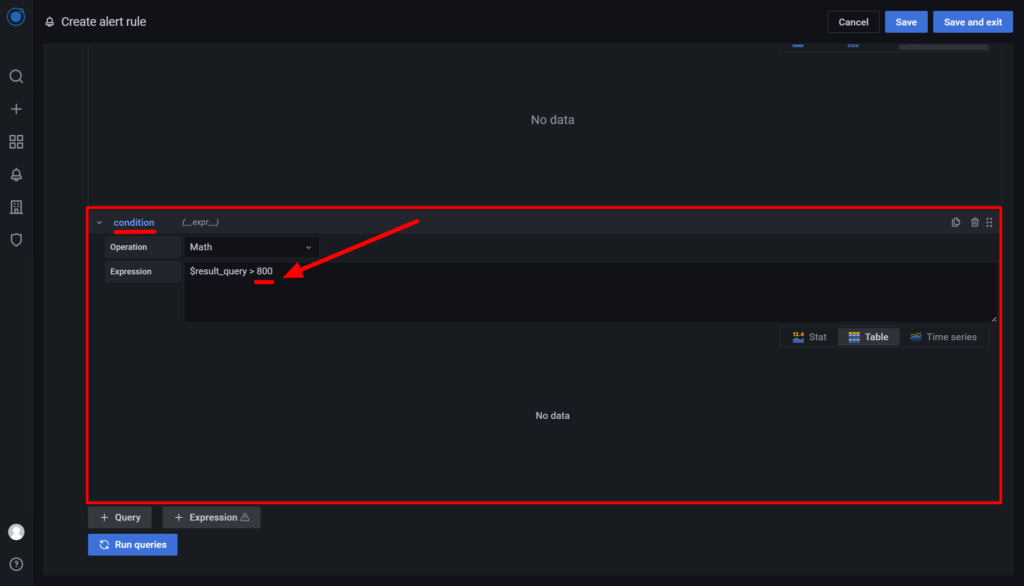
Changing threshold of the CO2 alert rule:
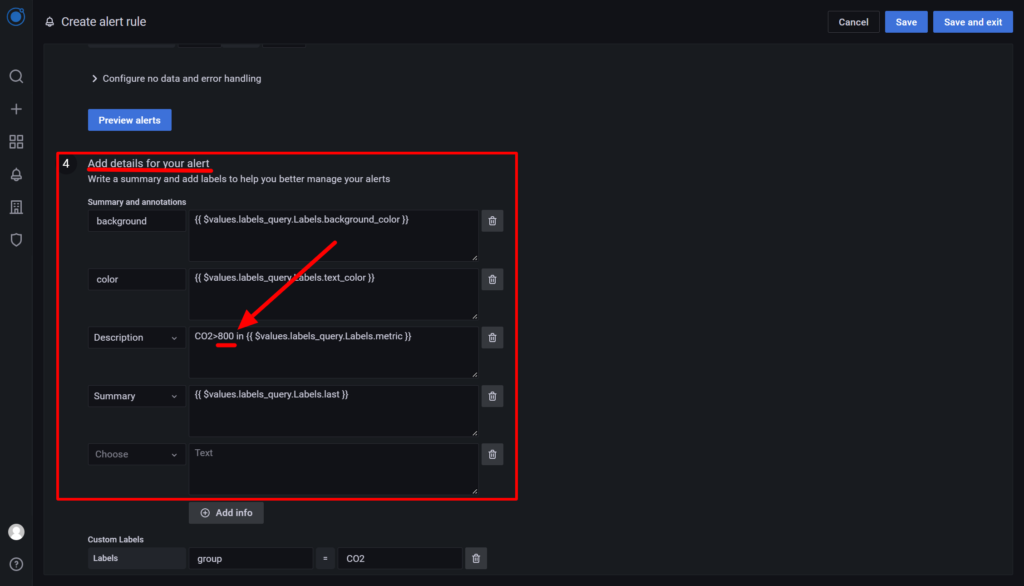


Changing duration of the alert:
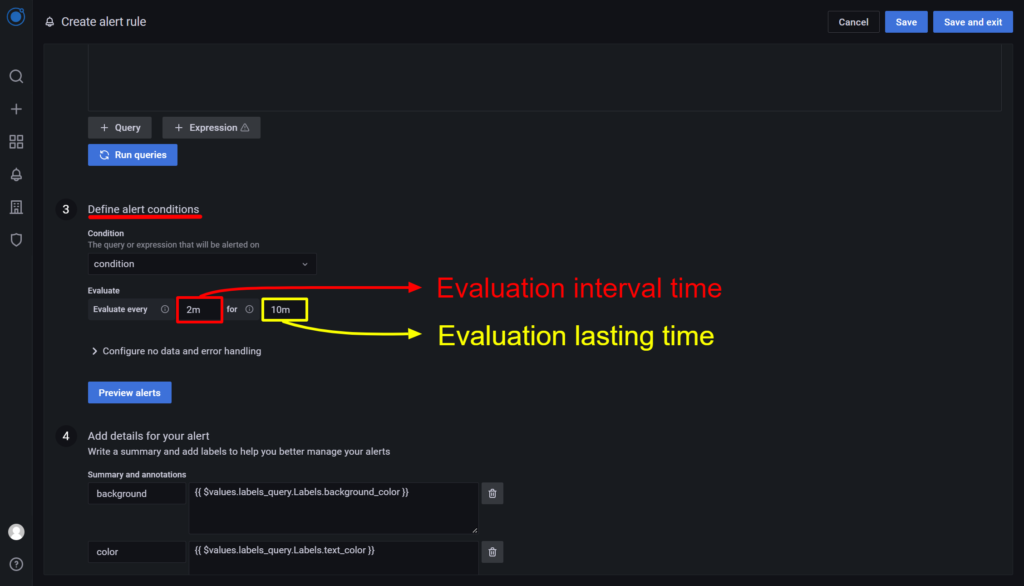
To change the duration of the alert, please kindly go through the following concepts.
- Evaluation interval time: How often the alert will be evaluated
- Evaluation lasting time: Once condition is breached, alert will go into pending state. If it is pending for longer than this time, an alert will be sent.
By default, the Evaluation interval time and Evaluation lasting time of the CO2 > 800 alert rule are 2 minutes and 10 minutes respectively. This indicates that the system will evaluate whether the CO2 is above 800 ppm every 2 minutes. Once the CO2 is above 800 ppm for the next 10 minutes, then an alert will be sent.
As for the “No data” alert rule, the Evaluation interval time and Evaluation lasting time are 10 minutes and 7 hours respectively.
To change the duration of the alert rule,


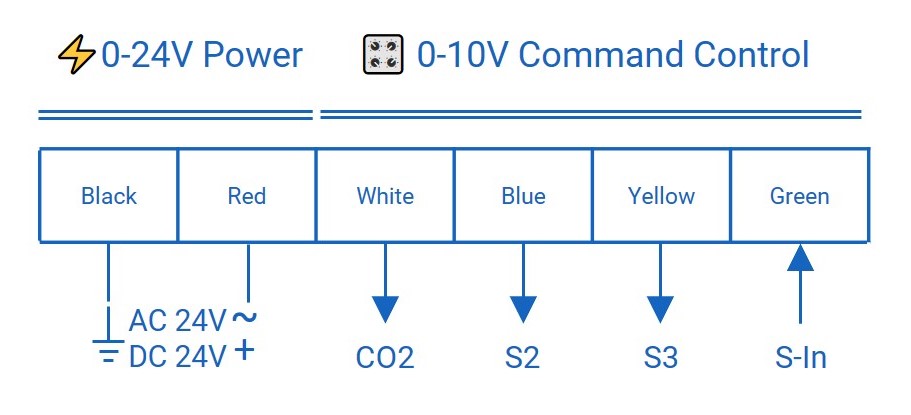
Only for meo mini X and meo maxi, to control your HVAC / VAV ventilation system or inform your BMS through wire communication:
- configure CO2, S2, S3 and S-In on app.meo.life settings page.
- unscrew the back plate to access the wire connectors.
- power with 0-24V line.
- “S-In” is an optional ventilation system feedback.
- Ground line of the ventilation system should also be connected to the ground connector (Black).